

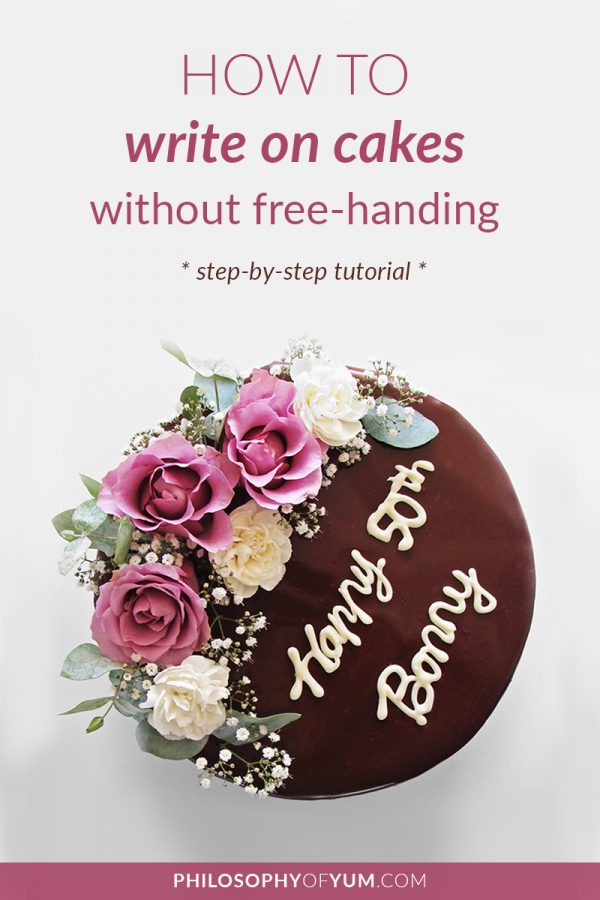
How to Write on Cake Without Free-Handing
Writing on Cake without Free-handing is possible and actually quite easy 🙂
I simply HAD to figure this out because no matter how much I practiced, I’ve always SUCKED at free hand piping! As I’ve said before, artisan home baking is my thing, cake decorating is NOT my passion.
My MAIN focus is to make my bakes DELICIOUS, not pretty.
That being said, the motivation behind learning how to write on cakes is actually not to make them “pretty” per se, but rather that it makes a cake more personal. Home Bakeries are founded on being personal!
For some people the whole “neat handwriting and accurate spacing” thing comes naturally. Unfortunately the last time I had a neat handwriting I was 9.
When I tried to write something free hand on a cake I ALWAYS ended up running out of space and needing to squash in those last 3 letters. And on a good day I would win at the spacing, but still have UGLY writing.
To me, artisan home baking is the ULTIMATE approach to baking, but here’s the sad news…
Even if you bake cakes that make people pass out from YUM-overload, you will need to write special and personal messages on cakes at some point. It is absolutely inevitable.
And unfortunately, ugly writing on a cake CAN put a damper on a client’s whole experience of your cake.
So if your handwriting is ATROCIOUS (like mine) and if you SUCK at free handing (like me) – what do you do??
Fret not my friend, there is a solution for writing on cake without free-handing! It’s relatively simple and after trying it a few times, you will rock it. And most importantly your writing will look SUPER professional 😀
This process might take 3 or so attempts before you are comfortable with it (especially with working through my lengthy instructions), but then it’s so quick and easy!
I thought it best to rather explain as thoroughly as possible so that you have a great chance at success from the very first attempt!
I know you can do it – you’ve got this!!

Chocolate is the Answer
Since my Ultimate Vanilla Frosting and Ultimate Chocolate Frosting BOTH have quite a high water content, using something like Royal Icing to write on my cakes was not an option. The royal icing (and all other high sugar decorations) melt into the frosting within a few minutes.
I was not about to switch to overly sweet buttercream or flavourless fondant – EVER! So I had to find another ingredient to use.
Chocolate ended up being the perfect “ink” to work with for several reasons:
- It has a higher fat content which prevents the sugar from melting into my frosting.
- Chocolate is obviously way more delicious than royal icing!
- Top Quality Chocolate sets hard (technically it crystallizes), so this enables you to write neatly on a printed template and transfer the words onto the cake.
- Chocolate comes in a variety of shades! I use white or dark chocolate, depending on the shade of frosting or ganache coating the cake. Using a contrasting colour of chocolate really makes the writing “pop”.
But using chocolate means that there will be tempering involved. BUT, before you panic, just consider that I have a SUPER EASY chocolate tempering method to share with you today!
RELATED: How to Make Gorgeous Chocolate Shavings
Why Does the Chocolate Need to Be Tempered?
- Un-tempered chocolate melts VERY quickly! If the chocolate starts to melt while you are trying to transfer the words onto the cake it is one huge and panicked MESS.
- Un-tempered chocolate tends to bloom when it sets. Blooming refers to those weird light spots or streaks you see on chocolate. It looks a bit like mould I guess. Although blooming doesn’t make the chocolate taste bad, it really just looks severely unappetizing. These light spots & streaks are cocoa butter that has separated out of the chocolate.
- Tempered chocolate sets (technically it crystallizes) nice and hard, making it a breeze to transfer without it ever beginning to melt and stick to the palette knife!
- Tempered chocolate has a lovely sheen to it which makes it a very beautiful centerpiece for your cake 🙂
How to Temper Chocolate – EASILY
Tempering chocolate was this ridiculously intimidating thing I could never master.
I even went for a short chocolate course and did the whole marble slab thing. Even though I did it more or less correctly in the class, I totally sucked at it back home and I just could not get it to work!
When it comes to tempering chocolate, REMEMBER THIS ONE THING:
DO NOT OVERHEAT THE CHOCOLATE.
That is it.
When you overheat chocolate, you break the structure of its crystallization – specifically the structure of the cocoa butter. Successfully tempered chocolate has optimal cocoa butter structure. When you overheat chocolate it basically means it won’t be stable – it will melt easily. It also won’t be shiny, but it will be dull or have blooming. And it won’t have a nice snap.
Click here if you want to read more on the polymorphic structure of chocolate.
The classic tempering with a marble slab allows you to overheat the chocolate and then bring it back to the right temperature on the marble slab with correct technique and experience. But it is difficult to master and super sensitive.
So don’t even go there! Why make life so difficult when it’s not necessary?
It’s far easier to just not overheat the chocolate in the first place and rather maintain the crystal structure it already has. Prevention is better than cure.
The best way to prevent chocolate from overheating comes down to three things:
- The container you melt your chocolate in. ALWAYS melt your chocolate in a PLASTIC BOWL. Ceramic, glass or aluminium bowls conduct heat FAR too easily and quickly. They also remain hot for a very long time. This will force up the temperature of your chocolate within 20 seconds – seriously..
.
PLASTIC BOWLS are poor heat conductors, so they do not become hot easily and they lose their heat very fast. The plastic bowl basically becomes “invisible” in the chocolate melting process, allowing the chocolate to melt at its own pace. - The type of heat you apply. Although the bain-marie thing (bowl of chocolate over barely simmering water) is quite a standard way to melt chocolate – it’s not ideal. Sorry if I’m being controversial here, but it really isn’t ideal because it overheats the chocolate.
.
Firstly because you can’t place a plastic bowl over a bain-marie. It could melt the bowl and as we have established – plastic doesn’t conduct heat very well. Even if the water is barely steaming, it will still be enough to overheat your chocolate.
.
Chocolate melts with VERY LITTLE heat. It melts at 30°C/86°F! So the heat you use needs to be super subtle and above all – controllable!For this reason I like to use my microwave. I can control exactly how hot things get and stop it abruptly at any point I wish.
. - How long you apply the heat for. If you apply any source of heat for too long, your chocolate is going to overheat. For this reason it’s best to melt the chocolate with 30 second bursts in the microwave. Dark chocolate can take a bit longer to melt, but BE PATIENT! Stick to 30 second bursts!
Take it out of the microwave after EVERY 30 second burst, squash and stir it a bit (even when it’s not melting yet) and then return to the micro for the next 30 second burst. I know it’s tempting to put it in there for longer, but don’t do it!
Now that you understand the science and super important basics, let’s move on to the FULL method: Writing on Cake without free-handing, from start to finish.
Writing on Cake Without Free Handing – Step by Step
IF you happened to skip to this part, go back up and read the full post. All the info above was shared with great reason. If you do not understand this whole process, the chances of you failing at this really increase drastically.
Create and Print Your Desired Template
- Measure the space you want to fill on top of your cake.
- On your computer, in Photoshop or Canva (free program), create a block a bit smaller than the measured size. A little bit smaller is always a good idea here.
- Choose a good font. Cursive is better here because the letters are all connected into one item. This means that “Birthday” becomes one item to transfer instead of 8 separate letters to transfer. My favourite font to use is “Dragon is Coming”! I downloaded it for free on dafont.com – click here.
- Type your desired message and print it on ordinary paper.
- Cut around your message to make the size of the paper smaller. Stick it onto the bottom of a cake tin base plate with some sticky tape. If the tin’s base has a lip, make sure it faces the bottom so that your top surface is completely smooth and level.
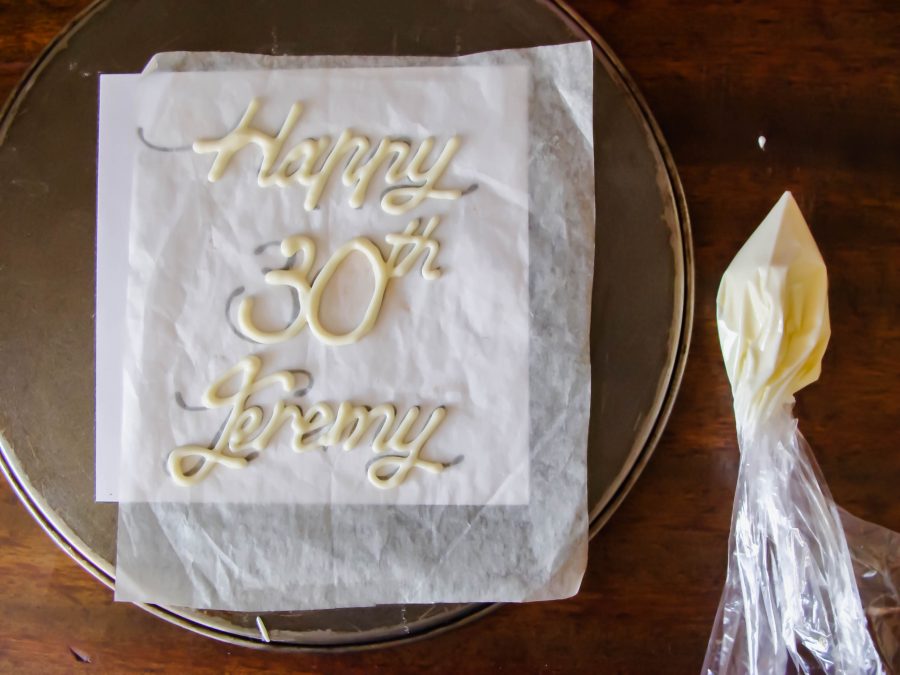
- Cut a square of NON-STICK, opaque baking paper/parchment (not wax paper) big enough to cover the writing. You should be able to see the writing through the baking paper. Make sure there are no bumps or kinks in the paper and that it is absolutely clean. Place it over the writing template and secure it in position with a few pieces of sticky tape.
Temper the Chocolate
- Chop 50 g of your desired chocolate. There should be no pieces larger than 1 cm x 1 cm. SUPER IMPORTANT: Use TOP quality chocolate!! Commercial chocolate bars like Nestlé and Cadbury contain too much sugar and not enough cocoa butter, so they are always too soft and unstable. Lindt is always a safe bet.
- Place the chopped chocolate into a small PLASTIC bowl.
- Microwave in 30 second bursts. Dark chocolate can take a bit longer to melt, but BE PATIENT! Stick to one 30 second session at a time! Take it out of the microwave after EVERY 30 seconds, squash and stir it a bit (even when it’s not melting yet) and then return to the micro for the next 30 second burst. I know it’s tempting to put it in there for longer, but don’t do it!
- While you wait you can prepare your “piping bag”. Even though I have many piping bags, I prefer using a small, plastic sandwich bag for this (not Ziploc though. It gets in the way). Open it up and place it with one point facing down into a glass or cup. Fold the edges of the plastic bag over the side of the glass.
- When the chocolate BEGINS to melt reduce your next microwave session to 20 seconds. And now the next bit is crucial.
- THE TRICK TO GOOD TEMPERING IS TO MELT MOST, BUT NOT ALL OF THE CHOCOLATE IN THE MICROWAVE. The bits of melted chocolate may be enough to melt the rest of the chocolate pieces in the bowl, so stir and squash it thoroughly to see if the rest will melt. And keep tabs on the temperature of the chocolate by testing a bit of it on your lip. If it’s the same temperature or cooler you are on the right track. (If the temperature is warmer you have overheated it. Rather start again with new chocolate.)
- If the heat of the melted chocolate is not enough to melt the remaining solid pieces, return it to the microwave for 10 seconds at a time. Stir super thoroughly after each 10 seconds to see if the rest of the chocolate melts completely. YOU WANT THE LAST FEW PIECES TO MELT OUTSIDE THE MICROWAVE.
- Once everything is melted and smooth, stir the chocolate thoroughly another few times. Test the temperature again – it should be roughly the same temperature (or a little bit cooler) as your lip.
- Immediately scrape the melted chocolate into the prepared plastic baggie. Tempered chocolate does set quite quickly so you want to get it in the bag and close to your hand as soon as possible. The warmth from your hand will keep the chocolate melted.
Piping the Chocolate Lettering
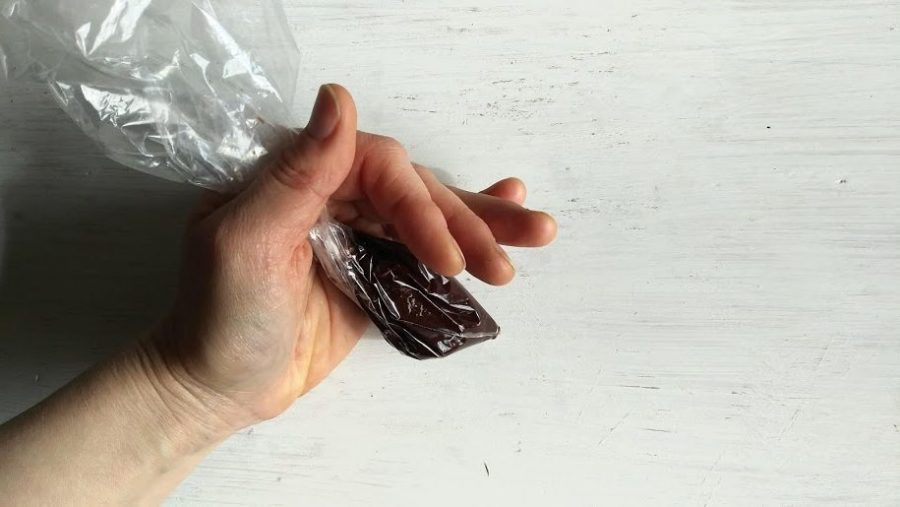
- Twist the end of the baggie thoroughly (but not all the way up against the chocolate. You don’t want the melted chocolate to be under pressure and burst out when you snip off the end) and secure with a paper clip, clothes pin or anything you want. I mostly just keep the twisted end closed by pinching it in the space between my thumb and index finger while I’m piping (see image below).
- Snip off a tiny bit at the end. You can always snip off more. You can test to see how thick your line will be. The ideal line thickness is about 2 mm, but it’s totally up to you.
- Whenever you want to stop the flow of chocolate, just lift the tip of the baggie vertically upwards.
- Pipe the lettering with the melted chocolate while constantly keeping the side of your hand on the surface for some stability. Slide your hand on the surface as you move along. Do not let your hand hover in the air. I’m left handed, so I need to write the words backwards, starting from the right. If you’re right handed you can start from the left.
Transferring the Chocolate Lettering
- The chocolate will have begun to set once you are done piping the words, but allow the chocolate to set fully in the fridge for 5 minutes.
- Depending on how well you tempered the chocolate, this next bit could be super easy or a bit more difficult.
- The first thing you need to do now is loosen the lettering from the baking paper/parchment. Remove the sticky tape keeping the non-stick baking paper/parchment in place. Slide the parchment with the lettering on it to the edge of your work surface. Starting from the one side, grab the paper firmly on either side with your hands.
Carefully slide the parchment over the edge, pulling the parchment down with your one hand. Go about 1 – 2 inches in. You obviously don’t want to crack the lettering or have it fall on the floor! Rotate the paper 90 degrees and repeat the process. Repeat for remaining two sides as well. Test with your clean and dry palette knife if the lettering is nice and loose on the paper. - In my experience it it’s better to transfer the MIDDLE word first. Guessing the exact middle of your cake is much easier than guessing the top third. The middle is a great reference point.
- Carefully slide your clean and dry palette knife under a bit more than the top half of the word, keeping the bottom half unattached (see image below). Carry it over to your cake.
- Let the unattached bottom half make contact with the surface of the cake where you desire to place it. Allow it to ease off into position as you gently lift away the palette knife.
- Repeat with remaining lettering and then you’re done!!

This process might take around 3 attempts of practice before you are comfortable with it (especially with working through all my instructions), but then it’s so quick and easy!
I thought it best to rather explain as thoroughly as possible so that you have a great chance at success from the very first attempt! I know you can do it – you’ve got this!!
RELATED: How to Make Gorgeous Chocolate Shavings
If you use my method for writing on cake without free-handing, please let me know by tagging me @philosophyofyum because I would love to give you a virtual high ten 😀
Chat soon
Aurelia


POPULAR BAKING BIZ TIPS


POPULAR BAKING TIPS


Got a question? Something to add? Let’s chat in the comments section down below! (I respond to every single comment)


