Gluten Free Brownies
Gluten Free Brownies were totally not a sales gimmick for me. Many of my clients thought I started baking gluten free brownies because gluten free eating became a trend a few years ago. Actually, that is not the case.
Photos by Alice Swan
See, I married this incredible guy… Adriaan. When we were dating he ate all the wonderful things that any regular student eats. Pasta, pies and McDonalds. Problem is that these nutritious foods were often eaten at 3h00 in the morning.
Adriaan and I both studied architecture and all-nighters were as common as breathing. Obviously you get hungry and McD’s was the only 24 hour food provider.

Adriaan’s mother also has a highly sensitive stomach with a whole list of foods she cannot eat. Whether the poor quality of food, lifestyle or genes were to blame, about 6 months into our marriage we discovered that he is gluten intolerant. Thanks Murphy!
Wife becomes a baker, and 6 months later, husband becomes gluten intolerant.
You need to understand that my husband is my biggest fan. When I realized I want to rather be a baker and not an architect, he was so excited with me.
Even though we had nothing, were getting married, moving to a new city and had no jobs he could see the potential and my heart 🙂
One of my favourite ways to express love, gratitude or joy is through cooking and especially through baking. But now my whole baking repertoire was suddenly quite useless in our home. I had to regroup.
Adriaan had to have a baked thingy. It had to be gluten free. And I was going to make it for him.

Gluten Free Baking Begins
Gluten free brownies seemed like a good place to start 🙂 There is a wonderful chocolaterie here in Cape Town called CocoaFair! They are “Africa’s first bean to bar chocolate manufacturer founded on the principles of social entrepreneurship.”
I bought their chocolate once and I’ve never looked back. So yes, great quality chocolate is of the essence here as half the recipe is just melted chocolate!
If you don’t have a local chocolaterie, you could always order goods online. Just be sure to check the ingredients list. Commercial chocolate often contains gluten.
I adapted this recipe for gluten free brownies from a recipe by David Lebovitz. I’ve baked this recipe hundreds of times – editing and fine tuning for 3 years now. This really is my ultimate recipe for gluten free brownies. I hope you enjoy them as much as our family, friends and clients do!
This Gluten Free Brownie Recipe has earned me at least $5000 in brownie sales, so yep, I think it’s SAFE to say that they are amazing 😉
A non gluten free eater ate these brownies and commented: “This is the best brownie in the world… I want to go sit in a corner and cry now.” Lol!
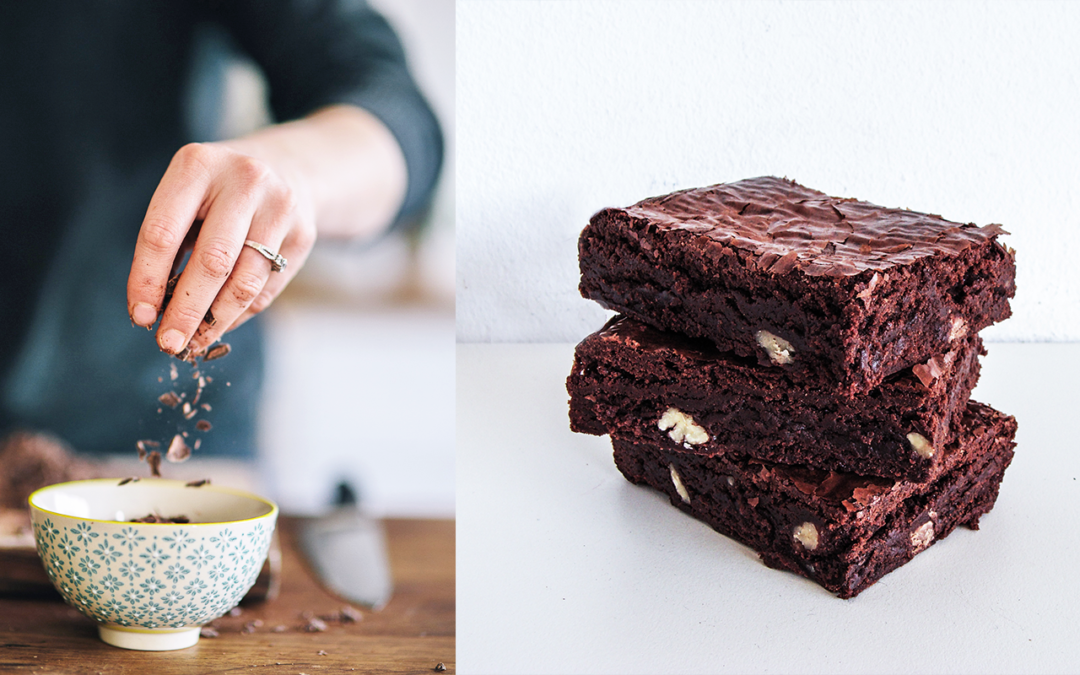
The texture is perfectly balanced between fudgy and chewy…
- 130 g butter, unsalted
- 230 g 65% dark chocolate, chopped
- 1 tsp Salt
- 180 g sugar
- 2½ eggs, at room temperature
- 1½ tsp Vanilla Extract
- 40 g White rice flour
- 40 g Tapioca Flour
- ¼ tsp Baking Powder
- 20 g milk chocolate, chopped
- optional: ½ c pecans, coarsely chopped
- Spray the inside of a 17 x 27 x 3 cm (7 x 10,5 x 1 inch) brownie tin with non-tick cooking spray. Line the tin with baking parchment so that it goes up the sides and 3 cm over the rim. This makes the brownies easy to pull out once cooked and cooled. An 8 x 8 inch tin will also work just fine.
- Preheat the oven to 180ºC/350ºF.
- In a medium size pot, melt the butter over medium-low heat. As soon as the butter is melted and begins to simmer, add in the chopped dark chocolate and turn off the heat. Stir around thoroughly every 30 seconds until the chocolate is completely melted into the butter.
- Keep the pot on the stove and stir in the sugar and salt. Leave to sit for 5 minutes and then stir very well. Remove the pot from the stove.
- Beat in the vanilla and eggs.
- Add the white rice flour, tapioca flour, and baking powder to the pot and then stir to combine into the chocolate mixture. Beat the batter on high speed for one minute. You’ll notice that the batter becomes silky smooth and a shade or two lighter in colour.
- Scrape the batter into the prepared pan, making sure to spread out the batter into the corners of the pan. Distribute the nuts evenly over the mixture. Push the nuts down into the mixture with a spatula and then smooth the surface once more.
- Sprinkle the chopped milk chocolate over the top of the brownie batter and allow the heat from the mixture to melt the chocolate. If your batter is too cool to melt the chocolate, use a hairdryer to melt it! Useful appliance! Smear the melted milk chocolate into the top layer of the batter, making sure to cover every inch of the surface. Don't leave any chocolate streaks - smear it in thoroughly. This creates the shiny crust on top.
- Bake for 35-40 minutes, turning after 15 minutes. It is important that a skewer comes out completely clean when testing. Remove the brownies from the oven and let them cool completely before removing them from the tin. Slice them on the same day you make them. If you leave them standing overnight, they become very fudgy and stick to your knife terribly! Rather slice them just after they've cooled down. Enjoy!
Have fun with this recipe! Bask in the chocolate ambiance…
Chat soon!
Aurelia 🙂

