
How to Make Gorgeous Chocolate Shavings
Chocolate shavings were basically the first decorative thing I could associate with. In my first few years of baking the term “cake decorating” always scared me off.
It seemed like this super fancy skill which you can only acquire through years of studying and practice.
On top of all that I could not reach equilibrium in my mind over fondant and gum paste… I didn’t like them at all because they have NO FLAVOUR whatsoever, but it seemed like those are the only materials to use in cake decorating.
Should I give in? I guess it is okay that gum paste decorations are flavourless… isn’t it?
For me, the main reason I add anything to a cake is because it contributes to the flavour – a very honest and bare approach. And that’s me in a nutshell; I cannot pretend to save my life.
This meant I had to find a way to decorate cakes in an honest fashion. The simplest answer was this…
Quality Ingredients as Decorations
Taking an ingredient that is inside the cake already and presenting it in a beautiful way on top of the cake. To me the final product is incredibly inviting.
Beautiful chocolate curls and fresh berries call out to my taste buds, but silver deco balls just don’t get my mouth watering (anyone else feel the same way?).
If gum paste and fondant works for you in your cake decorating, that’s wonderful. We all have to discover what materials work for us and best represent, and express, us as creatives.
I am an honest purist at heart so if I approach cake decorating in the same way, I am way more likely to create a stunning product I am proud of and feel comfortable with.
Over the past 5 years I’ve discovered some nifty tricks to make cakes & cupcakes look spectacular in a matter of 5 minutes just by using ingredients to decorate my cakes.
It makes so much sense to me and the end result can hold its own next to a fondant cake any day 🙂 I would define my cake decorating style as “Purist Cake Decorating”.
Isn’t it Hard to Make Chocolate Shavings?!
Please don’t panic! You don’t need amazing skills to do this. I don’t have any qualifications in working with chocolate, but just figured things out as I went along.
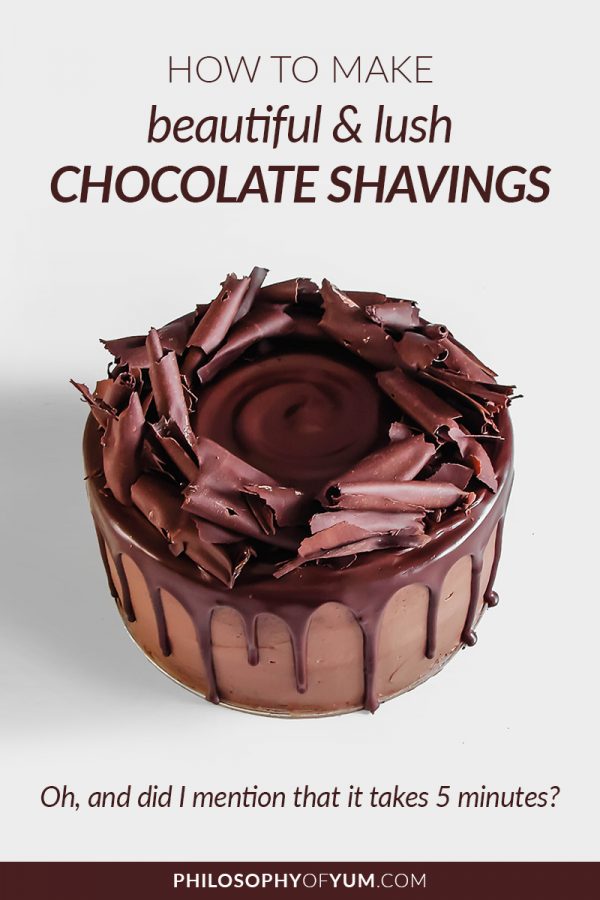
This technique is super easy and quick, I promise! And the finish is just so beautiful. It immediately adds a professional edge to your cakes!
The technique for making chocolate shavings is simple in principle. Very simple. It comes down to pressing and dragging a knife over chocolate.
First place I saw this technique was on The Naked Chef (I NEVER missed an episode).
Jamie was decorating a chocolate tart or something and in seconds he made these stunning chocolate shavings that made his homemade tart look like a centerpiece in a French Bakery!
RELATED: How to Write on Cake Without Free-Handing
What I love about this technique is that you just use an ordinary bar of dark chocolate to make them.
No need to fuss about with baking sheets and vegetable shortening which is the case when making proper chocolate curls. No thanks, too much effort.
Only problem is that these regular chocolate shavings can often seem a bit skimpy.
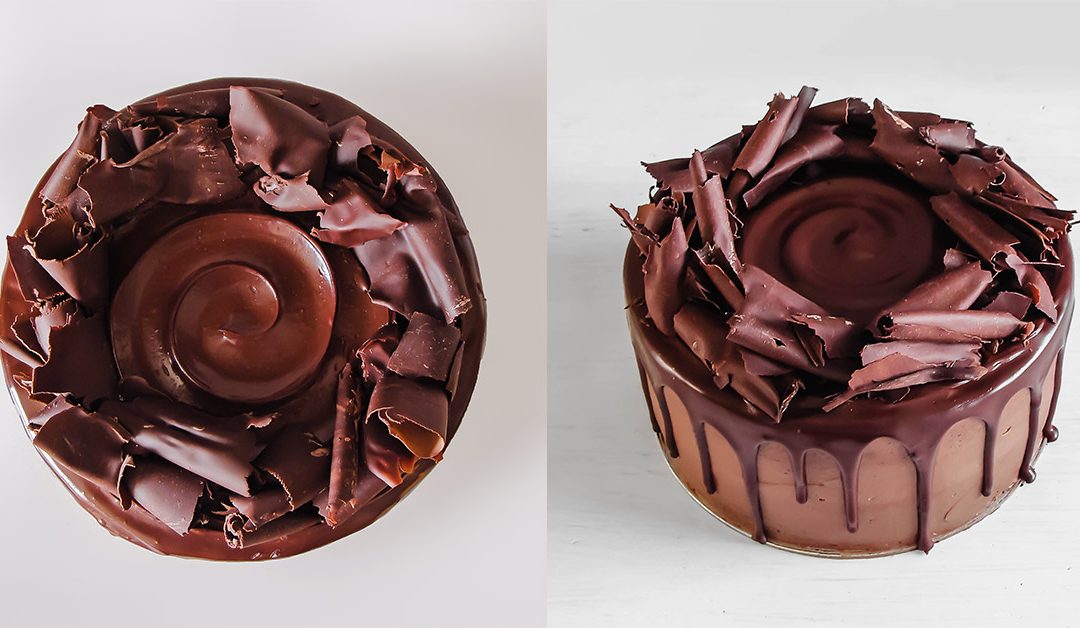
I’ve discovered a few hacks however that end up giving you fuller chocolate shavings which give you something in between a chocolate shaving and a curl… a shurl! 😀 Officially a thing.
Chocolate curls are too “stiff and organized” for me and regular chocolate shavings can look a bit skimpy, so chocolate shurls are absolutely ideal!
How to Make Chocolate Shavings/Shurls
You’ll need:
A bar of Dark Chocolate (56% – 65% Cocoa Solids. Anything higher is too hard and anything lower is too soft.)
A hairdryer
A smooth edged chef’s knife
Ceramic plate
Method:
I’m giving you the method here in WRITING but, as you know, it often helps to SEE someone doing the things we want to learn, right?
That’s why I’ve created a Chocolate Shavings Video Tutorial to SHOW you how to create these gorgeous chocolate shavings 🙂 And it’s only $15! Click the blue link if you want to SEE how it’s done.
Here’s the Method in Writing:
Put on an apron made of thick fabric (very important!).
Put your knife and plate to one side so they don’t get warm from the hairdryer’s heat.
Place the bar of chocolate on your work surface, perpendicular to your tummy. Make sure the smooth side is facing up.
Hold your hairdryer about 20 cm away from the chocolate and turn it on to its lowest speed. Gently move the hairdryer up and down the length of the chocolate, all the while keeping the hairdryer at 20 cm distance.
You only want to soften the chocolate slightly! You don’t want it to melt. The surface of the chocolate should become dull, but not shiny (then you’ve gone too far).

Press and drag your knife over the surface of the chocolate, starting at the furthest end and dragging it towards you, bracing the chocolate with your tummy.
Do this in one, swift motion. Drag the knife over the chocolate as fast as you can!
The chocolate shavings will cling to the knife. Very gently, starting from the top, loosen, curve and roll the shavings onto your ceramic plate with your fingers.
Even after the shaving has been made you can manipulate it to curve a bit more since the chocolate has been softened slightly.
Some chocolate shavings will already be quite curled, so in such cases you can just push them off the knife onto the plate.
Carry on shaving till the soft surface chocolate is used up. Repeat hairdryer process again before making more chocolate shavings.
In summer I like to place the plate of chocolate shavings in the fridge for a minute, just to firm up the chocolate a bit.
These thicker chocolate shavings are not as fragile as regular chocolate shavings, so you can easily pick them up with your fingers and place them where you want without breaking them.
I use this method DAILY for making chocolate shavings. With them I decorate cakes, cupcakes, tarts… anything really. Minimum effort for maximum results. Nice!
Struggling to Get The Chocolate Shavings Right?
This technique does require some practice to get just right!
Maybe you’ve been trying and trying to create chocolate curls like these, but they’re just NOT cooperating…
And now you’re literally covered in chocolate and giving up hope…
But just wait a minute!
As you know, it often helps to SEE someone doing the things we want to learn, right?
That’s why I’ve created a Chocolate Shavings Video Tutorial to SHOW you how to create them 🙂 And it’s only $15!

And there’s another video tutorial for White Chocolate Curls which is also $15.

I hope you give this simple & delicious cake decorating technique a go and WOW your friends and family with your super snazzy chocolate curls.
And then you can be all like “Oh yes, I spent my whole day doing this incredible chocolate work because you all are just so worth it!” and then take an elaborate bow! 😉
Thanks for reading! Chat soon!
Aurelia


POPULAR BAKING TIPS


POPULAR BAKING BIZ TIPS


Got a question? Something to add? Let’s chat in the comments section down below! (I respond to every single comment)


