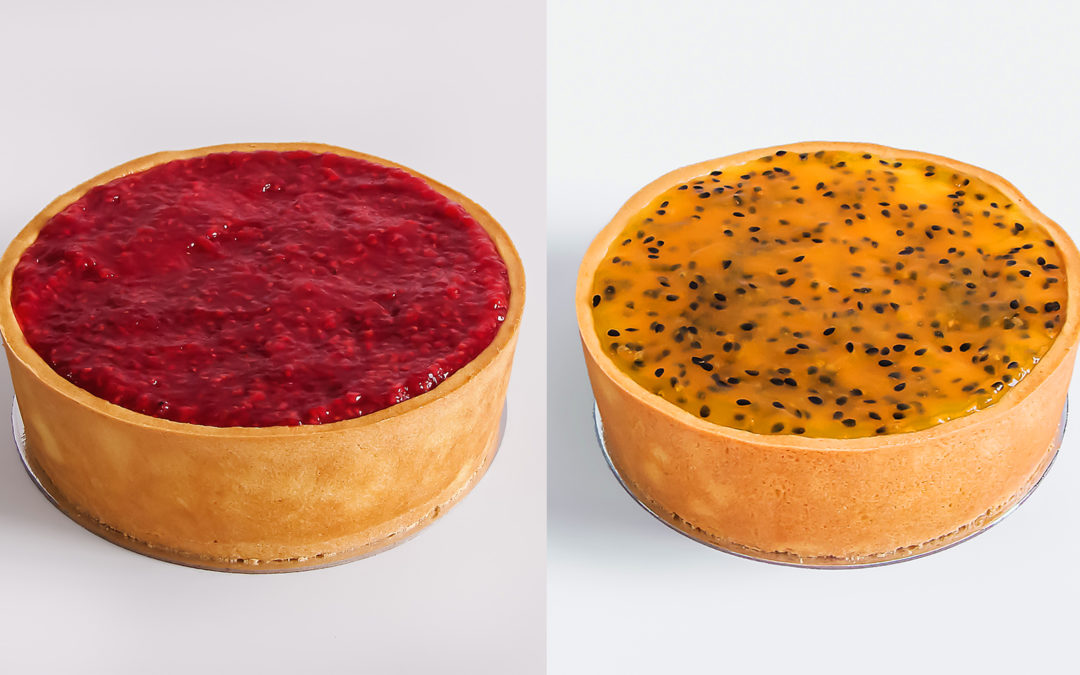
The Ultimate Vanilla Baked Cheesecake Recipe

The Ultimate Vanilla Baked Cheesecake Recipe

Ultimate Vanilla Baked Cheesecake

Vanilla Baked Cheesecake is one of the most glorious desserts on earth. Fact. Tangy, creamy, smooth and rich. Paired with a sharp fruit compote, it is even better! Total, TOTAL bliss.

If you’ve read my previous posts in my Perfect Baked Cheesecake Series, you will know that I was absolutely petrified of making baked cheesecake – for yeeeears.

There are so many things that can go wrong with baked cheesecake. It can sink, curdle and crack or (on the other side of the spectrum) you can be too gentle and end up with an under-cooked cheesecake.

In most cooking/baking shows, we constantly see all the dramas and dangers surrounding the humble cheesecake. BUT, you honestly don’t need to be afraid – at all!


Let’s Get Technical

A perfect baked Vanilla Cheesecake is, seriously, super straight forward.

The ingredients are simple, but the METHOD is where things really go down

Therefore I advise you to READ MY PERFECT BAKED CHEESECAKE GUIDE FIRST, before diving into the recipe! These tips will prep you for making your own flawless Baked Vanilla Cheesecake.

This guide covers all the essential tips you need to avoid any cracks, curdling, sinking, shrinking, etc. I also discuss an alternative method to the traditional (and indiscreetly tedious) water bath baking method.

Open the Perfect Baked Cheesecake Guide in a separate tab and give it a read. Remember, method determines at least 50% of the quality of your bake! Method matters.

A lush, New York Style Vanilla Baked Cheesecake; buttery vanilla pastry with super creamy, dense (but not too dense), smooth and tangy cheesecake. Deeeeelectable! Eat it as is or add a topping; fresh fruit, salted caramel & nuts or a fruit compote. #newyorkcheesecake #bakedcheesecake #cheesecakerecipe #perfectcheesecake


My Baked Cheesecake Recipe Development

There are many takes on baked vanilla cheesecake. Many folks insist on using only cream cheese, eggs and sugar.

I do feel that using only cream cheese makes the cake a bit TOO cheesy though – in texture and flavour. Obviously a cheesecake needs to be cheesy, but I love it when the flavour is mellowed out just a tad with some sour cream inside the batter.

The first vanilla cheesecake I made was a recipe by Tyler Florence. He is constantly on a quest to make the ULTIMATE of something. My kind of person! His vanilla cheesecake recipe contained sour cream which gave the cheesecake a beautiful tang.

The addition of sour cream also rounded out the flavour of the cream cheese wonderfully! His recipe contained a bit too much sour cream for me though. Sorry Tyler!

I also tried a recipe by Gemma Strafford once. It was lovely, but I really missed the tang of the sour cream.

Some more influence came along from Ashlee Marie. Her recipe didn’t use any cream or sour cream inside the batter, but her baking and mixing methods for vanilla cheesecake were life changing.

For the cheesecake pastry, refer to my previous post in my Perfect Cheesecake Series – click here. I’ll include another link inside this vanilla cheesecake recipe (further down) when you will need it.

I utterly ADORE this vanilla cheesecake recipe… It’s a New York Style Cheesecake; buttery vanilla pastry with super creamy, dense (but not too dense), smooth and tangy cheesecake. Deeeeelectable!

It can be eaten as is, or you can add a topping. These are my favourite toppings:

  1. A Fruit Compote (recipe listed below this baked cheesecake recipe).
  2. Salted caramel & toasted pecans. I recommend that you still add the thin white chocolate layer on top of the cheesecake (as described in the recipe below) so that the caramel doesn’t soak into your perfect baked cheesecake.
  3. Dress it up with fresh, seasonal fruit. For this I like to ditch the white chocolate layer and add some of my ultimate vanilla cream cheese frosting on top of the cheesecake and then add the fruit on top of that. Dust the fruit with icing sugar to make it look gorgeous and festive!


Here is my ultimate Baked Vanilla Cheesecake Recipe!

5.0 from 1 reviews
The Ultimate Vanilla Baked Cheesecake Recipe
 
Prep time
Cook time
Total time
 
Author:
Serves: 9 inch cheesecake
Ingredients
FOR THE PASTRY:
  • 230 g All-Purpose Flour
  • 75 g Icing Sugar
  • 130 g Butter, cold and cubed
  • 50 g Egg Yolks (about 2 ½ yolks)
  • ½ Tbsp Vanilla Extract
FOR THE CHEESECAKE:
  • 1000 g Cream Cheese (I use medium fat – 25% fat)
  • 320 g White Sugar
  • 5 g Salt
  • 240 g Egg (4 X-large eggs)
  • 200 g Sour Cream
  • 1 Tbsp Vanilla Extract
FOR THE FRUIT COMPOTE:
  • 220 g Fruit of choice
  • 120 g White Sugar
  • 1 Tbsp Lemon Juice
  • 45 g Water
  • 13 g Corn Starch
FOR THE WHITE CHOCOLATE LAYER:
  • 85 g White Chocolate
  • ½ Tbsp Flavourless Vegetable Oil
Instructions
FOR THE PASTRY:
  1. Refer to my previous post, Cheesecake Pastry, for instructions.
FOR THE CHEESECAKE:
  1. Preheat your oven to 300˚F/150˚C and move an oven rack to the center of your oven. Place the largest roasting tray you have on the bottom rack of your oven.
  2. Use a stand mixer to make this vanilla cheesecake. Do not use a hand mixer. If you don’t have a stand mixer, then rather mix the batter by hand. Place the room temperature cream cheese in the bowl of your stand mixer. With the paddle attachment, beat the cream cheese on medium low speed till smooth.
  3. Add in the sugar and salt. Beat on medium-low speed for 30 seconds. Leave to stand for 5 minutes and beat again on medium-low speed till sugar is dissolved (30 seconds).
  4. Scrape down the paddle, sides and bottom of the bowl. Beat again on medium-low speed till smooth (30 seconds).
  5. From here on out ONLY mix on the lowest and slowest turtle speed possible. If your mixer doesn’t have the option to go very slow, then do the rest by hand.
  6. Crack all the eggs in a separate bowl. Stir lightly with a fork till the yolks are broken.
  7. Pour more or less 1 egg at a time into the cream cheese mixture with the mixer going on its slowest speed, or stir by hand. It is crucial to not whip in any air.
  8. Add the remaining egg in in 3 sessions. Don’t watch it the whole time, you will be SO tempted to increase the speed. It is a great opportunity to spend some time on Pinterest or learn a language on the Duo Lingo App (I’ve become 7% more fluent in French, just from cheesecake mixing time! Haha!).
  9. Before mixing in the last egg, scrape down the sides and bottom of your bowl thoroughly and mix again on lowest speed.
  10. At this point, start boiling a full kettle of water on the side.
  11. Stir the sour cream and vanilla into the cheesecake batter by hand to avoid overmixing.
  12. Pour the vanilla cheesecake batter into the semi-baked pastry.
  13. Place the cheesecake in the center of your oven. Fill the empty roasting tray with just boiled water. Bake for 1 hour.
  14. Turn the cheesecake 180 degrees around. Bake for another 35 minutes. Switch off the oven with the cheesecake still inside and the door still closed.
  15. After 5 minutes, leave the oven door ajar. Leave the cheesecake inside the switched off oven for 1h30.
  16. Remove from the oven and leave to cool at room temperature for 1 hour. Transfer to the fridge and leave it in there overnight.
FOR THE FRUIT COMPOTE:
  1. Place the fruit, sugar, lemon juice and salt in a saucepan over medium heat. Stir frequently and allow to cook for 5 - 7 minutes till the sugar is dissolved. Smash some of the berries with a fork during the cooking process.
  2. In a small bowl, dissolve the corn flour in the water. Add it to the cooking berries while stirring constantly. Allow to cook for about 2 minutes, while stirring, so that the corn flour gets cooked through. The compote should be thickened. Set aside to cool.
FOR THE WHITE CHOCOLATE LAYER:
  1. The next morning you can decorate the cheesecake! There may be some condensation on the surface of the cheesecake; dab the surface with some paper towels to absorb the moisture. Leave the cheesecake inside its tin.
  2. Heat the white chocolate and oil together in the microwave in 30 second bursts till completely melted. Pour it over the surface of the cheesecake and immediately tilt the cheesecake in all directions till the surface is completely covered with a thin layer of white chocolate. Refrigerate for 10 minutes to set.
FINISHING THE VANILLA BAKED CHEESECAKE:
  1. Carefully push up the bottom of the tin all around the cheesecake to loosen the sides. Place the cheesecake on top of a mug or sturdy glass, gently pressing down the sides of the tin.
  2. Lift the bare sided cheesecake back onto your work surface. Slide a large, smooth edged knife under the pastry to loosen the cheesecake from the bottom of the tin. I like to go all around the edges first before attempting to loosen the center-bottom. Push the cheesecake gently, with a cupped hand, onto your cake stand/cake board/serving platter.
  3. Lastly, top the white chocolate layer with your cooled fruit compote and spread it out evenly.
  4. Cut slices with a hot, dry knife. Enjoy!!!

If you’re into Baked Cheesecake you’ll LOVE these related posts:

  1. First there’s the Ultimate Guide to Perfect Baked Cheesecake
  2. Then there’s my Cheesecake Pastry Recipe (includes chocolate variation) and Walk-Through.
  3. Then my Chocolate Swirl Baked Cheesecake recipe.

Chat soon!

Aurelia

Got a question? Something to add? Let’s chat in the comments section down below! (I respond to every single comment)

Cheesecake Pastry Recipe – With 2 Flavour Variations!

Cheesecake Pastry Recipe – With 2 Flavour Variations!

Cheesecake Pastry

Cheesecake Pastry was not something I grew up with at all! Come on, we all mostly eat cookie crust cheesecakes – and they truly are fantastic! Who can ever manage to figure out if they like cheesecake’s crust or filling more?? BOTH are super delicious.

The slightly crunchy texture of the crust along with the flawlessly smooth cheesecake filling is the highlight of Dessert World.

BUT, did you know that Cheesecake Pastry was actually the original crust used by the clever Greeks and Romans? (Read more about the history of cheesecake).

Since they are generally considered as geniuses, I always knew deep down that cheesecake pastry might be something to look into.

Honestly, my decision to start making cheesecake with a cheesecake pastry base was due to the nature of my Home Bakery. I had to figure out how to make a crust sturdy enough to handle being moved over to a disposable cake board.

Crushed cookie bases are quick to prepare, but super difficult to transfer to a different dish, serving platter, cake board etc. Typically, you leave the cheesecake on the bottom of your spring-form cake tin and use it as a “cake board”.

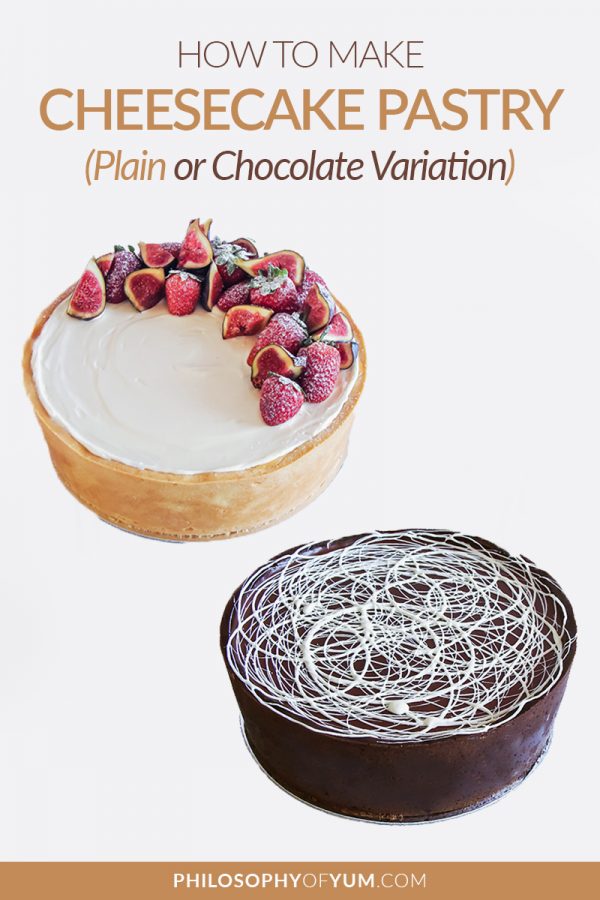
cheesecake pastry recipe plain or chocolate

Problem with this idea is that I can’t exactly expect my clients to return my cake tin’s bottom. Too tedious for them and me. Cheesecake Pastry is much sturdier and still contains gorgeous butter, so you aren’t missing anything!

What Makes Cheesecake Pastry Different?

There are a few differences between cheesecake pastry and regular shortcrust pastry. Cheesecake pastry typically contains more egg, because egg is a great binding agent. It provides extra strength and stability to the pastry.

I would even go so far as to say it provides a small amount of elasticity. Shortcrust pastry, in my opinion, needs to pretty much have the texture of shortbread. I did a very thorough post on Shortcrust Pastry earlier this year.

It might be a bit unorthodox, but I like to add vanilla extract to my cheesecake pastry instead of water. It really bumps up the flavour and compliments the cheesecake so beautifully!

Perks of Using Cheesecake Pastry

  • The biggest perk for me is that it protects the cheesecake during baking. It COMPLETELY eliminates the risk for over-cooked/browned/curdled edges around the cheesecake.
  • It keeps the cheesecake moister during baking since the delicate cheesecake filling never touches the hot and dehydrating aluminium sides of the tin.
  • As I mentioned before, it makes the finished cheesecake a BREEZE to transfer onto a cake board or cake stand without lending out your tin’s bottom.
  • It really is super delicious! Since I’ve switched to cheesecake pastry, I’ve never had the desire to go back to crushed cookie bases.
  • It is really not difficult at all! In a food processor, it really takes like 5 minutes. I’m going to give you step by step instructions so that you can also make your own cheesecake pastry!

*SUPER IMPORTANT!! Before you make this Cheesecake Pastry and proceed with making a Baked Cheesecake, I strongly urge you to read my post PERFECT BAKED CHEESECAKE | THE ULTIMATE GUIDE.

Cheesecake Pastry - easy and super delicious! VANILLA or CHOCOLATE Cheesecake Pastry variations available to compliment your favourite cheesecake recipe. #bakedcheesecake #cheesecakepastry #cheesecakerecipe

5.0 from 1 reviews
Cheesecake Pastry - Plain or Chocolate
 
Prep time
Cook time
Total time
 
Author:
Serves: 9 inch base
Ingredients
  • 230 g All-purpose Flour (sub 40 g cocoa if making chocolate pastry)
  • 75 g Pure Icing Sugar
  • 130 g Salted Butter, cold and cubed
  • 50 g Free-range Egg Yolks (2 egg yolks + 10g of whole beaten egg)
  • ½ Tbsp Vanilla Extract
Instructions
  1. Place flour (and cocoa powder if making choc pastry) in a food processor. Cut the butter into a 1 cm dice and add to the food processor. Try to distribute the cubes of butter evenly in the flour so that they don’t stick together.
  2. Process on high speed until resembling even bread crumbs.
  3. Add icing sugar and process for about 10 seconds on high speed.
  4. Add the egg yolks and vanilla. Process on high speed for about 15 seconds. The pastry will not form a ball inside the processor.
  5. cheesecake pastry process
  6. Pour the crumbly mixture onto a work surface – do not add any extra liquid! Press all the crumbs together and press the pastry together till more or less smooth. This should take only about 3 minutes. Form the pastry into a ball and squash it flat to about 1cm thick - this helps it to chill faster.
  7. Wrap the pastry in cling wrap and refrigerate it for 15 minutes.
  8. Cut a 30 cm x 30 cm square of non-stick parchment paper. Place the chilled pastry on the paper and roll out with a lightly floured rolling pin to an EVEN 3mm thickness, roughly in a circular shape. The parchment paper makes it super easy to turn the pastry when rolling!
  9. Spray/butter the inside of your 9 inch (22,5 cm) tin. Place the loose bottom face side down onto the pastry. Cut around the sides of the tin’s bottom and also at 12, 3, 6 and 9 o’clock to divide the excess pastry into 4 strips.
  10. Remove the strips one by one and place to one side. Press down on the tin’s bottom so that the pastry squishes out slightly underneath. I find this little lip of pastry helps to combine the pastry on the sides with the pastry on the bottom.
  11. Flip the parchment paper and tin’s bottom. Peel away the paper.
  12. Drop your tin’s bottom back into your tin and fill in the sides of the tin with your pastry strips using your fingers. Do not worry about a smooth finish just yet.
  13. Preheat your oven to 180ᵒC/350ᵒF.
  14. Place your tin in the freezer for 5 minutes. Remove from freezer and smooth the edges and bottom with a metal spoon. Return to freezer for a further 10 minutes or until frozen solid.
  15. Cut a large piece of heavy weight foil (enough to line the bottom AND go up and over the sides.) Spray the dull side of the foil with non-stick cooking spray. Smooth the greased side of the foil directly onto the pastry. Leave no pastry exposed. Be sure to press the foil down very snugly into the corners of the cheesecake pastry. Run your finger over the top edge as well to maintain the shape of the pastry during baking.
  16. Fill the cavity with dry baking beans (I prefer rice).
  17. Bake one notch below the center of your oven for 35 minutes, turning after 15 minutes.
  18. Remove from the oven and leave to stand (with foil and rice still inside) for 10 minutes.
  19. Remove the foil and rice and proceed to fill with cheesecake filling. Bake again for as long as your cheesecake recipe states.

I trust that these simple an thorough steps will enable you to make your own amazing cheesecake pastry! Please let me know how you get on by using #philosophyofyum or even tagging me @philosophyofyum.

If you’re into Cheesecake you’ll love these related posts:

Perfect Baked Cheesecake | The Ultimate Guide!

Perfect Vanilla Baked Cheesecake Recipe

Chocolate Swirl Baked Cheesecake Recipe

Chat soon!

Aurelia
Got a question? Something to add? Let’s chat in the comments section down below! (I respond to every single comment)

Pear, Apple & Blueberry Muffins

Pear, Apple & Blueberry Muffins

Pear, Apple & Blueberry Muffins Recipe

These Pear, Apple & Blueberry Muffins were one of my first big successes in my bakery. I’ve sold literally thousands of them to local coffee shops and deli’s. They are just incredibly delicious!

I know you guys have really enjoyed my muffin recipes, so I thought it’s about time that I share another one with you.

Plus, the last few posts have been so laden with chocolate, it’s like I can hear my blog whispering to me, asking for something more wholesome…

So here you go! Now we can all feel better about ourselves again!

Now if you’ve been following my blog for a while you will know that I have a very sentimental attachment to muffins.

My mother used to bake fresh muffins for my sister and I on very special holidays like youth day! I have such grand memories of the beautifully laid breakfast tray, complete with a flower from our garden and fruit juice in a wine glass. We felt like queens!

These Pear, Apple & Blueberry muffins are so light, tender and moist! A perfect fall muffin recipe to put on your fall home baking list. Great muffins for an on-the-go healthy breakfast. The crunchy cinnamon sugar crust on top pairs perfectly with the muffin's soft crumb underneath. And the bursts of fresh, dark blue-purple blueberries throughout the muffins is oh so delicious! #blueberrymuffins #fallrecipes #fallbaking #muffins #muffinrecipes


Recipe Introduction

I am a huge fan of putting a lot of fruit in muffins because it adds much needed fiber to your breakfast.

The added moisture and flavour is also fantastic. I LOVE the idea of eating a muffin on the run that doesn’t need any butter or jam.

These Pear, Apple & Blueberry muffins are one of those. You can eat it just as it is, no add-ons, and still be completely satisfied and yummy-fied!

Try to use fresh fruit if you can. The texture and flavour of fresh fruit is always WAY better!

If you have concerns about the sugar crust on top of the muffins, do not be alarmed. I used sugar that would have gone inside the muffins anyway and just gave it a promotion to form a crust on top. The muffin itself is not very sweet at all, so the crust really goes with it super duper well.

When it comes to muffins, you really want to mix the batter as little as possible. Once the wet ingredients hit the dry ingredients, STIR gently with a metal spoon, don’t beat it.

These Pear, Apple & Blueberry muffins are so light, tender and moist!

The crunchy cinnamon sugar crust on top pairs perfectly with the muffin’s soft crumb underneath. And the bursts of fresh, dark blue-purple blueberries throughout the muffins just makes you swoon!

These Pear, Apple & Blueberry muffins are so light, tender and moist! A perfect fall muffin recipe to put on your fall home baking list. Great muffins for an on-the-go healthy breakfast. The crunchy cinnamon sugar crust on top pairs perfectly with the muffin's soft crumb underneath. And the bursts of fresh, dark blue-purple blueberries throughout the muffins is oh so delicious! #blueberrymuffins #fallrecipes #fallbaking #muffins #muffinrecipes

5.0 from 1 reviews
Pear, Apple & Blueberry Muffins
 
Author:
Serves: 10
Ingredients
  • 220 g Cake Flour
  • 16 g Baking Powder
  • 1 tsp Salt
  • ¼ tsp ground ginger
  • 1 tsp cinnamon
  • 100 g Canola Oil
  • 110 g Milk
  • 110 g Yogurt, plain and low fat
  • 120 g Sugar
  • 1 Egg + 1 Yolk (80 g)
  • 1 tsp vanilla extract
  • 90 g fresh apple, granny smith preferably
  • 100 g fresh pear
  • 80 g blueberries, thawed if frozen
Instructions
  1. Start by preparing the fruit. Chop the fresh apple and pear into approximately a 1,5cm dice (you may toss the fruit in 1 teaspoon of lemon juice, diluted with 1 tablespoon of water, to stop it from browning.) Keep 20 of the blueberries aside for later use. If they were frozen, place them on a piece of paper towel so that most of the excess liquid is absorbed.
  2. Preheat oven to 180ᵒC (355ᵒF).
  3. Grease and line muffin tins with individual baking paper liners (remember the recipe makes 10 large muffins). You can make your own muffin liners just like mine! Click here to see how.
  4. In a small bowl, beat together the eggs, oil, milk, yogurt, sugar and vanilla until smooth. Set aside the wet mixture for a minute or 2 so that the sugar can dissolve.
  5. In the meantime, sift together the flour, baking powder, salt, cinnamon and ginger in a large mixing bowl. Mix all dry ingredients together thoroughly and make a well in the center.
  6. Return to your small bowl of wet ingredients. Beat for another 30 seconds till well combined. Pour the wet mix into the well you created in the dry ingredients. Don’t mix just yet!
  7. Add apple and pear into the well too and mix slowly with a metal spoon until just combined (over-mixing toughens the texture!). Scape down the sides of the bowl with a rubber spatula and lightly stir to combine.
  8. Divide the batter evenly between the 10 lined muffin holes in the muffin tin. Top each muffin with 2 of the reserved blueberries. Sprinkle each muffin with a teaspoon of cinnamon sugar just before they go in the oven.
  9. Bake on the lower rack of your oven for 15 minutes, turning after 10 minutes. Then bake on the higher rack for a further 15-20mins or until golden brown and a skewer comes out clean.

Recipe Notes

These Pear, Apple & Blueberry muffins are best eaten FRESH, on the day you make them. The cinnamon sugar crust will go soggy if you try to refrigerate them or keep them in a Tupperware. You can do it, but I don’t recommend it.

Do you like these rustic muffin liners? You can make them yourself! Check out this post for the full step-by-step tutorial >> DIY Cupcake/Muffin Liners.


Want More Delicious Muffin Recipes?

Ultimate Bran Muffins
Apple, Date & Pecan Muffins
Pumpkin & Cream Cheese Muffins with Pecan Crumble

If you give this recipe a go, tag me on facebook, twitter or instagram @philosophyofyum. I would LOVE to see!

Chat soon!

Aurelia 🙂

Got a question? Something to add? Let’s chat in the comments section down below! (I respond to every single comment)

Ultimate Chocolate Cupcakes Recipe

Ultimate Chocolate Cupcakes Recipe

Ultimate Chocolate Cupcakes – Secret Recipe!

Sharing my Ultimate Chocolate Cupcakes Recipe with you this week seemed quite fitting because it is (or actually was) Philosophy of Yum Blog’s 1-year Birthday!! Yayyyy! 😀

I wanted to share a super special recipe on this special occasion and also to just thank you for your support over the last year. It means so much to me.

Many of you have asked me why I don’t share my bakery’s “claim to fame” recipes like Double Chocolate Brownies, German Apple Cake or Dark Chocolate cake.

The simple reason behind this is that my home bakery (Philosophy of Yum) is by FAR my main source of income. These recipes are my bread and butter so sharing them with the world is still a little bit risky at this point.

This week however, I’m making an exception because of my blog’s birthday 😀 So I am sharing with you my top-secret recipe for Ultimate Chocolate Cupcakes!

Looking for that ultimate Chocolate Cupcake recipe? Super moist, ridiculously chocolate-y, not too sweet and packed with flavour? This is the chocolate cupcake recipe you've been looking for. Click through to get therecipe! #chocolatecupcakes #bestchocolatecupcakes #chocolatecupcakerecipe #homebaking


Ultimate Chocolate Cupcakes Recipe Development

Chocolate Cupcakes are really just one of those classic and sacred baked goods that ring nostalgic notes for ALL of us. They were and are always present at every kid’s birthday party, every bake sale, every church bazaar, every bakery and every grocery store.

I’ve probably tried out about 15 different recipes for chocolate cupcakes in my life. You know me by now. If cake doesn’t melt me with its powers of YUM, then I’ll stop eating it. Why waste the calories? I tried recipe after recipe.

Often tweaking a recipe 3 times before finally moving on to the next one. It became my mission for many years to finally find THE ONE!

I’ve found that butter based recipes are just not ideal for any kind of chocolate cake. Oil locks in a great deal more moisture!

The method is also absolutely critical. Once a hot liquid is added, you really want to keep the mixing low and slow.

The chocolate cupcakes recipe I was finally and fully pleased with ended up being a combination of a few plus some added tweaks I made on the spur of the moment. It worked perfectly and I am so grateful!

The base recipe was from Homemade by Holman. One huge perk about this recipe is that you can mix it in one bowl from start to finish which means less dishes – yes please!

Recipe Introduction

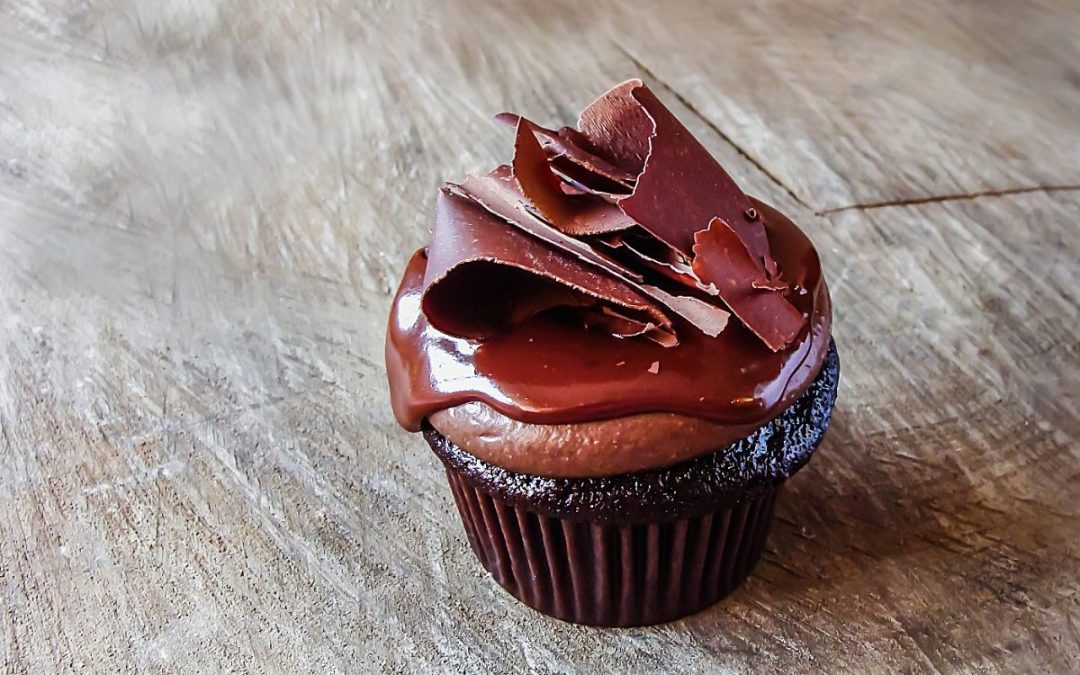
The texture of these chocolate cupcakes is very moist, soft and creamy. And the flavour is SUPER chocolatey! The smooth chocolate ganache and slightly tangy chocolate frosting round off an indulgent texture and flavour experience.

The chocolate frosting recipe I shared in my previous post here. You can also make your own fancy Dark Chocolate shavings like I did! I posted a whole step by step tutorial here. I didn’t think I would share one of my best recipes this soon, but here it is…

My top-secret Philosophy of Yum recipe for Chocolate Cupcakes!

Are you a total Chocolate Cupcake Snob? Well, so am I. It HAS to be super moist, ridiculously chocolate-y, not too sweet and packed with flavour! This is the ultimate chocolate cupcake recipe - seriously. It's the one you've been looking for. #chocolatecupcakes #bestchocolatecupcakes #chocolatecupcakerecipe

5.0 from 6 reviews
Ultimate Chocolate Cupcakes
 
Author:
Serves: 14
Ingredients
  • 240 g Granulated White Sugar
  • 190 g Cake Flour
  • 50 g Cocoa Powder, best quality you can find
  • ⅓ tsp Baking Powder
  • ¾ tsp Bicarbonate of Soda
  • 1 tsp salt
  • 55 g Egg (out of shell)
  • 115 g Milk (4-5% Fat)
  • 125 g Canola Oil
  • 2 tsp Vanilla Extract
  • ½ cup Water (just boiled)
  • FOR GANACHE: 100 g Cream (about 35% fat content)
  • FOR GANACHE: 100 g Dark Chocolate (at least 65% cocoa solids)
Instructions
  1. Preheat your oven to 170°C (338F) on the regular bake setting - NOT convection or fan-forced.
  2. Line a cupcake/muffin tin with cupcake liners.
  3. In the mixing bowl of a stand mixer, add in the sugar, oil, vanilla and eggs.
  4. Sift together the flour, cocoa powder, baking powder, bicarbonate of soda and salt into the same mixing bowl.
  5. Warm the milk in the microwave for 20 seconds to bring it more or less to room temperature. Add it to the mixing bowl with the rest of the ingredients.
  6. Beat all the ingredients together with the paddle attachment on a low speed for 20 seconds to roughly combine. Stop the machine and scrape down the sides of the bowl and the paddle.
  7. Switch on your kettle at this point for the boiling water.
  8. Beat the batter once more on medium high speed for 2 minutes. The batter will be very stiff! As the sugar dissolves, it will become a bit looser.
  9. Pour the ½ cup boiling water into the batter.
  10. Mix in light pulses on super low speed to stop the boiling liquid from splashing everywhere. After a few light turns it should be safe to turn up the speed to a steady low. Mix until liquid is no longer separate.
  11. Remove the mixing bowl from the machine and stir the batter thoroughly with a metal spoon till you have an even and smooth consistency.
  12. Divide the batter evenly between 14 lined cupcake holes.
  13. Make sure your oven has two oven racks inside. One rack should be in the top half of your oven, and one in the bottom half of your oven so that your oven cavity is basically divided into 3 equal spaces. Place an empty muffin tin, roasting tray or any other baking tin on the top rack. Place your cupcakes on the lower rack.
  14. Pour about ½ cup water into the bottom of your oven to create some steam. If your oven has an element right on the bottom or if you have a gas oven, pour 1 cup of water into the baking tin on the top rack in your oven.
  15. Bake the cupcakes for 15-20 minutes, turning after 8 minutes. Test with a skewer to see if the cupcakes are cooked. Ideally there should be a few moist crumbs sticking to the skewer… Remember, they will continue to cook for a minute or two more after you remove them from the oven.
  16. Read below for decorating instructions with chocolate ganache.

Decorating the Ultimate Chocolate Cupcakes:

I love the combination of chocolate ganache and frosting! The chocolate frosting I used here is my signature ultimate chocolate frosting I use in my bakery every day. It’s the tastiest frosting in the whole world!

Place a round tip nozzle in your piping bag and fill with the ultimate chocolate frosting. Hold the piping bag directly over the top of the cupcake (about 2 cm away from the surface) and squeeze out the frosting while keeping the bag stationary.

Once you are satisfied with the AMOUNT of frosting, stop. Use a teaspoon to flatten out the surface and spread the frosting more to the edges.

Place the frosted cupcakes in the fridge for at least 30 minutes before you make the chocolate ganache.

To make the ganache, simply heat the cream till it starts to simmer and add it to the chopped dark chocolate. Allow it to stand for 5 minutes and stir till smooth & dreamy.

Just spoon the semi-runny ganache over the frosting and work it around the top till you are happy with the look. Do not dunk the frosted cupcakes in the ganache! This frosting is a lot softer than traditional frosting and it will probably fall off.

Finally, I topped my ultimate chocolate cupcakes with some beautiful dark chocolate shavings. Click here to see how to make your own!

I really hope you make these yourself at home! They are just DIVINE. If you give this recipe a go, tag me on facebook, twitter or instagram #philosophyofyum because I would LOVE to see!

Chat soon!

Aurelia 🙂

Got a question? Something to add? Let’s chat in the comments section down below! (I respond to every single comment)

The Most DELICIOUS, Ultimate Chocolate Frosting!

The Most DELICIOUS, Ultimate Chocolate Frosting!

The Ultimate Chocolate Frosting Recipe

This Ultimate Chocolate Frosting is not a recipe that happened over night. I used to HATE frosting actually! Maybe you feel the same way about icky sweet buttercream as I do?

My childhood memories of frosting are completely grim. Conventional Chocolate Buttercream piped onto semi-dry sheet cakes with a star tip was a STAPLE at every single birthday party as a kid.

Oh and don’t forget the garnish of chocolate vermicelli sprinkles, glace cherries or the tiny rosettes of dulce de leche! Even though every birthday party had a themed cake, there was always one of these chocolate sheet cakes on standby in the background.

As fond as my memories are of childhood birthday parties, the chocolate sheet cakes are not included in that fondness.

That frosting was just too darn sweet. The overwhelming sweetness penetrated into your gills and made your mouth turn skew!

Every time I ate chocolate cake, I hoped this chocolate frosting might taste different, and every time the outcome was the same…

I ended up having one tiny bite, proceeded to SCRAPE OFF ALL THE CRAZY-SWEET FROSTING and ate the semi-dry cake on its own instead (which suddenly seemed a whole lot yummier after tasting that awful frosting!). Did anyone else also do this??

In the end I was so opposed to ANY kind of frosting.

I’d just never tasted a frosting that actually had FLAVOUR of its own. Not just sweet fat to make a dry cake seem less dry. I apologize for the clouds of criticism… I’m just so passionate about flavour 🙂


A Second Date with Frosting

My mother was writing Low Fat Low GI recipe books throughout my school years. The series is called “Eating for Sustained Energy”.

The carrot cake recipe is just fantastic! Naturally they had to take a road less traveled when it came to the frosting. Butter is not exactly “low fat” 😀

They also wanted a frosting with less sugar. Problem with buttercream is that you need to add a LOT of sugar to achieve the right consistency and something resembling flavour.

Thus, a smooth cottage cheese (which is even lower in fat than cream cheese), was the option they went for.

IT

WAS

SOOOOO

GOOOOOD!!!!!!

Finally, a frosting that had a great flavour and didn’t make my head spin from sweetness! A frosting you wanted to eat, as is, with a spoon!

The frosting was often a bit temperamental though… If you mixed it too much, it would go runny in seconds. Even so, the flavour and different approach was a great lesson I would draw from in the future.


Ultimate Chocolate Frosting Development

When I started baking part-time in 2012, I kind of avoided frosting. I knew I wouldn’t use buttercream. EVER. And I was honestly too scared to make my mom’s frosting out of fear that it would go runny. I needed something pipe-able.

Ultimate Chocolate Frosting elevates cake to a whole new dimension of YUM! It goes with EVERY CAKE FLAVOUR known to man. You'll never want to eat buttercream again. #deliciousfrosting #creamcheesefrosting #lowsugarfrosting #chocolatefrosting

I realized that cream cheese on its own would be too solid and cheesy tasting, so adding whipped cream would make it lighter. Truly, I had never read about whipped-cream-cream-cheese-frosting before or heard about it or anything! It just seemed like a good idea.

The great thing about cream cheese is that it already has flavour and it’s softer than butter, so you can add WAY less sugar to achieve the right consistency and sweetness. Wonderful!

It worked out PERFECTLY. Easy to pipe, super yummy and it seriously goes with ANY cake.

At this point I was still using chocolate ganache as my chocolate frosting. Although I LOVE ganache, it is a bit intense and heavier – even if you whip it. I wanted something more mellow, but still very chocolate-y.

About 2 years later I was watching another episode of Unique Sweets (all my stories seem to involve this show! LOVE IT!). The crew was visiting The Yellow Leaf Cupcake Co in Seattle, Washington. It is a unique cupcake eatery that makes an INSANE amount of cupcake flavours. Like 150+ flavours! The frosting they use is Swiss Meringue Buttercream (SMBC).

The one cupcake flavour on the episode was the “Tomato Soup Cupcake”, which is a flavour one of the owners had as a kid at every birthday party. Amazing! On top of this cupcake they put chocolate SMBC and it just looked divine.

At that moment I realized that I can easily turn my vanilla cream cheese frosting into a chocolate frosting by adding melted chocolate. I tried it and it was amazing.

Low Sugar Chocolate Frosting is so easy and TASTIER!! Photos by Alice Swan

So here is my super classified (until now) Philosophy of Yum Ultimate Chocolate Frosting recipe. I have made it 1000’s of times, refined it and perfected it in my 5 years of full time baking.

I guess if you wanted to be technically correct you could call it whipped-cream-chocolate-ganache-cream-cheese-frosting.


Reasons to Make This Ultimate Chocolate Frosting:

# It’s so flipping DELICIOUS!!! So delicious in fact that it makes you giggle, squirm and dance from the deliciousness.

# My Ultimate Chocolate Frosting contains a staggering 75% – 80% LESS SUGAR than any other frosting, but it is completely sufficiently sweet enough.

# It’s actually a whole lot quicker and easier to make than buttercream or traditional cream cheese frosting.

# You don’t need a stand mixer to make this chocolate frosting! A simple electric hand mixer is ideal.

# Because there is no butter in this frosting, it is also 55% lower in fat than any other conventional frosting. What a bargain!!

Let’s get started! My instructions are going to be rather thorough so that there’s little room for error. I really want  you to experience the awesomeness of this ultimate chocolate frosting.


5.0 from 3 reviews
Ultimate Chocolate Frosting
 
Prep time
Total time
 
Author:
Serves: 15
Ingredients
  • 30 g Whipping Cream (at least 33% fat) with ½ tsp Granulated Sugar
  • 50 g Dark Chocolate (at least 65% cocoa solids), chopped
  • 70 g Whipping Cream (at least 33% fat), ICE COLD
  • 200 g Full Fat Cream Cheese (at least 25% fat), non-aerated, ICE COLD
  • 2 tsp Vanilla Extract
  • 65 g Pure Icing Sugar
Instructions
  1. First make the chocolate ganache. Place chopped chocolate in a ceramic or glass bowl.
  2. Place 30 g cream and ½ tsp sugar in a saucepan and heat till just simmering.
  3. Add the hot cream to chopped dark chocolate. Stir well until fully combined and glossy. It's totally fine if the ganache splits a bit. Transfer to the fridge to cool down for at least 5 minutes.
  4. Next make the frosting. Whip cold cream to stiff peaks with an electric hand mixer in a medium mixing bowl.
  5. Beat in cold Cream Cheese till smooth. Scrape down sides of bowl and beat again till smooth and thickened. About 1 minute.
  6. Beat in Vanilla and icing sugar. Leave to stand for 2 minutes in the fridge so that sugar can melt into the cream cheese.
  7. Beat again till smooth and thick – about 1 minute. The frosting will be a bit runny at first, but just keep your beaters in one spot and keep beating on max speed and it will thicken up. You're essentially re-whipping the cream inside the frosting.
  8. Beat in the cooled chocolate ganache till the frosting is uniform in colour. If you want your frosting even more chocolatey, go ahead and beat in some cocoa powder.
  9. If I'm using the frosting for layer cakes I use it as it is. Let each layer of frosting chill in the fridge for at least 2 hours before adding another cake layer on top. This frosting isn't ideal for stacking more than 2 layers of cake.
  10. If I'm using this chocolate frosting for cupcakes I make sure that it's at the perfect consistency first before I start piping it. Signs of my perfect consistency: when you tap the side of the bowl, the frosting jiggles a tiny bit. When you scoop up a spoon, it takes about 2,5 - 3 seconds to drop back into the bowl.
  11. Stir the chocolate frosting with a spoon to smooth out any air bubbles before transferring to a piping bag or smoothing onto a layer cake.
Notes
This batch of frosting is enough for about 12 Cupcakes

I hope you’ll try out my Ultimate Chocolate Frosting Recipe! It’s a perfect match with my Banana & Chocolate Cupcakes, not to mention my Ultimate Chocolate Cupcakes.


If you give this recipe a go, tag me on facebook, twitter or instagram #philosophyofyum because I would LOVE to see!

Next time I’ll be sharing a recipe to go with this frosting… a VERY special recipe since it is Philosophy of Yum Blog’s 1 year birthday! 😀

Chat soon!

Aurelia 🙂

Got a question? Something to add? Let’s chat in the comments section down below! (I respond to every single comment)

Ultimate Bran Muffins

Ultimate Bran Muffins

Ultimate Bran Muffins Recipe

You want to eat more fiber, but why do high fiber bakes have to be so dry… and bland?

You want to eat something that’s good for you AND tastes great! I totally get that. And these ultimate bran muffins are the answer!

They’re super moist, flavourful and tender. And best of all, they’re LOADED with fiber!

My husband frequently struggles with… ehem… constipation. So I always make sure I have a stash of these Ultimate Bran muffins in our freezer.


Recipe Introduction

All photos by Alice Swan Photography

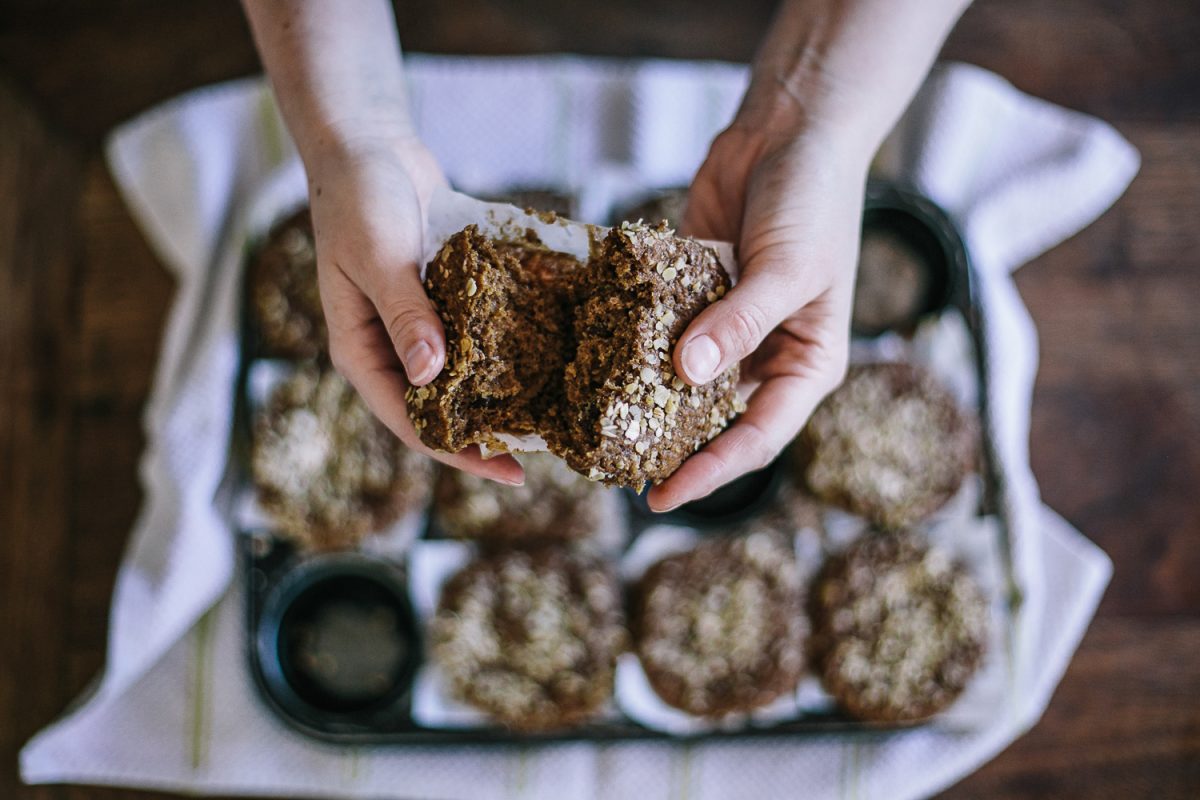
These ultimate bran muffins are SO MOIST AND FLUFFY!

You can serve them warm with some preserves and cheese, or eat them just as they are. Either way, they are sensational – even at room temperature. They make great lunchbox fillers as well.

What I love about these ultimate bran muffins is that they freeze incredibly well! I keep a batch in my freezer and just whip one out whenever I need a healthy, fiber filled breakfast or snack. It takes just 2 minutes to defrost them in the microwave.

I like adding raisins to my ultimate bran muffins, but you are welcome to sub cranberries, or add some nuts if you wish. If you place the nuts right on top of the batter before baking, they will toast in the oven and add a whole new depth of flavour 🙂

There is mashed banana in this recipe, but you really don’t taste it at all (if you are worried about that). It just adds a beautiful moistness and tenderness to the crumb. It also provides some natural sweetness which enables us to use less refined sugar.

The most important note I have for my ultimate bran muffins is to really just stir the mixture until combined.

A few lumps are TOTALLY okay! They will work themselves out during baking.

As soon as you add the wet ingredients to the dry ingredients, focus and be gentle. Stay away from that hand mixer!

If you would like to know how I make my pretty Muffin cases/liners, click here for a step by step tutorial post.

Bran muffin recipe | Bran muffins with molasses | Bran muffins healthy

5.0 from 1 reviews
Ultimate Bran Muffins
 
Author:
Serves: 10
Ingredients
  • 125 g unsalted butter, softened
  • 60 g Granulated White Sugar
  • 60 g egg, beaten lightly
  • 1 cup buttermilk
  • 1 t Vanilla Extract
  • 90 g sweet molasses
  • 1 ripe banana (90 g flesh), mashed
  • 45 g raisins
  • 205 g all-purpose flour
  • 1 tsp baking soda
  • 1 tsp baking powder
  • 1 tsp Cocoa Powder
  • ½ Tbsp cinnamon
  • ½ tsp ginger
  • 1 tsp salt
  • 1 cup bran (47 g)
  • Oats, to sprinkle on top
Instructions
  1. Preheat your oven to 180˚C/350˚F.
  2. Lightly spray the top surface of a muffin tin. Line 10 holes of the muffin tin with muffin liners/wrappers.
  3. In a medium sized bowl, cream together the butter and sugar with an electric hand mixer until light and fluffy.
  4. Beat in the egg, buttermilk, vanilla, mashed banana and molasses. At this point the mixture might look a bit curdled and messy, it’s completely normal. Stir in the raisins.
  5. Get a separate, large bowl. Sift together flour, baking powder, bicarbonate of soda, cocoa powder, spices and salt. Stir in the bran.
  6. Make a well in the center of your dry ingredients. Pour the wet mixture into the well. Stir the batter with a metal spoon until it is just combined (the batter will be slightly lumpy.)
  7. Divide the batter evenly into the 10 lined muffin holes. Sprinkle with regular, rolled oats.
  8. Bake the muffins in the middle of the oven for 20 - 25 minutes, or until a skewer tests clean. Leave to cool in the muffin tin for 10 minutes.
  9. Place the muffins on a rack and let them cool further, or eat them 🙂


Looking for more muffin recipes? Here you go!

Cranberry & Coconut Muffins,
Pumpkin & Cream Cheese Muffins
Apple, Date & Pecan Muffins.

Thank you so much for reading! If you give this recipe a go, tag me on Facebook, twitter or Instagram #philosophyofyum because I would LOVE to see!

See you in 2 weeks AFTER the Good Food & Wine Show!

Aurelia 🙂

Got a question? Something to add? Let’s chat in the comments section down below! (I respond to every single comment)

Red Velvet Brownies

Red Velvet Brownies

Red Velvet Brownies (with Cheesecake Swirl)

Red Velvet Brownies are, to me, the BEST and yummiest Red Velvet interpretation. Better than Red Velvet Cake, red velvet pancakes, red velvet cookies or ANY other Red Velvet thing you’ve ever had.

What makes Red Velvet Brownies so brilliant is their chewy, fudgy texture – not to mention the chocolatey, tangy flavour!

Recipe Introduction

As you may know, Red Velvet Cake originated in the South of the USA during the Great Depression. The history is actually quite fascinating! You can read it here.

One of my favourite elements of Red Velvet Cake is the tanginess you get from the buttermilk and vinegar. I just had to retain that element in my Red Velvet Brownie recipe. I have done it by adding white spirit vinegar to the batter. Works like a charm.


Another key element is, of course, Cream Cheese Frosting. Now I’m not a huge fan of frosting brownies… It’s overkill in my opinion. Frosting is also incredibly sweet and since brownies already contain a fair bit of sugar, I don’t think it adds to the flavour.

The best option had to be to add the cream cheese (in some form) to the brownie batter before it gets baked.

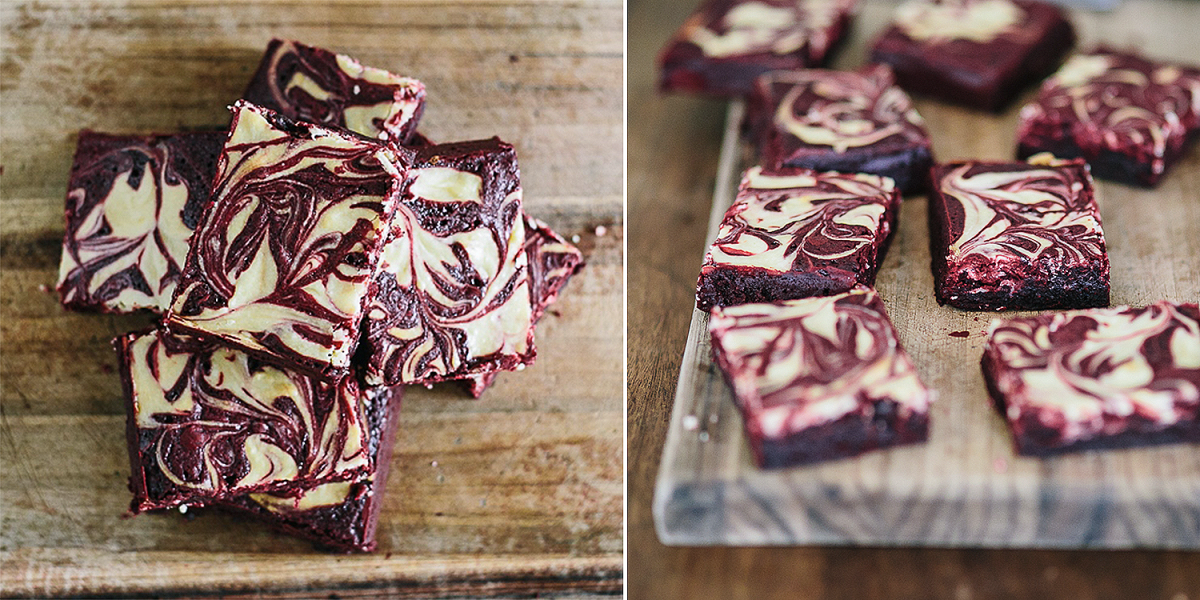
It was a good move – the result is just incredible! You essentially make a small amount of cheesecake batter and swirl it into the brownies. The cheesecake batter also keeps the Red Velvet Brownies very moist. Total win-win!

Red Velvet Brownies | Red Velvet Brownies from scratch | red velvet cheesecake brownies


This tried and tested recipe for Red Velvet Brownies has been one of the biggest successes in my bakery. My clients LOVE them and so do I!


Red Velvet Brownies
 
Author:
Serves: 8
Ingredients
FOR CHEESECAKE SWIRL:
  • 160 g cream cheese (medium fat 25%, non-aerated)
  • 25 g Granulated Sugar
  • 25 g Egg White
  • 1 tsp Vanilla Extract
FOR RED VELVET BROWNIES:
  • 180 g Flour
  • 35 g Cocoa Powder
  • 5 g Salt
  • 210 g Unsalted Butter / Baking Margarine
  • 40 g 70% Dark Chocolate, finely chopped
  • 160 g White Sugar
  • 105 g Demerara Sugar
  • 2 tsp Vanilla Extract
  • 140 g Eggs (2 + left over egg from cheesecake mix)
  • 2 tsp Red Food Colouring (liquid)
  • 1 tsp White Spirit Vinegar
Instructions
  1. Spray the inside of a 17 x 27 x 3 cm (7 x 10,5 x 1 inch) brownie tin with non-tick cooking spray. Line the tin with baking parchment so that it goes up the sides and 3 cm over the rim. This makes the brownies easy to pull out once cooked and cooled. If you don’t have this specific size tin, an 8 x 8 inch tin will also work just fine.
  2. Start by making the cheesecake swirl. Place egg white and cream cheese in a small bowl. Beat together with a hand mixer till smooth and thickened – about 30 seconds. Beat in the sugar and vanilla for 10 seconds.
  3. At this point the sugar won’t dissolve yet, so place the bowl in the fridge for now. We’ll get back to it later.
  4. Next make the Red Velvet Brownies. Sift flour, Cocoa powder and salt in a large bowl, set aside.
  5. Melt the margarine/butter in a mixing bowl in the microwave for 2 mins. Swirl so that solid bits get distributed. Microwave for another 30 sec. It must boil before you continue.
  6. Transfer the melted butter to the bowl of your standing mixer (you can also continue by hand if you wish). Mix in the dark chocolate, granulated sugar and demerara sugar on medium speed with paddle attachment for 15 seconds. Leave to stand for 1 minute so that the sugars and chocolate can melt a bit.
  7. While you are waiting, combine the eggs, vanilla, vinegar and food colouring in a separate bowl. Don’t beat the ingredients. Just stir them till they are more or less combined. Set aside.
  8. Return to your stand mixer with the melted butter and sugar. Beat again for 15 seconds. The sugar should stick to the paddle when you lift it up. Add the egg mixture to the butter mixture. Beat on lowest speed for 10 seconds.
  9. Add dry ingredients to the bowl in one go. Beat on low speed till roughly combined. Scrape down the paddle and sides of the bowl. Beat on high speed for 30 seconds till the batter comes together and sticks to the sides of the bowl. Reduce speed to medium-low and continue beating for another 2 minutes.
  10. Preheat your oven to 170ºC/338ºF on the REGULAR BAKE SETTING (not convection/thermofan).
  11. Pour the Red Velvet Brownie Batter into your prepared tin. Place the pan in the fridge for 5 – 10 minutes, till the batter is cool and firms up a bit.
  12. In the meantime beat the cheesecake mix again. The sugar will now dissolve easily. Beat until smooth and moderately thick (about 30 seconds).
  13. Drop dollops of the cream cheese mix into the brownie batter. Swirl with a chopstick - see full post and video on technique! 
  14. Bake at 170ᵒC/338ºF for 33-37 minutes, turning after 15 minutes. You don’t want to over bake these Red Velvet Brownies, so keep a close eye on them. They are done when the cheesecake is set, but not browned. Also, a skewer should test clean, but barely so.
  15. Slice them up into however many squares you wish. Enjoy!
Notes
Store your Red Velvet Brownies in an airtight container at room temperature. They will last for 3 - 5 days.


If you give this recipe a go, tag me on facebook, twitter or instagram #philosophyofyum because I would LOVE to see!

Chat Soon!

Aurelia 🙂


Got a question? Something to add? Let’s chat in the comments section down below! (I respond to every single comment)

Pumpkin & Cream Cheese Muffins

Pumpkin & Cream Cheese Muffins

Pumpkin and Cream Cheese Muffins are really my all-time favourite muffins – BY FAR! They are absolutely sensational.

No really, you don’t understand… they are sensational!

Since you guys have been enjoying all my muffin recipes (Pear, Apple & Blueberry, Ultimate Bran, Cranberry & Coconut) so much, I thought I should share this one as well 🙂

The Story:

If you’ve read my About page, you will know that I have a thing for Butternut Squash. I would live on it alone if I could. Apparently our bodies need protein as well. Bummer. One of my favourite flavour combos with butternut, is cheese! Feta, cream cheese, mozzarella, you name it.

I guess it’s the salty combined with the sweet, but it’s also so much more than that… They are just made for each other.

Back when I first started out baking for Coffee Shops, I baked for a place called Field Office. The manager and I were constantly strategizing and bouncing flavour ideas back and forth for different muffins and cupcakes. I started searching online for more ideas and found a post on “Top 20 muffin flavours” or something like that.

Most of them looked quite nice, but nothing grabbed me… Until the words “Pumpkin” and “Cream Cheese” graced my screen. I made my own version of this recipe using butternut squash (obviously) and changing the cream cheese filling, so that it resembles cheesecake.

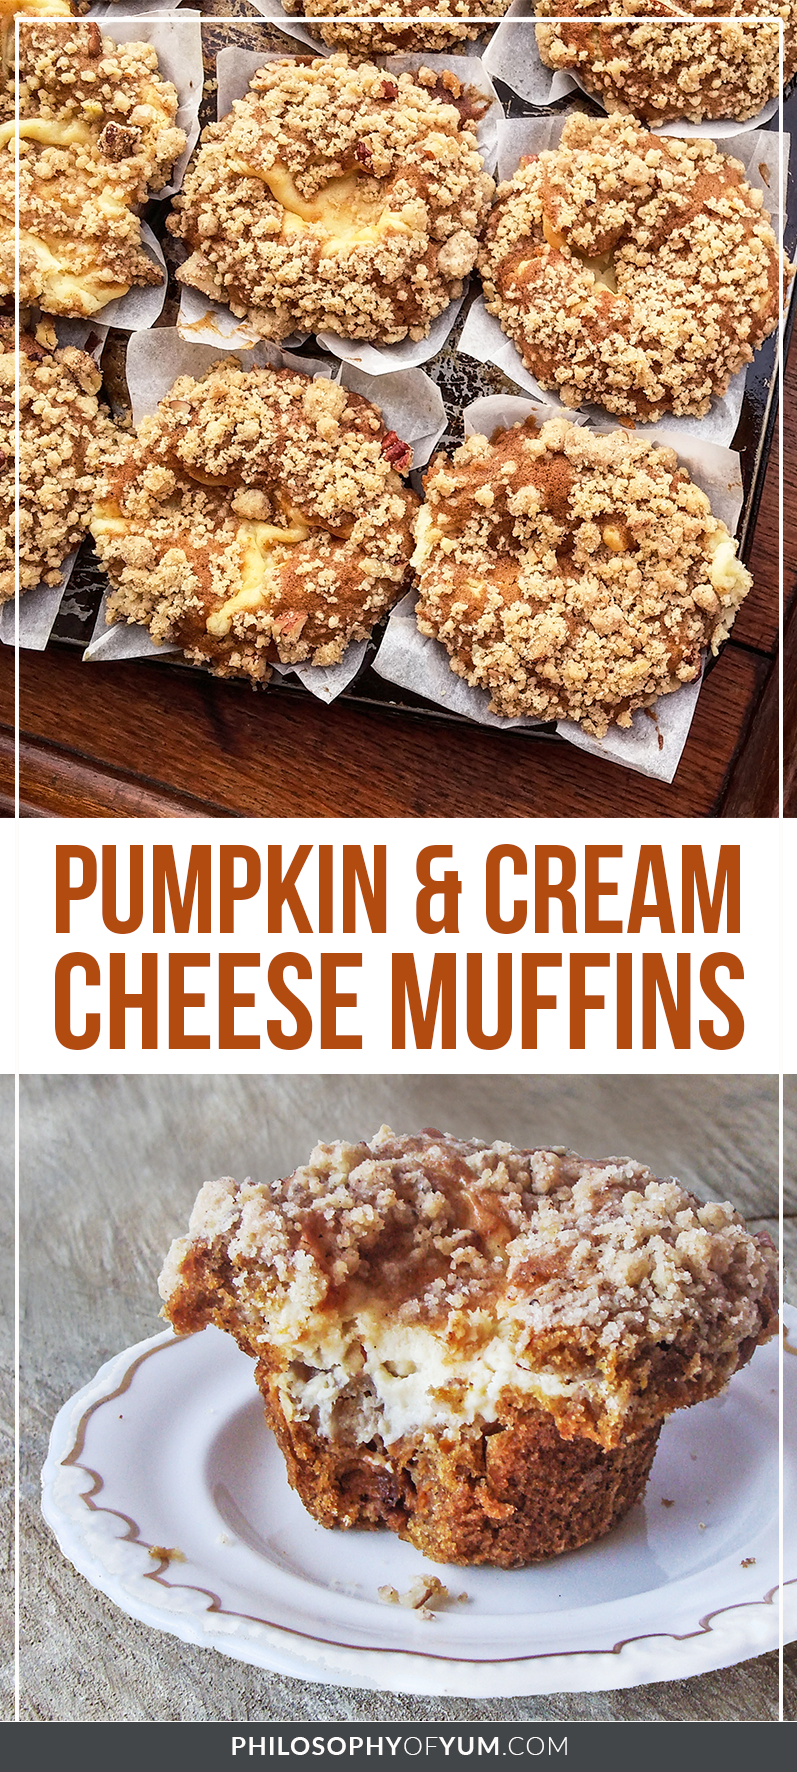
The crunchy, salted butter pecan crumble is the ultimate crown, providing a buttery, nutty crunch to the whole experience!

pumpkin muffins | fall muffin recipe | crumble muffins | pumpkin cream cheese muffins

These Pumpkin & Cream Cheese muffins were flying off the shelves at Field Office. Everyone loved them! The manager & I were so elated that we had found the Nemo of the muffin world!

Recipe Introduction:

How you cook the butternut will completely determine the quality of your muffins. You don’t want to boil it to death. Make sure you keep it on a medium heat and once it is soft, remove it from the heat.

The butternut also shouldn’t be submerged in water. Simply pour about 5 mm of water in the bottom of the pot so that you are essentially steaming it. If you prefer steaming it altogether, that is also fine. I don’t have a steamer, so I prefer using a small pot on a stove. Also add 1/2 tsp salt when cooking the butternut.

The Cream Cheese filling does need to be made in advance and frozen for at least 4 hours. Using it straight away encourages the batter to mix with it which leaves the amazing cream cheese center a bit sparse and not so amazing.

Most bakers insist on using unsalted butter in their cakes and I totally get that. This is a muffin though and salted butter makes the crumble topping ridiculously good!

A moist, tender, warmly spiced pumpkin muffin with a slightly caramelized cream cheese center and a crown of pecan crumble on top – it is the PERFECT incentive to wake up in the morning!

5.0 from 1 reviews
Pumpkin & Cream Cheese Muffins
 
Prep time
Cook time
Total time
 
Author:
Serves: 10
Ingredients
FOR THE FILLING:
  • 60 g Whipping Cream
  • 140 g Cream Cheese
  • 30 g Granulated Sugar
  • 1 tsp Vanilla Extract
FOR THE CRUMBLE:
  • 55 g Cake Flour
  • 35 g Granulated Sugar
  • 15 g Pecans, roughly chopped
  • ⅓ tsp Ground Cinnamon
  • 30 g Salted Butter
FOR THE MUFFINS:
  • 205 g Cake Flour
  • 6 g Baking Powder
  • ⅓ tsp Bicarbonate of Soda
  • ½ tsp Ground Cinnamon
  • ½ Tbsp Pumpkin Pie Spice (1 teaspoon ground cinnamon, ¼ teaspoon ground nutmeg, ¼ teaspoon ground ginger, ⅛ teaspoon ground cloves)
  • 1 tsp Salt
  • 80 g Eggs
  • 130 g Granulated Sugar
  • 230 g Cooked/Steamed Butternut (250 g raw), mashed up. Cook the butternut as described in the Recipe Introduction.
  • ¼ cup Water, room temperature
  • ½ cup Canola Oil
  • ½ Tbsp Vanilla Extract
Instructions
FOR THE FILLING:
  1. Make the Cream Cheese Filling at least 4 hours before you plan on making the actual muffins. It will need time to freeze solid. This can be done up to 2 weeks in advance if desired.
  2. Whip cream to stiff peaks. Beat in the cream cheese till smooth. Beat in the sugar and vanilla. Allow to stand for 5 minutes so that the sugar can melt. Beat again till smooth. Place in freezer for at least 4 hours.
FOR THE CRUMBLE:
  1. To make the pecan crumble, melt the butter in a heat proof bowl.
  2. Add in the flour, sugar and cinnamon. Stir with a fork to combine thoroughly. There will be some clumps - this is exactly what you want. Stir in the pecans.
  3. Preheat oven to 180˚C/350˚F. Line a standard muffin tin with 10 paper liners; set aside.
  4. Sift together the flour, baking powder, bicarbonate of soda, spices and salt in a large bowl. Set aside. At this point also remove your frozen cream cheese mixture from the freezer – this will make it easier to scoop out when the time comes.
FOR THE MUFFINS:
  1. Beat together the eggs and sugar in a large bowl for 1 minute, till pale and fluffy. Add in the vanilla, water, butternut and oil. Whisk to combine. From here on work with a handheld balloon whisk.
  2. Add the dry ingredients into the wet ingredients and whisk to combine well.
  3. Fill your liners about halfway full and keep the rest of the batter for later.
  4. Using a sturdy spoon or ice cream scoop, scoop 23 g of the cream cheese mixture into each case. 23 g is really the ideal amount. More will make it spill over into the oven and less is too sad.
  5. Divide the rest of your batter between the 10 muffins. Be sure to cover all the cream cheese poking out.
  6. Spoon the pecan crumble on top of each muffin. Use all of it. Be sure to spread it out so that all the batter is covered.
  7. Bake at 180˚C/350˚F in the center of your oven for 40 minutes on the regular bake setting. Do not use the convection or thermo-fan setting. TURN THE TIN EVERY 10 MINUTES for a perfectly even bake. Place a large roasting tray underneath the muffins just in case any drippings of cream cheese cook out.
  8. Allow these boys (because they are definitely not girls) to cool for at least 40 minutes before eating. The cream cheese filling gets piping hot in the cooking process.
  9. Eat and enjoy!

These sublime Pumpkin and Cream Cheese Muffins age exceptionally well… They actually get better, believe it or not. I prefer not to eat them straight out of the oven.

It’s like the spices need time to develop or something? Like a curry. Now this is totally up to you, but I make my muffins the day before and then just pop them in the oven for 5-10 minutes to warm through again before serving.

Funky Fact: These muffins pair SUPER well with beer!!

Thanks for reading! If you give this recipe a go, tag me on facebook, twitter or instagram #philosophyofyum because I would LOVE to see!

Chat soon!

Aurelia 🙂

Got a question? Something to add? Let’s chat in the comments section down below! (I respond to every single comment)