Piping Frosting 101 – The Frosting Piping Manual!

Piping Frosting 101 – The Frosting Piping Manual!

Piping Frosting 101 – The Frosting Piping Manual!

Piping frosting was something I overthought for about a year.

I must have watched 50 videos on YouTube before I actually picked up a piping bag for the first time.

But even after watching ALL those videos I still felt like I had NO IDEA what I was doing! During my first year of more serious baking, I resorted to rather spooning frosting onto cupcakes just to be safe.

Since my last post was my ultimate Vanilla Frosting Recipe and I have shared my ultimate Chocolate Frosting Recipe with you before, I thought I should complete the circle and write this post on PIPING Frosting.

Over the last 5 years I’ve become, thankfully, super comfortable with piping frosting. But I’ve also realized that there are some practical tips and methods that can help a beginner understand more clearly what they need to do.

Most of those 50 videos didn’t help me at all.

The bakers just said: “Pipe the frosting around… Like that!”

That doesn’t do it for me. I need WORDS to explain to me what I need to do.

Just watching someone isn’t enough. And no one can really afford to frost 1000 guinea pig cupcakes before being able to pipe frosting well enough to sell them!

I’ll start by explaining all the natural MISTAKES beginners tend to make when piping frosting…


FROSTING PIPING MISTAKES:

1. Piping Nozzle is too Small

Tiny star tips are so 1990’s. Stay away from them. The finish looks so bad and it’s also much harder to get the frosting to come out with a consistent thickness all the way through. So use a larger nozzle – it makes the frosting look way more generous and voluptuous!

2. Open Star Nozzles aren’t Ideal

Open star nozzles (except for the French tip) do not create a finish as beautiful as CLOSED star nozzles. Closed star nozzles make DEEPER grooves in the frosting, making the finished effect way more dramatic and shapely.

Definitely go for a large, closed star nozzle. If you can only find open star ones, then bend the spikes into the open center to create a closed star shape. I did this 5 years ago with my first ever stainless steel nozzle (13mm diameter opening) – it’s still my favourite one for piping frosting onto cupcakes 🙂 I highly recommend the Wilton 2D or Wilton 1M tip!

Make sure that the spikes are long enough to bend in all the way to the center. Do leave about 1 mm open in the center though.

Another perk of closed star nozzles is that they SAVE FROSTING! The frosting is more defined when it comes out, but the deeper grooves also mean that less frosting comes out overall. Win-win my friend!
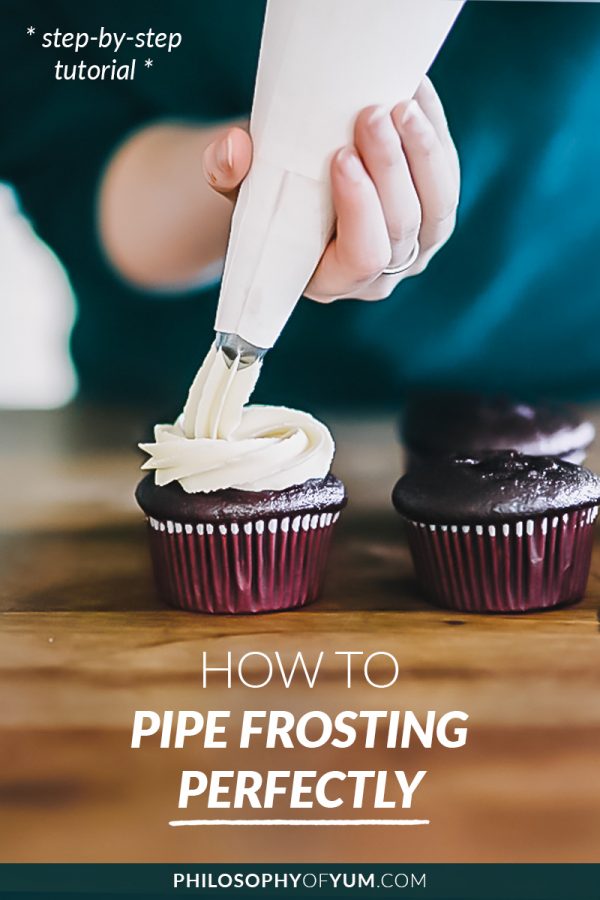
 

Frosting Piping Manual: This thorough post breaks down all the DO's and DON'TS of piping frosting. Includes step by step instructions for piping frosting perfectly every time! #pipingfrosting #cakedecorating #bakingforbeginners


3. Plastic Nozzles – No Go!

You still have plastic nozzles in your house? Whaaaat?! NO! Throw those things away or give it to your kids to play with.

The biggest problem with plastic nozzles is that they fray and decay over time. This fraying creates jagged edges on your frosting – not cool.

Stainless steel nozzles basically have a lifetime warranty. As I’ve said, I’ve used 1 piping nozzle for 5 years and for THOUSANDS of cupcakes.

The finish on my frosting is defined and beautifully smooth every time. I highly recommend the Wilton 2D or Wilton 1M tip!

4. Frosting is too Stiff

Frosting needs a form of “elasticity” to be piped beautifully. If your frosting is too stiff, it will behave as if it’s “brittle”. This means it will break off before you get to pipe around the cupcake.

What you want is ONE, long frosting sausage from beginning to end with no breakage whatsoever.

If you only realize that your frosting is too stiff when you are busy piping, remove all the frosting from the piping bag and fix the consistency first.

Yes, it is more effort, but a shabby finish on your cupcakes is way more exhausting on an emotional level.

5. Frosting is too Runny/Slack

If your frosting is too runny/slack, the grooves in your piped frosting will totally disappear and ruin the cupcake’s aesthetics completely.

If you only realize that your frosting is too runny when you are busy piping, remove all the frosting from the piping bag and fix the consistency first.

Yes, it is more effort, but a shabby finish on your cupcakes is way more exhausting on an emotional level.

6. Holding Nozzle too Close to Cupcake

I’ve realized that piping frosting beautifully onto cupcakes is rather about GUIDING the frosting to gracefully rest in the right position than “putting it on” the cupcakes.

When you have the approach of “putting frosting on” cupcakes, then you tend to hold the nozzle way too close to the cupcake while piping. Any sudden movement then causes you to push the nozzle into the frosting on the cupcake, ruining the finish and clean groove lines.

7. Wrong Angle When Piping Frosting

When you are piping frosting, don’t hold the piping bag diagonal to the cupcake. If you do this then every side of the finished cupcake will look different.

Hold the piping bag perfectly perpendicular to the top of cupcake’s surface. This ensures a consistent frosting pattern all the way around.

👉 Want to SELL your home baked goods so you can make more income?

In this YouTube video you’ll learn exactly how to start your own Home Bakery Business – even if you don’t have time, a large kitchen, or starting capital!

So now that we know the DON’TS of piping frosting, what are the DOS?

HOW TO PIPE FROSTING PERFECTLY

1. Perfect Piping Consistency

This is quite a sensitive one. We already know that the frosting shouldn’t be too stiff because it will break off when piping. We also know that it shouldn’t be too runny because then our beautifully defined grooves will disappear.

Piping consistency is different from spreading consistency – which is used for layering cakes. To test whether your frosting is piping consistency, you will need a large spoon.

The spoon is handy for 2 reasons. First of all, use it to stir your frosting vigorously for 15 seconds to break any large air pockets and get your frosting smooth.

Secondly you need the spoon for the “plop test”. Yes, this is a term I totally made up just now.

Piping frosting | piping tips | piping frosting on cupcakes

Scoop up a generous spoonful of frosting and hold it up. Now turn your wrist 90 degrees so that the frosting is exposed to gravity, heading towards dropping back into the bowl. Ideally, you want the frosting to linger on the spoon for 3 – 5 seconds before it drops off, back into the bowl.

Another test is the “peak test”. Yet another term I made up just now 🙂

Tap a spoon on top of the frosting and push down gently. Next, lift the spoon up vertically to create a perky peak on the frosting. If the peak bends over and flops down, your frosting is too runny.

If this test doesn’t create one, tall peak but rather a few shorter peaks in an oval arrangement, then your frosting is too stiff.

2. Perfectly Shaped Cupcakes

A “do” that we can’t ignore is that piping frosting perfectly becomes SO much easier when you’ve got perfect cupcakes!

Cupcakes with pointy tops are very difficult to pipe onto because the angle brings gravity into the mix as well, causing your frosting to sag down and ruining your beautiful frosting grooves.

Cupcakes with perfectly smooth and level tops make a world of difference! Fortunately I’ve written a super thorough post on How to Bake Perfect Cupcakes 🙂

3. Holding the Piping Bag

When you’ve filled your piping bag with frosting, twist the end a few times to prevent the frosting from escaping.

Wrap your dominant hand around the filled piping bag. Hold the twisted end securely in the gap between your thumb and index finger.
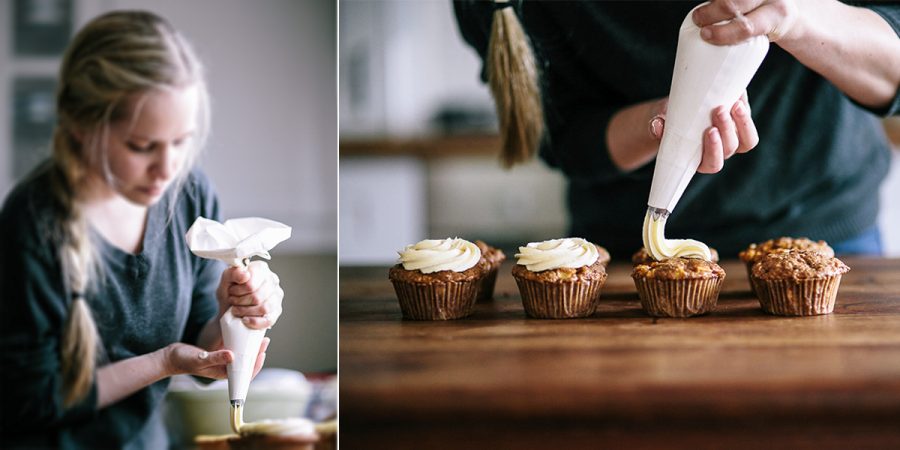
Piping frosting | piping tips | piping frosting on cupcakes

The frosting will be squeezed out with your dominant hand ONLY! Your other hand is merely there to guide the tip in the right direction. Never apply pressure with both hands.

When piping frosting, apply pressure using the outer part of your palm along with your pinky, ring finger and middle finger. You can also use your thumb’s palm to assist in applying pressure. Let your thumb and index finger focus on keeping the piping bag’s twist from unraveling.

4. Piping Frosting – Basic Swirl

The biggest mistake I made as a beginner was to keep my eye on the frosting while I was piping. KEEP YOUR EYES ON THE CUPCAKE while piping frosting. The aim is to follow the shape of the cupcake – that is your constant reference/guide.

Before you start piping frosting, keep in mind that you are merely GUIDING the frosting into place and not “putting it on”.

Decide beforehand how big your border of exposed cupcake will be (more or less). Your frosting’s first contact point should be another 5 mm inside that border so that the frosting’s blunt starting point will be hidden at the end.

Hold the piping bag as perpendicular as possible to the cupcake’s surface.

Hold the piping nozzle’s end point a good half inch away from the surface of the cupcake. Apply careful, even pressure and make your first contact point.

While still applying consistent pressure, squeeze the frosting so that it gracefully leaves the piping bag and guide it into place. Keep your eye on the outer edge of the cupcake all the time!! That is your guide.

Go all the way around till you reach your starting point. Just before your starting point, curve in slightly, allow your second circle to overlap slightly with your first circle of frosting.

Piping frosting | piping tips | piping frosting on cupcakes

When you have spiraled to the center, push down slightly and then release. This last, slight push secures your last spiral of frosting in place so that it doesn’t lift off into a slim, awkward, angled peak when you remove your piping nozzle.

Also, when you lift off the nozzle at the end, don’t do it 100% straightly upwards. Try to incorporate a bit of the swirl’s direction as you end off.

5. Piping Frosting in a “Rose”

Before you start, keep in mind that you are GUIDING the frosting into place and not “putting it on”.

Decide beforehand how big your border of exposed cupcake will be (more or less).

Hold the piping bag as perpendicular as possible to the cupcake’s surface.

Start in the center of the cupcake.

Hold the piping nozzle’s end point a good half inch away from the surface of the cupcake. Apply careful, even pressure and make your first contact point. Hold your position for another second so that more frosting comes out. (The center of a rose always has more petals)

After this you can proceed to start piping frosting in a spiral, around the contact point.

While still applying consistent pressure, squeeze the frosting so that it gracefully leaves the piping bag and guide it into place.

Keep your eye on the outer edge of the cupcake all the time so that you get a symmetrical rose.

As you approach the end of your cupcake’s outer surface, gradually apply less pressure, till you seamlessly stop (while guiding the last bit of frosting to adhere to the frosting on the cupcake).

A step by step tutorial with thorough explanations on hand movements, frosting consistency, piping nozzles, different piping techniques and more. You'll be piping frosting like a pro in not time! #cupcakedecorating #cakedecorating #perfectcupcakes #pipingfrosting


6. Piping Frosting – Tall Swirl

If you want your frosting a mile high on top of your cupcakes, I’m going to recommend something quite controversial.

Rather start with the rose technique and then go over directly into the basic swirl ON TOP of the rose. Doing this creates more frosting structure below your high swirl as well as some additional frosting support in the center.

That’s it my friend! Easy peasy frosting squeezy! 😉

The frosting in all my pics is my Ultimate Vanilla Frosting and Ultimate Chocolate Frosting. They are both SENSATIONALLY delicious!! They’ll turn you into a frosting snob… Seriously… you’ll shun buttercream forever after tasting them.

Chat soon

Aurelia

Got a question? Something to add? Let’s chat in the comments section down below! (I respond to every single comment)

Ultimate Chocolate Cupcakes Recipe

Ultimate Chocolate Cupcakes Recipe

Ultimate Chocolate Cupcakes – Secret Recipe!

Sharing my Ultimate Chocolate Cupcakes Recipe with you this week seemed quite fitting because it is (or actually was) Philosophy of Yum Blog’s 1-year Birthday!! Yayyyy! 😀

I wanted to share a super special recipe on this special occasion and also to just thank you for your support over the last year. It means so much to me.

Many of you have asked me why I don’t share my bakery’s “claim to fame” recipes like Double Chocolate Brownies, German Apple Cake or Dark Chocolate cake.

The simple reason behind this is that my home bakery (Philosophy of Yum) is by FAR my main source of income. These recipes are my bread and butter so sharing them with the world is still a little bit risky at this point.

This week however, I’m making an exception because of my blog’s birthday 😀 So I am sharing with you my top-secret recipe for Ultimate Chocolate Cupcakes!

Looking for that ultimate Chocolate Cupcake recipe? Super moist, ridiculously chocolate-y, not too sweet and packed with flavour? This is the chocolate cupcake recipe you've been looking for. Click through to get therecipe! #chocolatecupcakes #bestchocolatecupcakes #chocolatecupcakerecipe #homebaking


Ultimate Chocolate Cupcakes Recipe Development

Chocolate Cupcakes are really just one of those classic and sacred baked goods that ring nostalgic notes for ALL of us. They were and are always present at every kid’s birthday party, every bake sale, every church bazaar, every bakery and every grocery store.

I’ve probably tried out about 15 different recipes for chocolate cupcakes in my life. You know me by now. If cake doesn’t melt me with its powers of YUM, then I’ll stop eating it. Why waste the calories? I tried recipe after recipe.

Often tweaking a recipe 3 times before finally moving on to the next one. It became my mission for many years to finally find THE ONE!

I’ve found that butter based recipes are just not ideal for any kind of chocolate cake. Oil locks in a great deal more moisture!

The method is also absolutely critical. Once a hot liquid is added, you really want to keep the mixing low and slow.

The chocolate cupcakes recipe I was finally and fully pleased with ended up being a combination of a few plus some added tweaks I made on the spur of the moment. It worked perfectly and I am so grateful!

The base recipe was from Homemade by Holman. One huge perk about this recipe is that you can mix it in one bowl from start to finish which means less dishes – yes please!

Recipe Introduction

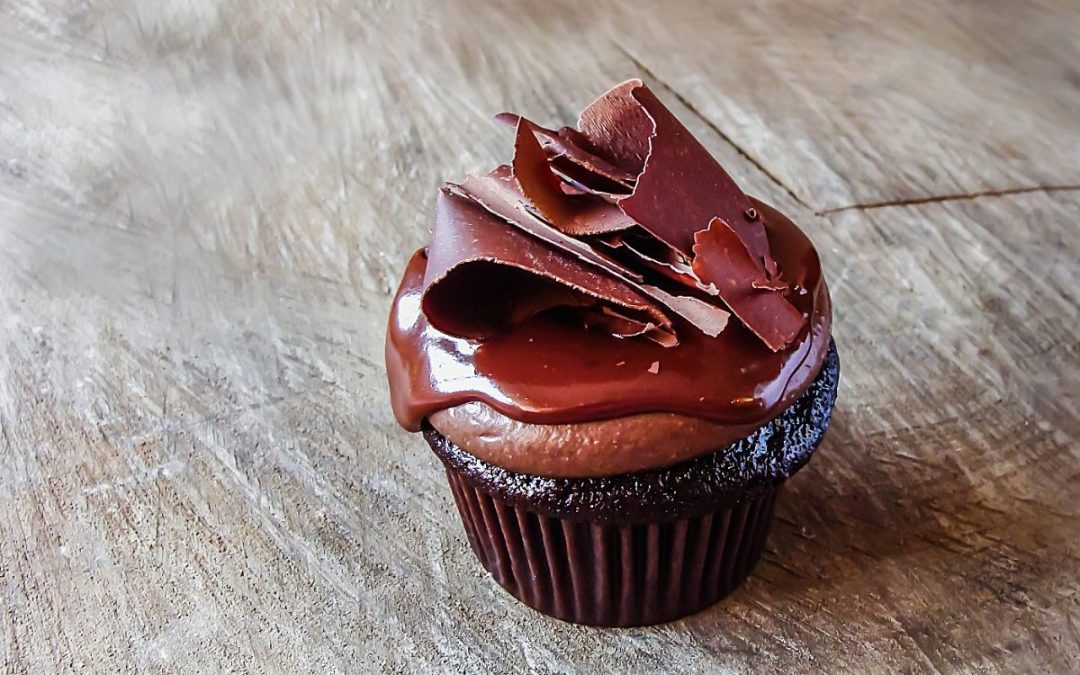
The texture of these chocolate cupcakes is very moist, soft and creamy. And the flavour is SUPER chocolatey! The smooth chocolate ganache and slightly tangy chocolate frosting round off an indulgent texture and flavour experience.

The chocolate frosting recipe I shared in my previous post here. You can also make your own fancy Dark Chocolate shavings like I did! I posted a whole step by step tutorial here. I didn’t think I would share one of my best recipes this soon, but here it is…

My top-secret Philosophy of Yum recipe for Chocolate Cupcakes!

Are you a total Chocolate Cupcake Snob? Well, so am I. It HAS to be super moist, ridiculously chocolate-y, not too sweet and packed with flavour! This is the ultimate chocolate cupcake recipe - seriously. It's the one you've been looking for. #chocolatecupcakes #bestchocolatecupcakes #chocolatecupcakerecipe
5.0 from 6 reviews
Ultimate Chocolate Cupcakes
 
Author:
Serves: 14
Ingredients
  • 240 g Granulated White Sugar
  • 190 g Cake Flour
  • 50 g Cocoa Powder, best quality you can find
  • ⅓ tsp Baking Powder
  • ¾ tsp Bicarbonate of Soda
  • 1 tsp salt
  • 55 g Egg (out of shell)
  • 115 g Milk (4-5% Fat)
  • 125 g Canola Oil
  • 2 tsp Vanilla Extract
  • ½ cup Water (just boiled)
  • FOR GANACHE: 100 g Cream (about 35% fat content)
  • FOR GANACHE: 100 g Dark Chocolate (at least 65% cocoa solids)
Instructions
  1. Preheat your oven to 170°C (338F) on the regular bake setting - NOT convection or fan-forced.
  2. Line a cupcake/muffin tin with cupcake liners.
  3. In the mixing bowl of a stand mixer, add in the sugar, oil, vanilla and eggs.
  4. Sift together the flour, cocoa powder, baking powder, bicarbonate of soda and salt into the same mixing bowl.
  5. Warm the milk in the microwave for 20 seconds to bring it more or less to room temperature. Add it to the mixing bowl with the rest of the ingredients.
  6. Beat all the ingredients together with the paddle attachment on a low speed for 20 seconds to roughly combine. Stop the machine and scrape down the sides of the bowl and the paddle.
  7. Switch on your kettle at this point for the boiling water.
  8. Beat the batter once more on medium high speed for 2 minutes. The batter will be very stiff! As the sugar dissolves, it will become a bit looser.
  9. Pour the ½ cup boiling water into the batter.
  10. Mix in light pulses on super low speed to stop the boiling liquid from splashing everywhere. After a few light turns it should be safe to turn up the speed to a steady low. Mix until liquid is no longer separate.
  11. Remove the mixing bowl from the machine and stir the batter thoroughly with a metal spoon till you have an even and smooth consistency.
  12. Divide the batter evenly between 14 lined cupcake holes.
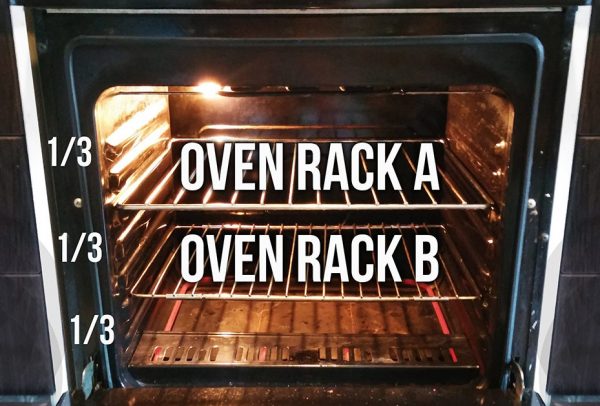
  13. Make sure your oven has two oven racks inside. One rack should be in the top half of your oven, and one in the bottom half of your oven so that your oven cavity is basically divided into 3 equal spaces. Place an empty muffin tin, roasting tray or any other baking tin on the top rack. Place your cupcakes on the lower rack.
  14. Pour about ½ cup water into the bottom of your oven to create some steam. If your oven has an element right on the bottom or if you have a gas oven, pour 1 cup of water into the baking tin on the top rack in your oven.
  15. Bake the cupcakes for 15-20 minutes, turning after 8 minutes. Test with a skewer to see if the cupcakes are cooked. Ideally there should be a few moist crumbs sticking to the skewer… Remember, they will continue to cook for a minute or two more after you remove them from the oven.
  16. Read below for decorating instructions with chocolate ganache.

Decorating the Ultimate Chocolate Cupcakes:

I love the combination of chocolate ganache and frosting! The chocolate frosting I used here is my signature ultimate chocolate frosting I use in my bakery every day. It’s the tastiest frosting in the whole world!

Place a round tip nozzle in your piping bag and fill with the ultimate chocolate frosting. Hold the piping bag directly over the top of the cupcake (about 2 cm away from the surface) and squeeze out the frosting while keeping the bag stationary.

Once you are satisfied with the AMOUNT of frosting, stop. Use a teaspoon to flatten out the surface and spread the frosting more to the edges.

Place the frosted cupcakes in the fridge for at least 30 minutes before you make the chocolate ganache.

To make the ganache, simply heat the cream till it starts to simmer and add it to the chopped dark chocolate. Allow it to stand for 5 minutes and stir till smooth & dreamy.

Just spoon the semi-runny ganache over the frosting and work it around the top till you are happy with the look. Do not dunk the frosted cupcakes in the ganache! This frosting is a lot softer than traditional frosting and it will probably fall off.

Finally, I topped my ultimate chocolate cupcakes with some beautiful dark chocolate shavings. Click here to see how to make your own!

I really hope you make these yourself at home! They are just DIVINE. If you give this recipe a go, tag me on facebook, twitter or instagram #philosophyofyum because I would LOVE to see!

Chat soon! Aurelia 🙂
Got a question? Something to add? Let’s chat in the comments section down below! (I respond to every single comment)

How to Bake Perfectly Flat Cake Layers

How to Bake Perfectly Flat Cake Layers

How to Bake Perfectly Flat Cake Layers

I used to think that perfectly flat cake layers are only within the grasp of PRO bakers. When I started out baking, I loved baking cupcakes a whole lot more than baking layered cakes.

The simple reason behind this is that I wanted to avoid all the waste. You know how it goes… We need to trim off that ugly dome off our cake layers to make them level and then I obviously don’t throw the off-cuts away…

I hate wasting, so I eat all of it…

Shameless Aurelia.

Shameless.

As much as I enjoyed stuffing my face with cake, I couldn’t keep this up. Neither could my jeans!

Beyond the desire for perfectly level cake layers, there was another problem. The cake was moist in the center, but quite dry around the edges.

This had to be fixed. Cupcakes bake a lot quicker than large cake layers, so they aren’t in the oven for very long. Large cakes however, obviously need to spend a lot more time in the oven.

By the time the center is cooked, the outer edge has been cooked for the past 25 minutes and is now overcooked.

Level cake layers can be BAKED that way. NO need to trim or waste with this amazing baking hack! Bake level cake layers easily.

Credit is due:

I did some research and found a great  post on the issue of baking level cake! A Cozy Kitchen wrote this amazing post on baking flat cake layers. It was tremendously helpful!

I’ve refined the technique quite a bit though, because as you know I do not believe all cake recipes can be baked the same way. If you don’t know what I mean, take a look at How to Bake Perfect Cupcakes – Advanced Tips.

Please note: This post has affiliate links. This means that if you purchase some of these products I get a tiny commission – but at NO extra cost to you. I’m super proud to recommend these resources to you because they’ve completely transformed my Home Bakery Business!


Before we get started:

So once again there is a basic technique for baking level cake layers (as with baking Perfect Cupakes), but it needs to be adapted according to your recipe. In my experience cake recipes can be divided into 3 different categories (due to how they respond in the oven). This definitely does not include cakes like Angel Food Cake which is a whole different ballgame.

  1. Butter Based Recipes
  2. Oil Based Recipes
  3. Recipes containing fresh fruit/vegetables

Here is a picture of how I divide my oven. You will need this later.

oven for perfect cupcakes

Greasing the tin:

I always line the bottom of my tin with high quality non-stick parchment/baking paper. It makes removing the cake a total breeze! Simply place the base of your cake tin on the paper, trace a circle and cut it out.

Lining the sides of the tin with parchment paper is just too tedious for me. I love using non-stick spray! Feel free to use butter or oil if you desire.


Basic technique for baking flat cake layers:

Adrianna from A Cozy Kitchen uses moist towel strips, fastened around the tin with safety pins. Her hypothesis is that “What’s happening here is that the moisture from towel is helping the cake bake more evenly, resulting in an even rise and a cake with a flat top.”

I think the moisture definitely plays a role, but in my opinion the damp towel keeps the sides of the tin cooler, so that the batter in direct contact with the sides of the tin doesn’t cook so fast. This gives the cake batter around the edge a bigger window of time to rise.

Of course you can also buy Wilton Bake-Even Strips online! They’re like a formal version of this wet-towel-strips-method and save you the drama of cutting up a towel (that your Mother may or may not have given you…)

  1. Measure the height of your tin.
  2. Get a clean, new-ish hand towel. Not a scrap one you used to clean the floor with.
  3. Cut off strips of towel as wide as the height of your tin and long enough to wrap around your tin. It’s totally fine if the towel is going to end up overlapping around the tin. Rather don’t cut off the edges of the towel, this helps keep the strip intact.
  4. Place the towel strips in some water and squeeze them about till they are evenly wet. Wring out the water.
  5. Grease and line your cake tin.
  6. Fasten the wet towel strips around the tin.
  7. Pour in batter, level it out and bake.

My first change was to fasten the towel strips around the tin with paperclips instead of safety pins. It was very difficult to get the towel strips tightly wrapped around the tin. It was even more challenging to make them stay in position with safety pins as these allow room for movement.

The first time was a disaster! The towel kept sagging down on the sides of the tin, but I did see a slight improvement in the levelness of the cake. Second time around I used paperclips and I’ve never looked back.


Adapting the technique:

Butter based recipes:

Butter based cake recipes respond extremely well to this technique! Be sure to squeeze and wring out your towel strips as well as you possibly can. If they are too wet, the sides of your cakes can even rise higher than the middle! Be sure to level out your batter with a spatula before baking. There is no need to spread the batter higher up the sides or anything.

  • Bake the cake on oven rack A at 180˚C
  • Gently rotate your pans halfway through baking.


Oil based recipes:

The wetter, the better for this category. Lightly squeeze the towel strips so that they are just past dripping point. Grease and line the tin as usual and pour in your batter.

Swirl the pan around slowly so that the batter coats about 1 cm of the tin’s edge above the batter’s normal resting level.

Shake the pan a little bit so that the main batter returns to its neutral resting level. Do this just before you place the cakes in the oven.

  • To bake the cake, preheat your oven to 170˚C.
  • Place a clean, empty roasting tray on rack A.
  • Place your cake tins on rack B.
  • Pour about 1/2 cup water in the bottom of the oven.
  • Bake for about 10 minutes.
  • Rotate the pans and pour ½ cup water in the bottom of the oven. Continue to bake on rack B for a further 20 minutes.
  • Remove the roasting tray on rack A and move your cakes from rack B to rack A. Rotate your cakes again at this point as well.
  • Continue to bake until done.


Recipes containing Fresh Fruit/Vegetables:

Curiously these batters respond somewhere in between the butter and oil categories. The fresh fruit/vegetables naturally release a lot of moisture as they bake as well which helps in the level cake baking process.

Still, it does help to have a towel strips very wet (squeezed out just past dripping point) for this category as well.

Grease and line the tin as usual and fasten the wet towel strips around your tins. Pour in the cake batter. Swirl the pan around slowly so that the batter coats about 1 cm of the tin’s edge above the batter’s normal resting level.

Shake the pan a little bit so that the main batter returns to its neutral resting level. Do this just before you place the cakes in the oven.

  • To bake the cake, preheat your oven to 170˚C.
  • Place your cake tins on rack A.
  • Continue to bake on rack A until done, rotating the pans every 15 minutes.

level cake layers

Final Notes:

When baking 7 inch cakes and smaller, I’ve found that a hand towel’s absorption powers are too great. For small cakes I use DISH towel strips instead – they work perfectly! OR if you bake different sized cakes, it’s really worth it to get the Wilton Bake Even Strips Set for 6 inch, 8 inch, 10 inch and 12 inch tins.

Although this hack is the most amazing game changer in baking a level cake, you’ll still need to trim off tiny bits here and there – but it’ll be minimal. Oil based cakes especially still rise with a slight dome, but they are about 80% more level than before!

And you also won’t need to trim the sides of your cake ever again. The wet towel strips ensure the oven stays moist and keeps the edges from baking too quickly. Your level cake layers will have a beautifully moist crumb from edge to center 🙂 Yay!

This technique has changed my life! Give it a try and let me know what your results are.

Chat soon!

Aurelia 🙂

Got a question? Something to add? Let’s chat in the comments section down below! (I respond to every single comment)

X