Pear, Apple & Blueberry Muffins

Pear, Apple & Blueberry Muffins

Pear, Apple & Blueberry Muffins Recipe

These Pear, Apple & Blueberry Muffins were one of my first big successes in my bakery. I’ve sold literally thousands of them to local coffee shops and deli’s. They are just incredibly delicious!

I know you guys have really enjoyed my muffin recipes, so I thought it’s about time that I share another one with you.

Plus, the last few posts have been so laden with chocolate, it’s like I can hear my blog whispering to me, asking for something more wholesome…

So here you go! Now we can all feel better about ourselves again!

Now if you’ve been following my blog for a while you will know that I have a very sentimental attachment to muffins.

My mother used to bake fresh muffins for my sister and I on very special holidays like youth day! I have such grand memories of the beautifully laid breakfast tray, complete with a flower from our garden and fruit juice in a wine glass. We felt like queens!

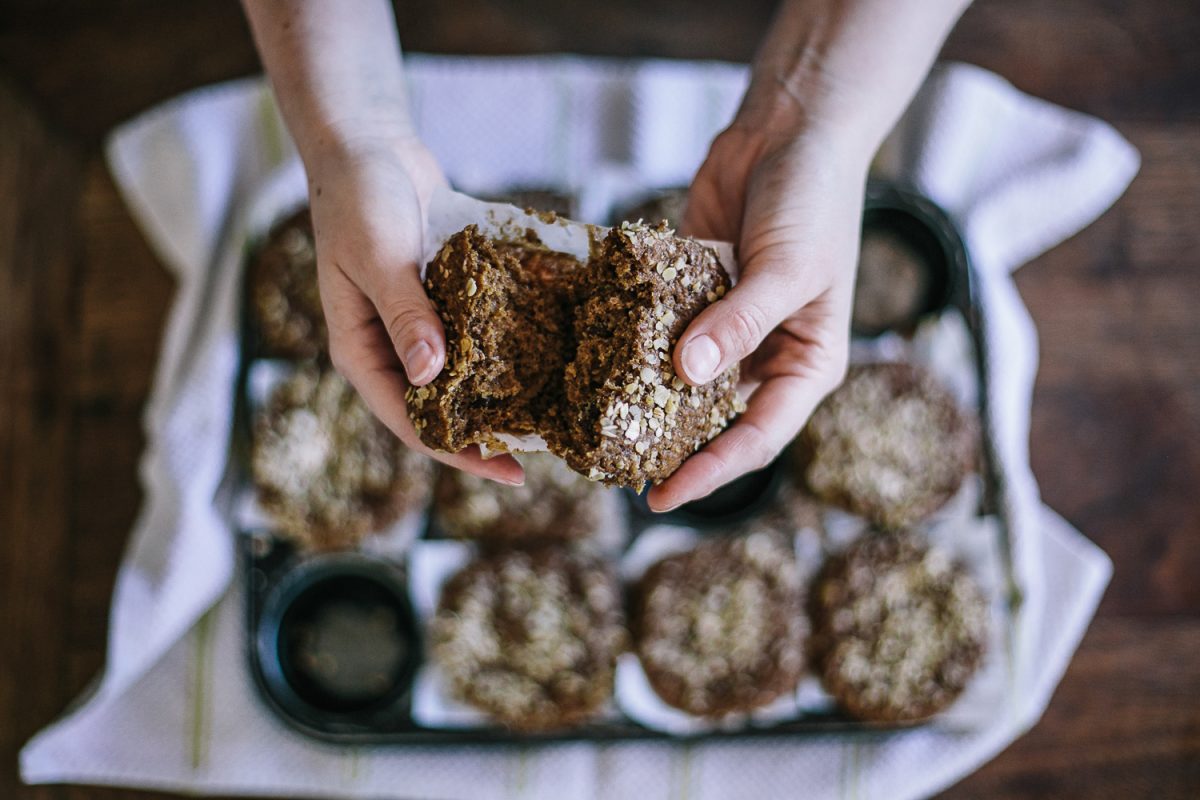
These Pear, Apple & Blueberry muffins are so light, tender and moist! A perfect fall muffin recipe to put on your fall home baking list. Great muffins for an on-the-go healthy breakfast. The crunchy cinnamon sugar crust on top pairs perfectly with the muffin's soft crumb underneath. And the bursts of fresh, dark blue-purple blueberries throughout the muffins is oh so delicious! #blueberrymuffins #fallrecipes #fallbaking #muffins #muffinrecipes


Recipe Introduction

I am a huge fan of putting a lot of fruit in muffins because it adds much needed fiber to your breakfast.

The added moisture and flavour is also fantastic. I LOVE the idea of eating a muffin on the run that doesn’t need any butter or jam.

These Pear, Apple & Blueberry muffins are one of those. You can eat it just as it is, no add-ons, and still be completely satisfied and yummy-fied!

Try to use fresh fruit if you can. The texture and flavour of fresh fruit is always WAY better!

If you have concerns about the sugar crust on top of the muffins, do not be alarmed. I used sugar that would have gone inside the muffins anyway and just gave it a promotion to form a crust on top. The muffin itself is not very sweet at all, so the crust really goes with it super duper well.

When it comes to muffins, you really want to mix the batter as little as possible. Once the wet ingredients hit the dry ingredients, STIR gently with a metal spoon, don’t beat it.

These Pear, Apple & Blueberry muffins are so light, tender and moist!

The crunchy cinnamon sugar crust on top pairs perfectly with the muffin’s soft crumb underneath. And the bursts of fresh, dark blue-purple blueberries throughout the muffins just makes you swoon!

These Pear, Apple & Blueberry muffins are so light, tender and moist! A perfect fall muffin recipe to put on your fall home baking list. Great muffins for an on-the-go healthy breakfast. The crunchy cinnamon sugar crust on top pairs perfectly with the muffin's soft crumb underneath. And the bursts of fresh, dark blue-purple blueberries throughout the muffins is oh so delicious! #blueberrymuffins #fallrecipes #fallbaking #muffins #muffinrecipes

5.0 from 1 reviews
Pear, Apple & Blueberry Muffins
 
Author:
Serves: 10
Ingredients
  • 220 g Cake Flour
  • 16 g Baking Powder
  • 1 tsp Salt
  • ¼ tsp ground ginger
  • 1 tsp cinnamon
  • 100 g Canola Oil
  • 110 g Milk
  • 110 g Yogurt, plain and low fat
  • 120 g Sugar
  • 1 Egg + 1 Yolk (80 g)
  • 1 tsp vanilla extract
  • 90 g fresh apple, granny smith preferably
  • 100 g fresh pear
  • 80 g blueberries, thawed if frozen
Instructions
  1. Start by preparing the fruit. Chop the fresh apple and pear into approximately a 1,5cm dice (you may toss the fruit in 1 teaspoon of lemon juice, diluted with 1 tablespoon of water, to stop it from browning.) Keep 20 of the blueberries aside for later use. If they were frozen, place them on a piece of paper towel so that most of the excess liquid is absorbed.
  2. Preheat oven to 180ᵒC (355ᵒF).
  3. Grease and line muffin tins with individual baking paper liners (remember the recipe makes 10 large muffins). You can make your own muffin liners just like mine! Click here to see how.
  4. In a small bowl, beat together the eggs, oil, milk, yogurt, sugar and vanilla until smooth. Set aside the wet mixture for a minute or 2 so that the sugar can dissolve.
  5. In the meantime, sift together the flour, baking powder, salt, cinnamon and ginger in a large mixing bowl. Mix all dry ingredients together thoroughly and make a well in the center.
  6. Return to your small bowl of wet ingredients. Beat for another 30 seconds till well combined. Pour the wet mix into the well you created in the dry ingredients. Don’t mix just yet!
  7. Add apple and pear into the well too and mix slowly with a metal spoon until just combined (over-mixing toughens the texture!). Scape down the sides of the bowl with a rubber spatula and lightly stir to combine.
  8. Divide the batter evenly between the 10 lined muffin holes in the muffin tin. Top each muffin with 2 of the reserved blueberries. Sprinkle each muffin with a teaspoon of cinnamon sugar just before they go in the oven.
  9. Bake on the lower rack of your oven for 15 minutes, turning after 10 minutes. Then bake on the higher rack for a further 15-20mins or until golden brown and a skewer comes out clean.

Recipe Notes

These Pear, Apple & Blueberry muffins are best eaten FRESH, on the day you make them. The cinnamon sugar crust will go soggy if you try to refrigerate them or keep them in a Tupperware. You can do it, but I don’t recommend it.

Do you like these rustic muffin liners? You can make them yourself! Check out this post for the full step-by-step tutorial >> DIY Cupcake/Muffin Liners.


Want More Delicious Muffin Recipes?

Ultimate Bran Muffins
Apple, Date & Pecan Muffins
Pumpkin & Cream Cheese Muffins with Pecan Crumble

If you give this recipe a go, tag me on facebook, twitter or instagram @philosophyofyum. I would LOVE to see!

Chat soon!

Aurelia 🙂

Plan your Home/Micro Bakery in 1 afternoon. Download this free Home/Micro Bakery Business Plan template to start turning your passion for baking into an income.

Got a question? Something to add? Let’s chat in the comments section down below! (I respond to every single comment)

57 Shares
Ultimate Chocolate Cupcakes Recipe

Ultimate Chocolate Cupcakes Recipe

Ultimate Chocolate Cupcakes – Secret Recipe!

Sharing my Ultimate Chocolate Cupcakes Recipe with you this week seemed quite fitting because it is (or actually was) Philosophy of Yum Blog’s 1-year Birthday!! Yayyyy! 😀

I wanted to share a super special recipe on this special occasion and also to just thank you for your support over the last year. It means so much to me.

Many of you have asked me why I don’t share my bakery’s “claim to fame” recipes like Double Chocolate Brownies, German Apple Cake or Dark Chocolate cake.

The simple reason behind this is that my home bakery (Philosophy of Yum) is by FAR my main source of income. These recipes are my bread and butter so sharing them with the world is still a little bit risky at this point.

This week however, I’m making an exception because of my blog’s birthday 😀 So I am sharing with you my top-secret recipe for Ultimate Chocolate Cupcakes!

Looking for that ultimate Chocolate Cupcake recipe? Super moist, ridiculously chocolate-y, not too sweet and packed with flavour? This is the chocolate cupcake recipe you've been looking for. Click through to get therecipe! #chocolatecupcakes #bestchocolatecupcakes #chocolatecupcakerecipe #homebaking


Ultimate Chocolate Cupcakes Recipe Development

Chocolate Cupcakes are really just one of those classic and sacred baked goods that ring nostalgic notes for ALL of us. They were and are always present at every kid’s birthday party, every bake sale, every church bazaar, every bakery and every grocery store.

I’ve probably tried out about 15 different recipes for chocolate cupcakes in my life. You know me by now. If cake doesn’t melt me with its powers of YUM, then I’ll stop eating it. Why waste the calories? I tried recipe after recipe.

Often tweaking a recipe 3 times before finally moving on to the next one. It became my mission for many years to finally find THE ONE!

I’ve found that butter based recipes are just not ideal for any kind of chocolate cake. Oil locks in a great deal more moisture!

The method is also absolutely critical. Once a hot liquid is added, you really want to keep the mixing low and slow.

The chocolate cupcakes recipe I was finally and fully pleased with ended up being a combination of a few plus some added tweaks I made on the spur of the moment. It worked perfectly and I am so grateful!

The base recipe was from Homemade by Holman. One huge perk about this recipe is that you can mix it in one bowl from start to finish which means less dishes – yes please!

Recipe Introduction

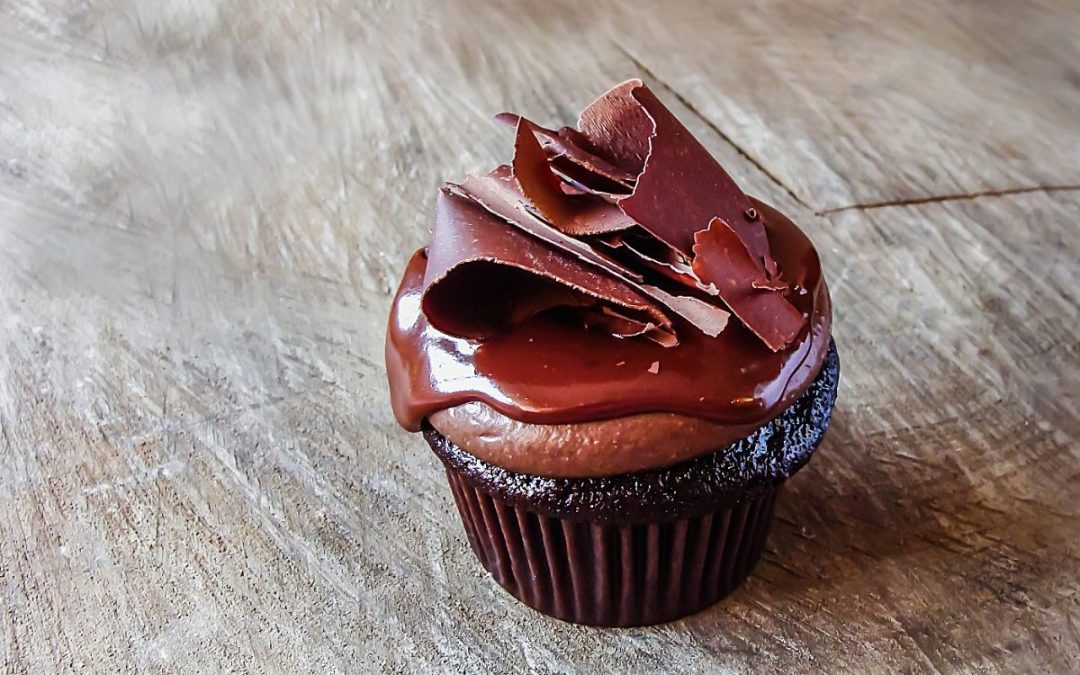
The texture of these chocolate cupcakes is very moist, soft and creamy. And the flavour is SUPER chocolatey! The smooth chocolate ganache and slightly tangy chocolate frosting round off an indulgent texture and flavour experience.

The chocolate frosting recipe I shared in my previous post here. You can also make your own fancy Dark Chocolate shavings like I did! I posted a whole step by step tutorial here. I didn’t think I would share one of my best recipes this soon, but here it is…

My top-secret Philosophy of Yum recipe for Chocolate Cupcakes!

Are you a total Chocolate Cupcake Snob? Well, so am I. It HAS to be super moist, ridiculously chocolate-y, not too sweet and packed with flavour! This is the ultimate chocolate cupcake recipe - seriously. It's the one you've been looking for. #chocolatecupcakes #bestchocolatecupcakes #chocolatecupcakerecipe
5.0 from 6 reviews
Ultimate Chocolate Cupcakes
 
Author:
Serves: 14
Ingredients
  • 240 g Granulated White Sugar
  • 190 g Cake Flour
  • 50 g Cocoa Powder, best quality you can find
  • ⅓ tsp Baking Powder
  • ¾ tsp Bicarbonate of Soda
  • 1 tsp salt
  • 55 g Egg (out of shell)
  • 115 g Milk (4-5% Fat)
  • 125 g Canola Oil
  • 2 tsp Vanilla Extract
  • ½ cup Water (just boiled)
  • FOR GANACHE: 100 g Cream (about 35% fat content)
  • FOR GANACHE: 100 g Dark Chocolate (at least 65% cocoa solids)
Instructions
  1. Preheat your oven to 170°C (338F) on the regular bake setting - NOT convection or fan-forced.
  2. Line a cupcake/muffin tin with cupcake liners.
  3. In the mixing bowl of a stand mixer, add in the sugar, oil, vanilla and eggs.
  4. Sift together the flour, cocoa powder, baking powder, bicarbonate of soda and salt into the same mixing bowl.
  5. Warm the milk in the microwave for 20 seconds to bring it more or less to room temperature. Add it to the mixing bowl with the rest of the ingredients.
  6. Beat all the ingredients together with the paddle attachment on a low speed for 20 seconds to roughly combine. Stop the machine and scrape down the sides of the bowl and the paddle.
  7. Switch on your kettle at this point for the boiling water.
  8. Beat the batter once more on medium high speed for 2 minutes. The batter will be very stiff! As the sugar dissolves, it will become a bit looser.
  9. Pour the ½ cup boiling water into the batter.
  10. Mix in light pulses on super low speed to stop the boiling liquid from splashing everywhere. After a few light turns it should be safe to turn up the speed to a steady low. Mix until liquid is no longer separate.
  11. Remove the mixing bowl from the machine and stir the batter thoroughly with a metal spoon till you have an even and smooth consistency.
  12. Divide the batter evenly between 14 lined cupcake holes.
  13. Make sure your oven has two oven racks inside. One rack should be in the top half of your oven, and one in the bottom half of your oven so that your oven cavity is basically divided into 3 equal spaces. Place an empty muffin tin, roasting tray or any other baking tin on the top rack. Place your cupcakes on the lower rack.
  14. Pour about ½ cup water into the bottom of your oven to create some steam. If your oven has an element right on the bottom or if you have a gas oven, pour 1 cup of water into the baking tin on the top rack in your oven.
  15. Bake the cupcakes for 15-20 minutes, turning after 8 minutes. Test with a skewer to see if the cupcakes are cooked. Ideally there should be a few moist crumbs sticking to the skewer… Remember, they will continue to cook for a minute or two more after you remove them from the oven.
  16. Read below for decorating instructions with chocolate ganache.

Decorating the Ultimate Chocolate Cupcakes:

I love the combination of chocolate ganache and frosting! The chocolate frosting I used here is my signature ultimate chocolate frosting I use in my bakery every day. It’s the tastiest frosting in the whole world!

Place a round tip nozzle in your piping bag and fill with the ultimate chocolate frosting. Hold the piping bag directly over the top of the cupcake (about 2 cm away from the surface) and squeeze out the frosting while keeping the bag stationary.

Once you are satisfied with the AMOUNT of frosting, stop. Use a teaspoon to flatten out the surface and spread the frosting more to the edges.

Place the frosted cupcakes in the fridge for at least 30 minutes before you make the chocolate ganache.

To make the ganache, simply heat the cream till it starts to simmer and add it to the chopped dark chocolate. Allow it to stand for 5 minutes and stir till smooth & dreamy.

Just spoon the semi-runny ganache over the frosting and work it around the top till you are happy with the look. Do not dunk the frosted cupcakes in the ganache! This frosting is a lot softer than traditional frosting and it will probably fall off.

Finally, I topped my ultimate chocolate cupcakes with some beautiful dark chocolate shavings. Click here to see how to make your own!

I really hope you make these yourself at home! They are just DIVINE. If you give this recipe a go, tag me on facebook, twitter or instagram #philosophyofyum because I would LOVE to see!

Chat soon! Aurelia 🙂
Plan your Home/Micro Bakery in 1 afternoon. Download this free Home/Micro Bakery Business Plan template to start turning your passion for baking into an income.

Got a question? Something to add? Let’s chat in the comments section down below! (I respond to every single comment)

526 Shares
The Most DELICIOUS, Ultimate Chocolate Frosting!

The Most DELICIOUS, Ultimate Chocolate Frosting!

The Ultimate Chocolate Frosting Recipe

This Ultimate Chocolate Frosting is not a recipe that happened over night. I used to HATE frosting actually! Maybe you feel the same way about icky sweet buttercream as I do?

My childhood memories of frosting are completely grim. Conventional Chocolate Buttercream piped onto semi-dry sheet cakes with a star tip was a STAPLE at every single birthday party as a kid.

Oh and don’t forget the garnish of chocolate vermicelli sprinkles, glace cherries or the tiny rosettes of dulce de leche! Even though every birthday party had a themed cake, there was always one of these chocolate sheet cakes on standby in the background.

As fond as my memories are of childhood birthday parties, the chocolate sheet cakes are not included in that fondness.

That frosting was just too darn sweet. The overwhelming sweetness penetrated into your gills and made your mouth turn skew!

Every time I ate chocolate cake, I hoped this chocolate frosting might taste different, and every time the outcome was the same…

I ended up having one tiny bite, proceeded to SCRAPE OFF ALL THE CRAZY-SWEET FROSTING and ate the semi-dry cake on its own instead (which suddenly seemed a whole lot yummier after tasting that awful frosting!). Did anyone else also do this??

In the end I was so opposed to ANY kind of frosting.

I’d just never tasted a frosting that actually had FLAVOUR of its own. Not just sweet fat to make a dry cake seem less dry. I apologize for the clouds of criticism… I’m just so passionate about flavour 🙂


A Second Date with Frosting

My mother was writing Low Fat Low GI recipe books throughout my school years. The series is called “Eating for Sustained Energy”.

The carrot cake recipe is just fantastic! Naturally they had to take a road less traveled when it came to the frosting. Butter is not exactly “low fat” 😀

They also wanted a frosting with less sugar. Problem with buttercream is that you need to add a LOT of sugar to achieve the right consistency and something resembling flavour.

Thus, a smooth cottage cheese (which is even lower in fat than cream cheese), was the option they went for.

IT

WAS

SOOOOO

GOOOOOD!!!!!!

Finally, a frosting that had a great flavour and didn’t make my head spin from sweetness! A frosting you wanted to eat, as is, with a spoon!

The frosting was often a bit temperamental though… If you mixed it too much, it would go runny in seconds. Even so, the flavour and different approach was a great lesson I would draw from in the future.


Ultimate Chocolate Frosting Development

When I started baking part-time in 2012, I kind of avoided frosting. I knew I wouldn’t use buttercream. EVER. And I was honestly too scared to make my mom’s frosting out of fear that it would go runny. I needed something pipe-able.

Ultimate Chocolate Frosting elevates cake to a whole new dimension of YUM! It goes with EVERY CAKE FLAVOUR known to man. You'll never want to eat buttercream again. #deliciousfrosting #creamcheesefrosting #lowsugarfrosting #chocolatefrosting

I realized that cream cheese on its own would be too solid and cheesy tasting, so adding whipped cream would make it lighter. Truly, I had never read about whipped-cream-cream-cheese-frosting before or heard about it or anything! It just seemed like a good idea.

The great thing about cream cheese is that it already has flavour and it’s softer than butter, so you can add WAY less sugar to achieve the right consistency and sweetness. Wonderful!

It worked out PERFECTLY. Easy to pipe, super yummy and it seriously goes with ANY cake.

At this point I was still using chocolate ganache as my chocolate frosting. Although I LOVE ganache, it is a bit intense and heavier – even if you whip it. I wanted something more mellow, but still very chocolate-y.

About 2 years later I was watching another episode of Unique Sweets (all my stories seem to involve this show! LOVE IT!). The crew was visiting The Yellow Leaf Cupcake Co in Seattle, Washington. It is a unique cupcake eatery that makes an INSANE amount of cupcake flavours. Like 150+ flavours! The frosting they use is Swiss Meringue Buttercream (SMBC).

The one cupcake flavour on the episode was the “Tomato Soup Cupcake”, which is a flavour one of the owners had as a kid at every birthday party. Amazing! On top of this cupcake they put chocolate SMBC and it just looked divine.

At that moment I realized that I can easily turn my vanilla cream cheese frosting into a chocolate frosting by adding melted chocolate. I tried it and it was amazing.

Low Sugar Chocolate Frosting is so easy and TASTIER!! Photos by Alice Swan

So here is my super classified (until now) Philosophy of Yum Ultimate Chocolate Frosting recipe. I have made it 1000’s of times, refined it and perfected it in my 5 years of full time baking.

I guess if you wanted to be technically correct you could call it whipped-cream-chocolate-ganache-cream-cheese-frosting.


Reasons to Make This Ultimate Chocolate Frosting:

# It’s so flipping DELICIOUS!!! So delicious in fact that it makes you giggle, squirm and dance from the deliciousness.

# My Ultimate Chocolate Frosting contains a staggering 75% – 80% LESS SUGAR than any other frosting, but it is completely sufficiently sweet enough.

# It’s actually a whole lot quicker and easier to make than buttercream or traditional cream cheese frosting.

# You don’t need a stand mixer to make this chocolate frosting! A simple electric hand mixer is ideal.

# Because there is no butter in this frosting, it is also 55% lower in fat than any other conventional frosting. What a bargain!!

Let’s get started! My instructions are going to be rather thorough so that there’s little room for error. I really want  you to experience the awesomeness of this ultimate chocolate frosting.


5.0 from 3 reviews
Ultimate Chocolate Frosting
 
Prep time
Total time
 
Author:
Serves: 15
Ingredients
  • 30 g Whipping Cream (at least 33% fat) with ½ tsp Granulated Sugar
  • 50 g Dark Chocolate (at least 65% cocoa solids), chopped
  • 70 g Whipping Cream (at least 33% fat), ICE COLD
  • 200 g Full Fat Cream Cheese (at least 25% fat), non-aerated, ICE COLD
  • 2 tsp Vanilla Extract
  • 65 g Pure Icing Sugar
Instructions
  1. First make the chocolate ganache. Place chopped chocolate in a ceramic or glass bowl.
  2. Place 30 g cream and ½ tsp sugar in a saucepan and heat till just simmering.
  3. Add the hot cream to chopped dark chocolate. Stir well until fully combined and glossy. It's totally fine if the ganache splits a bit. Transfer to the fridge to cool down for at least 5 minutes.
  4. Next make the frosting. Whip cold cream to stiff peaks with an electric hand mixer in a medium mixing bowl.
  5. Beat in cold Cream Cheese till smooth. Scrape down sides of bowl and beat again till smooth and thickened. About 1 minute.
  6. Beat in Vanilla and icing sugar. Leave to stand for 2 minutes in the fridge so that sugar can melt into the cream cheese.
  7. Beat again till smooth and thick – about 1 minute. The frosting will be a bit runny at first, but just keep your beaters in one spot and keep beating on max speed and it will thicken up. You're essentially re-whipping the cream inside the frosting.
  8. Beat in the cooled chocolate ganache till the frosting is uniform in colour. If you want your frosting even more chocolatey, go ahead and beat in some cocoa powder.
  9. If I'm using the frosting for layer cakes I use it as it is. Let each layer of frosting chill in the fridge for at least 2 hours before adding another cake layer on top. This frosting isn't ideal for stacking more than 2 layers of cake.
  10. If I'm using this chocolate frosting for cupcakes I make sure that it's at the perfect consistency first before I start piping it. Signs of my perfect consistency: when you tap the side of the bowl, the frosting jiggles a tiny bit. When you scoop up a spoon, it takes about 2,5 - 3 seconds to drop back into the bowl.
  11. Stir the chocolate frosting with a spoon to smooth out any air bubbles before transferring to a piping bag or smoothing onto a layer cake.
Notes
This batch of frosting is enough for about 12 Cupcakes

I hope you’ll try out my Ultimate Chocolate Frosting Recipe! It’s a perfect match with my Banana & Chocolate Cupcakes, not to mention my Ultimate Chocolate Cupcakes.


If you give this recipe a go, tag me on facebook, twitter or instagram #philosophyofyum because I would LOVE to see!

Next time I’ll be sharing a recipe to go with this frosting… a VERY special recipe since it is Philosophy of Yum Blog’s 1 year birthday! 😀

Chat soon!

Aurelia 🙂

Plan your Home/Micro Bakery in 1 afternoon. Download this free Home/Micro Bakery Business Plan template to start turning your passion for baking into an income.

Got a question? Something to add? Let’s chat in the comments section down below! (I respond to every single comment)

154 Shares

How to Make Chocolate Shavings

How to Make Chocolate Shavings

How to Make Gorgeous Chocolate Shavings

Chocolate shavings were basically the first decorative thing I could associate with. In my first few years of baking the term “cake decorating” always scared me off.

It seemed like this super fancy skill which you can only acquire through years of studying and practice.

On top of all that I could not reach equilibrium in my mind over fondant and gum paste… I didn’t like them at all because they have NO FLAVOUR whatsoever, but it seemed like those are the only materials to use in cake decorating.

Should I give in? I guess it is okay that gum paste decorations are flavourless… isn’t it?

For me, the main reason I add anything to a cake is because it contributes to the flavour – a very honest and bare approach. And that’s me in a nutshell; I cannot pretend to save my life.

This meant I had to find a way to decorate cakes in an honest fashion. The simplest answer was this…

Quality Ingredients as Decorations

Taking an ingredient that is inside the cake already and presenting it in a beautiful way on top of the cake. To me the final product is incredibly inviting.

Beautiful chocolate curls and fresh berries call out to my taste buds, but silver deco balls just don’t get my mouth watering (anyone else feel the same way?).

If gum paste and fondant works for you in your cake decorating, that’s wonderful. We all have to discover what materials work for us and best represent, and express, us as creatives.

I am an honest purist at heart so if I approach cake decorating in the same way, I am way more likely to create a stunning product I am proud of and feel comfortable with.

Over the past 5 years I’ve discovered some nifty tricks to make cakes & cupcakes look spectacular in a matter of 5 minutes just by using ingredients to decorate my cakes.

It makes so much sense to me and the end result can hold its own next to a fondant cake any day 🙂 I would define my cake decorating style as “Purist Cake Decorating”.

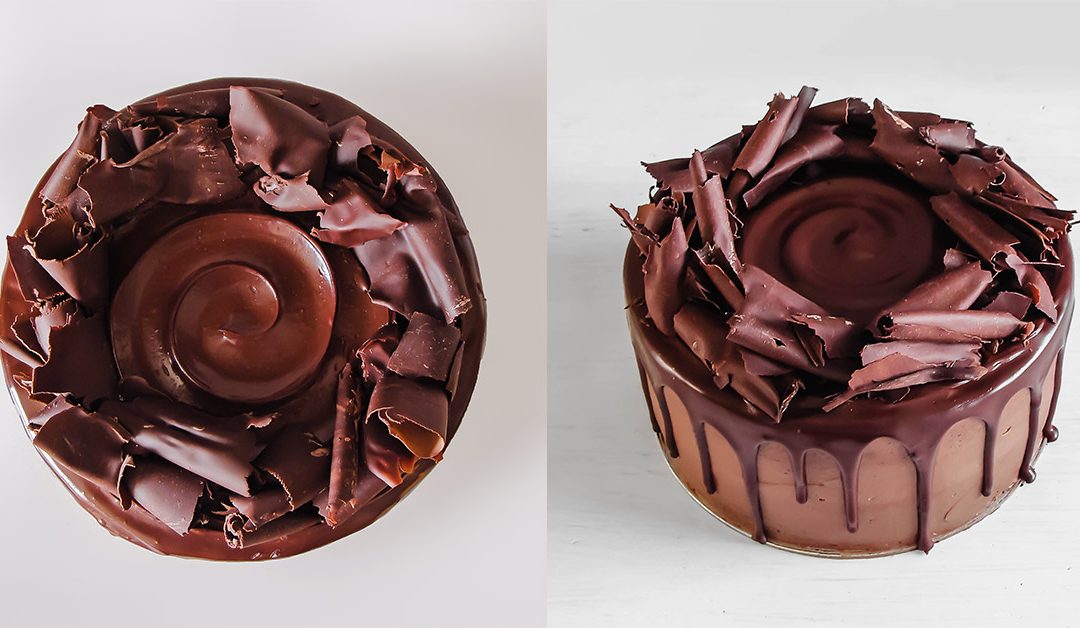
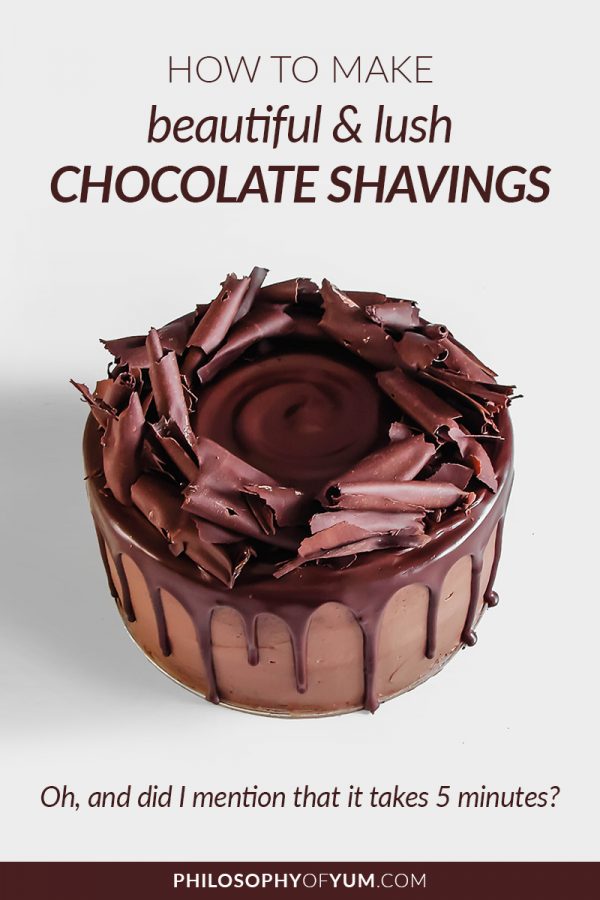
Make your own luscious chocolate shavings in 5 minutes! I use this method DAILY for giving my cakes a professional edge. With these chocolate shavings I decorate cakes, cupcakes and tarts. Minimum effort for maximum results - EASY cake decorating at its best! #cakedecorating #chocolatedecorations #cakedecoratingtips #cakedecoratingideas


Isn’t it Hard to Make Chocolate Shavings?!

Please don’t panic! You don’t need amazing skills to do this. I don’t have any qualifications in working with chocolate, but just figured things out as I went along.

This technique is super easy and quick, I promise! And the finish is just so beautiful. It immediately adds a professional edge to your cakes!

The technique for making chocolate shavings is simple in principle. Very simple. It comes down to pressing and dragging a knife over chocolate.

First place I saw this technique was on The Naked Chef (I NEVER missed an episode).

Jamie was decorating a chocolate tart or something and in seconds he made these stunning chocolate shavings that made his homemade tart look like a centerpiece in a French Bakery!

RELATED: How to Write on Cake Without Free-Handing

What I love about this technique is that you just use an ordinary bar of dark chocolate to make them.

No need to fuss about with baking sheets and vegetable shortening which is the case when making proper chocolate curls. No thanks, too much effort.

Only problem is that these regular chocolate shavings can often seem a bit skimpy.

I’ve discovered a few hacks however that end up giving you fuller chocolate shavings which give you something in between a chocolate shaving and a curl… a shurl! 😀 Officially a thing.

Chocolate curls are too “stiff and organized” for me and regular chocolate shavings can look a bit skimpy, so chocolate shurls are absolutely ideal!


How to Make Chocolate Shavings/Shurls

You’ll need:

A bar of Dark Chocolate (56% – 65% Cocoa Solids. Anything higher is too hard and anything lower is too soft.)

A hairdryer

A smooth edged chef’s knife

Ceramic plate

Method:

I’m giving you the method here in WRITING but, as you know, it often helps to SEE someone doing the things we want to learn, right?

That’s why I’ve created a Chocolate Shavings Video Tutorial to SHOW you how to create these gorgeous chocolate shavings 🙂 And it’s only $15! Click the blue link if you want to SEE how it’s done.

Here’s the Method in Writing:

Put on an apron made of thick fabric (very important!).

Put your knife and plate to one side so they don’t get warm from the hairdryer’s heat.

Place the bar of chocolate on your work surface, perpendicular to your tummy. Make sure the smooth side is facing up.

Hold your hairdryer about 20 cm away from the chocolate and turn it on to its lowest speed. Gently move the hairdryer up and down the length of the chocolate, all the while keeping the hairdryer at 20 cm distance.

You only want to soften the chocolate slightly! You don’t want it to melt. The surface of the chocolate should become dull, but not shiny (then you’ve gone too far).

Press and drag your knife over the surface of the chocolate, starting at the furthest end and dragging it towards you, bracing the chocolate with your tummy.

Do this in one, swift motion. Drag the knife over the chocolate as fast as you can!

The chocolate shavings will cling to the knife. Very gently, starting from the top, loosen, curve and roll the shavings onto your ceramic plate with your fingers.

Even after the shaving has been made you can manipulate it to curve a bit more since the chocolate has been softened slightly.

Some chocolate shavings will already be quite curled, so in such cases you can just push them off the knife onto the plate.

Carry on shaving till the soft surface chocolate is used up. Repeat hairdryer process again before making more chocolate shavings.

In summer I like to place the plate of chocolate shavings in the fridge for a minute, just to firm up the chocolate a bit.

These thicker chocolate shavings are not as fragile as regular chocolate shavings, so you can easily pick them up with your fingers and place them where you want without breaking them.

I use this method DAILY for making chocolate shavings. With them I decorate cakes, cupcakes, tarts… anything really. Minimum effort for maximum results. Nice!


Struggling to Get The Chocolate Shavings Right?

This technique does require some practice to get just right!

Maybe you’ve been trying and trying to create chocolate curls like these, but they’re just NOT cooperating…

And now you’re literally covered in chocolate and giving up hope…

But just wait a minute!

As you know, it often helps to SEE someone doing the things we want to learn, right?

That’s why I’ve created a Chocolate Shavings Video Tutorial to SHOW you how to create them 🙂 And it’s only $15!

And there’s another video tutorial for White Chocolate Curls which is also $15.

I hope you give this simple & delicious cake decorating technique a go and WOW your friends and family with your super snazzy chocolate curls.

And then you can be all like “Oh yes, I spent my whole day doing this incredible chocolate work because you all are just so worth it!” and then take an elaborate bow! 😉

Thanks for reading! Chat soon!

Aurelia

Plan your Home/Micro Bakery in 1 afternoon. Download this free Home/Micro Bakery Business Plan template to start turning your passion for baking into an income.

Got a question? Something to add? Let’s chat in the comments section down below! (I respond to every single comment)

608 Shares
Ultimate Bran Muffins

Ultimate Bran Muffins

Ultimate Bran Muffins Recipe

You want to eat more fiber, but why do high fiber bakes have to be so dry… and bland?

You want to eat something that’s good for you AND tastes great! I totally get that. And these ultimate bran muffins are the answer!

They’re super moist, flavourful and tender. And best of all, they’re LOADED with fiber!

My husband frequently struggles with… ehem… constipation. So I always make sure I have a stash of these Ultimate Bran muffins in our freezer.


Recipe Introduction

All photos by Alice Swan Photography

These ultimate bran muffins are SO MOIST AND FLUFFY!

You can serve them warm with some preserves and cheese, or eat them just as they are. Either way, they are sensational – even at room temperature. They make great lunchbox fillers as well.

What I love about these ultimate bran muffins is that they freeze incredibly well! I keep a batch in my freezer and just whip one out whenever I need a healthy, fiber filled breakfast or snack. It takes just 2 minutes to defrost them in the microwave.

I like adding raisins to my ultimate bran muffins, but you are welcome to sub cranberries, or add some nuts if you wish. If you place the nuts right on top of the batter before baking, they will toast in the oven and add a whole new depth of flavour 🙂

There is mashed banana in this recipe, but you really don’t taste it at all (if you are worried about that). It just adds a beautiful moistness and tenderness to the crumb. It also provides some natural sweetness which enables us to use less refined sugar.

The most important note I have for my ultimate bran muffins is to really just stir the mixture until combined.

A few lumps are TOTALLY okay! They will work themselves out during baking.

As soon as you add the wet ingredients to the dry ingredients, focus and be gentle. Stay away from that hand mixer!

If you would like to know how I make my pretty Muffin cases/liners, click here for a step by step tutorial post.

Bran muffin recipe | Bran muffins with molasses | Bran muffins healthy

5.0 from 1 reviews
Ultimate Bran Muffins
 
Author:
Serves: 10
Ingredients
  • 125 g unsalted butter, softened
  • 60 g Granulated White Sugar
  • 60 g egg, beaten lightly
  • 1 cup buttermilk
  • 1 t Vanilla Extract
  • 90 g sweet molasses
  • 1 ripe banana (90 g flesh), mashed
  • 45 g raisins
  • 205 g all-purpose flour
  • 1 tsp baking soda
  • 1 tsp baking powder
  • 1 tsp Cocoa Powder
  • ½ Tbsp cinnamon
  • ½ tsp ginger
  • 1 tsp salt
  • 1 cup bran (47 g)
  • Oats, to sprinkle on top
Instructions
  1. Preheat your oven to 180˚C/350˚F.
  2. Lightly spray the top surface of a muffin tin. Line 10 holes of the muffin tin with muffin liners/wrappers.
  3. In a medium sized bowl, cream together the butter and sugar with an electric hand mixer until light and fluffy.
  4. Beat in the egg, buttermilk, vanilla, mashed banana and molasses. At this point the mixture might look a bit curdled and messy, it’s completely normal. Stir in the raisins.
  5. Get a separate, large bowl. Sift together flour, baking powder, bicarbonate of soda, cocoa powder, spices and salt. Stir in the bran.
  6. Make a well in the center of your dry ingredients. Pour the wet mixture into the well. Stir the batter with a metal spoon until it is just combined (the batter will be slightly lumpy.)
  7. Divide the batter evenly into the 10 lined muffin holes. Sprinkle with regular, rolled oats.
  8. Bake the muffins in the middle of the oven for 20 - 25 minutes, or until a skewer tests clean. Leave to cool in the muffin tin for 10 minutes.
  9. Place the muffins on a rack and let them cool further, or eat them 🙂


Looking for more muffin recipes? Here you go!

Cranberry & Coconut Muffins,
Pumpkin & Cream Cheese Muffins
Apple, Date & Pecan Muffins.

Thank you so much for reading! If you give this recipe a go, tag me on Facebook, twitter or Instagram #philosophyofyum because I would LOVE to see!

See you in 2 weeks AFTER the Good Food & Wine Show!

Aurelia 🙂

Plan your Home/Micro Bakery in 1 afternoon. Download this free Home/Micro Bakery Business Plan template to start turning your passion for baking into an income.

Got a question? Something to add? Let’s chat in the comments section down below! (I respond to every single comment)
27 Shares

X