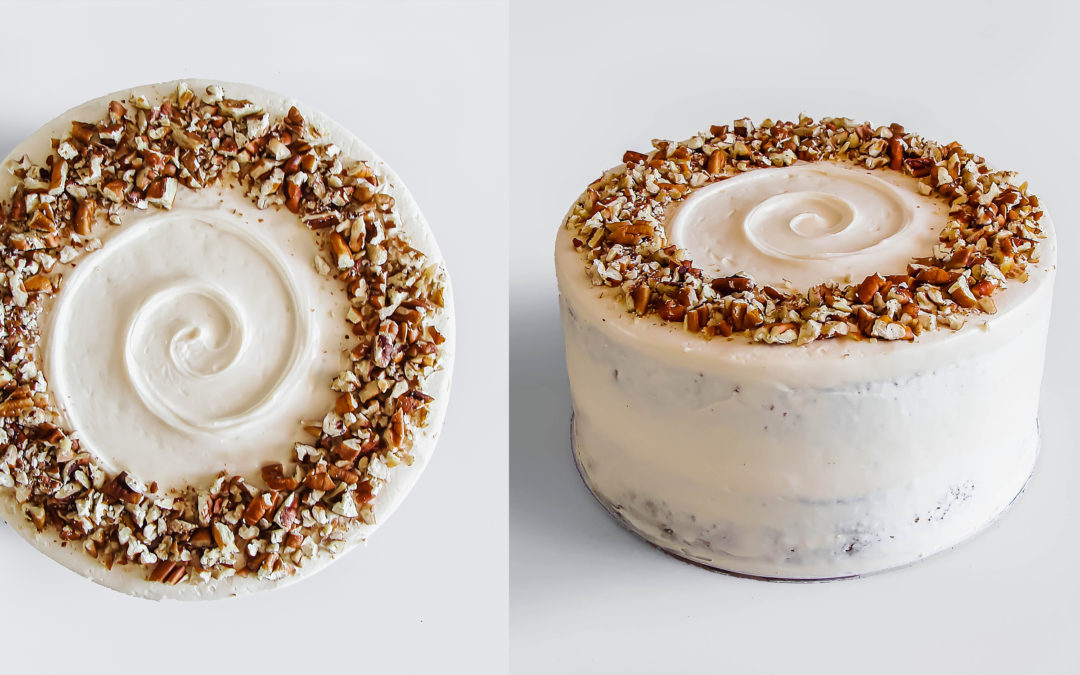
The Most DELICIOUS, Ultimate Vanilla Frosting

The Most DELICIOUS, Ultimate Vanilla Frosting

The Most DELICIOUS, Ultimate Vanilla Frosting

This Ultimate Vanilla Frosting Recipe is THE MAIN reason my clients LOVE my cakes so much…

It’s unique and FREAKIN’ DELICIOUS.

I know buttercream is the “standard frosting” out there, but it does not deserve to be. Its overwhelming sweetness actually DETRACTS from the beautiful flavour of a GOOD cake. 

I know there are some yummy buttercream recipes out there – like Magnolia Bakery’s famous frosting – but once you’ve tried this Philosophy of Yum frosting recipe, there will be a whole new standard of yum for you.

So today I’m asking you to please be open-minded.

low sugar frosting | low sugar frosting vanilla | most delicious frosting | alternative to buttercream frosting


This recipe is my Home Bakery’s SIGNATURE Frosting. It’s my GO-TO recipe I use every single day. I use this vanilla version or the chocolate frosting version on ALL my cakes & cupcakes.

It goes with EVERY CAKE FLAVOUR known to man. And not only does it “go with it”, it elevates it to a whole new dimension of bliss!

ALL my Home Bakery clients go gaga over this low sugar frosting, because it has so much flavour and it’s gloriously luxurious and smooth.

Please note that Philosophy of Yum frosting has a higher water content than buttercream or ganache, so if you place a high sugar item on top of it, it will melt into this frosting. This means fondant and sugar candies. But chocolate is A-OK 🙂

For classic cakes, cupcakes, naked frosting, semi-naked frosting, layered cakes, covering cakes etc. this frosting is absolutely perfect! It’s an honest frosting and it is honestly ridiculously delicious!!

Ultimate Vanilla Frosting Development

I explain the whole journey in detail on my chocolate frosting post if you want to check it out. In a nutshell it goes like this:

As a child I could not stand frosting. I always scraped it off the cake because it was just TOO sweet. My mother is a dietitian and developed a lower sugar frosting for her carrot cake recipe. Now that frosting was DELICIOUS! It was, however, a bit too runny to pipe.

When the time came for me to start up my own Home Baking Business, I knew that I would need to come up with my own frosting recipe… And that the frosting would need to be SUPER YUM and lower in sugar so that it’s not too sweet.

I made a drastic decision to omit butter altogether from my recipe! *GASP!!* Since you need to add HEAPS of icing sugar to butter to get it to the right consistency, it’s just so not worth it.

I opted to use whipped cream instead because cream is just SO delicious! The whipped cream also makes the frosting so much lighter.

Because cream cheese and cream are already quite soft, there’s no need to add kilos and kilos of sugar to achieve the right consistency.

The result was just stunning… So smooth, so luxurious, SO YUMMY!!

You'll never want to eat buttercream again. Ultimate Vanilla Frosting elevates cake to a whole new dimension of YUM! It goes with EVERY CAKE FLAVOUR known to man. #deliciousfrosting #creamcheesefrosting #lowsugarfrosting


Reasons to make Philosophy of Yum Vanilla Frosting

* It is so flipping DELICIOUS!!! So delicious in fact that it makes you giggle, squirm and dance from the deliciousness.

* Philosophy of Yum Frosting contains a staggering 75% – 80% LESS SUGAR than any other frosting, but it’s completely sufficiently sweet enough. 

* It is actually a whole lot quicker and easier to make than buttercream or traditional cream cheese frosting.

* You don’t need a stand mixer to make this frosting! A simple electric hand mixer is ideal.

* Because there is no butter in my ultimate vanilla frosting, it is also 55% lower in fat than any other conventional frosting. What a bargain!!

* Extra perk: you can freeze this frosting! Say what?? Yes indeed. Let it thaw again in the fridge for about 2 hours and proceed to whip it GOOD. You are basically re-whipping the cream inside the frosting. After a minute or so it will be beautifully thick once more 🙂

Let’s get started! My instructions are going to be quite thorough so that there’s little room for error. I really want you to experience the awesomeness of this Ultimate Vanilla Frosting.

5.0 from 3 reviews
Ultimate Vanilla Frosting
 
Author:
Serves: 12
Ingredients
  • 80 g Whipping Cream (at least 33% fat), ICE COLD
  • 200 g Full Fat Cream Cheese (at least 25% fat), non-aerated, ICE COLD
  • 1,5 tsp Vanilla Extract
  • 50 g Pure Icing/Powdered Sugar (no added corn starch)
  • 40 g White Chocolate (minimum 30% cocoa solids)
Instructions
  1. SUPER IMPORTANT: The recipe varies slightly depending on whether you're using the frosting for piping on cupcakes or to use in layer cakes. The default ingredients list and method steps are for piping frosting on cupcakes. Variations for layer cake frosting will be in brackets. For layer cakes, make this recipe for the 1st layer of cake and let it sit in the fridge overnight. The next morning, make 1.5 times of this recipe as if you're making it for cupcakes (super important!), to frost the second layer of cake and the sides. This frosting doesn't work for cakes taller than 2 layers, but they can be up to 5cm (2-inch) thick layers.
  2. First make your white chocolate ganache. Finely chop the white chocolate. Put it in a small bowl (or mug) with 15 g of the whipping cream. Melt it in the microwave in 2 x 30 second bursts. Stir it till smooth and put it in the fridge to cool down. If I'm in a rush I scrape it onto a plate and put in the freezer for 5 minutes. (*If making frosting for your 1st layer of cake, skip the ganache! Instead, stir ½ tsp agar-agar powder and 3 Tbsp water together in a small saucepan and set aside for 10 minutes. Once it's hydrated, boil the mixture for 2 minutes and set aside to cool slightly.)
  3. Whip the remaining COLD cream to soft peaks with an electric hand mixer in a medium mixing bowl. (*If making frosting for 1st layer of cake, whip all 80 g of cold cream to soft peaks.)
  4. Beat in COLD Cream Cheese till smooth. Scrape down sides of bowl and beat again till smooth and thickened. About 1 minute in total.
  5. Beat in Vanilla and icing sugar for 20 seconds (*if making frosting for a layer cake, beat in 20 g extra icing sugar). Leave frosting to stand in the fridge for 5 minutes so that sugar can melt into the cream cheese thoroughly.
  6. Get the frosting from the fridge. Beat it on max speed for 30 seconds - 1 minute (tilt your bowl and keep your beaters still in on the lowest side of the bowl while beating). The frosting might start off runny, but keep beating in one spot and it will start to thicken up. You're essentially re-whipping the cream inside the frosting. It should be quite thick after 1 minute. *NOTE: If the frosting isn't COLD, it won't whip up.
  7. Next scrape all the white chocolate ganache (it shouldn't be warmer than a cool room temperature when you add it in) into the frosting and beat it in on max speed immediately for 1 minute. The white chocolate will also help to thicken up the frosting even more. (*If making frosting for 1st cake layer, scrape your room temp, liquid agar-agar mixture into your frosting and beat it on max speed for 1 minute.)
  8. The frosting will be quite thick at this stage (depending on the cream cheese you used and how cold your ingredients were). If I’m using the frosting for layer cakes, I use it as it is. Frost the first layer of cake and let it chill in the fridge for AT LEAST 4 hours (I leave them in the fridge over night). Note that this is NOT a hard setting frosting. It will always still be wet to the touch, but it still holds.
  9. FOR LAYER CAKES: When the first layer of frosting has firmed up a bit, you can add 1 more cake layer on top. Not ideal for stacking more than 2 layers of cake!! Make 1.5 times this recipe and frost the top and sides of the cake. When you've frosted the outside of the cake, let it stand in the fridge for at least 2 more hours. After that the frosting is quite stable at room temp and won't melt - even on a hot day!
  10. If I’m piping the frosting onto cupcakes, I like to leave the frosting at room temperature for a few minutes to soften slightly before I transfer it to a piping bag. When you've frosted your cupcakes, let them stand at cool room temperature (or in the fridge) for about 30 minutes. After this the frosting is quite stable and won't melt - even on a hot day! I even tested this on a day that was 43 degrees C (109 degrees F).

Important Notes:

* THIS RECIPE ONLY WORKS WHEN THE INGREDIENTS ARE SUPER COLD. Both the cream and cream cheese should have been in the fridge, on the lowest shelf, overnight. Make sure your kitchen isn’t hot when you mix the frosting.

* If you live in a super hot climate, you may need to take extra precautions. If your frosting isn’t whipping up, let it chill in your FREEZER for 15 minutes. Hold your mixing bowl at an angle and hold beaters in the lowest spot on top speed for 1-2 minutes (don’t move beaters around initially). Once the frosting gets really thick around the beaters, gradually start moving the beaters around in smaller circles to incorporate the runnier frosting with the thick frosting. Continue beating till you see the frosting is as thick as it’s possibly going to get.

* Another precaution for super hot climates: Once you’ve piped the frosting onto cupcakes, let the frosted cupcakes chill in the fridge for at least 30 – 40 minutes so that the piped frosting chills and dries out a bit. After this, you can leave the cupcakes at room temperature and the frosting will keep its shape.

* Super important note: do not use candy or fondant or sugar paste decorations on this frosting! The frosting has a high water content, so sugary decorations will simply melt and weep into the frosting!

* A smaller, deeper mixing bowl makes this frosting much easier to whip up.

* This recipe produces enough frosting for about 12 cupcakes.

* If using in a layer cake: Allow the frosting on each layer to chill in the fridge for at least 2 hours before placing the next layer of cake on top. Do not stack more than 2 layers of cake on top of each other!

* This is not a hard-setting frosting. It remains moist. I love this because it keeps my cakes moist as well, so you never need to do the simple syrup soaking again!

* Because there’s cream & cream cheese in the frosting, encourage your clients eat their bakes within 2 days max.

* This frosting needs to be prepared fresh right before you use it. You can’t make it in advance. But you CAN freeze the left overs for up to 1 month! When you want to use it; let it thaw in the fridge overnight. Then whip it like crazy the next day till it thickens up again.


If you give this recipe a go, tag me on Facebook, twitter or Instagram #philosophyofyum because I would LOVE to see!

Chat soon!

Aurelia 😊

Plan your Home/Micro Bakery in 1 afternoon. Download this free Home/Micro Bakery Business Plan template to start turning your passion for baking into an income.

Got a question? Something to add? Let’s chat in the comments section down below! (I respond to every single comment)

617 Shares
4 Biggest MYTHS About Starting a Home/Micro Bakery Business

4 Biggest MYTHS About Starting a Home/Micro Bakery Business

4 Biggest MYTHS About Starting a Home/Micro Bakery Business

A Home/Micro Bakery Business is a brilliant way to earn money from home while doing something you love (mayyybe leaning a bit more towards “obsessed” 😉)… baking!

I’ve had my own successful Home Bakery Business since 2013 (full-time for 6 1/2 years with a full-time income too) and it’s been one of the best things I’ve ever done in my life.

Every job (whether you work for yourself or not) has its ups and downs, but I’m SO exceedingly grateful for my little Home Bakery!

In 2017 I realized that so many passionate bakers have talent, but they don’t pursue their passion/dream of starting their own Home Bakery because of FEAR…

Fear that they don’t have what it takes to create a successful Home Bakery Business.

They look at Instagram, TikTok, YouTube, etc. and only see bakers with gorgeous kitchens, expensive equipment, and perfect baked goods, and then assume they need to “fit that mould” to also be successful. They fall for the MYTHS.

Want to sell your home baking, but feel unsure about it? There are Home Bakery Business MYTHS that keep talented bakers from pursuing their Home Bakery dreams! Let's uncover the 4 BIGGEST myths one by one. This includes specific skill sets, huge capital & false beliefs about what kind of baking people pay for. Get all my 6+ years of full time home baking for free! Click through to get the inside info... #homebakery #bakingbusiness #homebaking #baking


These Home Bakery Business Myths Are:

MYTH #1: You need a qualification in pastry or baking for your baked goods to be “good enough to sell”.

MYTH #2: You need a qualification in business/marketing to create a successful small business.

MYTH #3: You must be able to make whatever clients want to be successful. (Like fondant cakes, sugar flowers, Anna & Elsa figurines, etc.)

MYTH #4: And then also this belief that you need heaps of capital/money (or investors) for expensive kitchen equipment, branding, packaging, advertising etc.

All of these beliefs are TOTALLY false.

They hold home bakers back unnecessarily, and today I’m hoping to expose these myths once and for all.

home bakery | home baking business | baking business from home

I’m exposing these myths because I keep coming across amazing, passionate, GIFTED Home Bakers that lack confidence because they don’t fit the brief listed above.

It breaks my heart, because they don’t need to feel this way.

There’s another way!

BUT FIRST, let’s start by breaking down the myths. Sound good?

MYTH # 1: You need a qualification in pastry or baking for your baked goods to be “good enough to sell”.

There’s this old mind-set still hanging around in society that makes life and growth quite difficult. It’s the belief you need to formally study and have some kind of qualification before you can work in a certain field.

Over time, some new shortcuts have been created (like short courses) which aim to condense your learning experience into a shorter span of time.

Although I love the idea that you don’t need to put aside YEARS for these courses, they still have major flaws.

I’ve wanted to do a thorough course in Pastry for 5 years now. Unfortunately, all the options would require of me to set aside a minimum of 6 months to complete the course. 6 Months of FULL TIME study.

This means no work and no income plus a mild expense of $ 5000. How is this sustainable or even possible?

My friend, this is a different time. The online world has opened up doors for all of us to learn almost any skill and excel at it.

You don’t need to study a formal, expensive course for your Home Baking Business to succeed. AT ALL.

If a cake tastes amazing and rocks your world, then no one cares if the baker has a qualification or not!

You can learn and grow into the BEST baker you can possibly be without any formal training. I’ve developed 5 FUN weekly habits over time that keep me sharp and constantly evolving as a Home Baker.

These 5 Weekly Habits Include:

1. Watching an inspirational dessert show. Shows like Unique Sweets, Great British Bake Off, Zumbo’s Just Desserts etc. NOT decorating shows. Watch shows that focus on flavour! I always keep a notebook handy to write down which new flavour combinations I’ve learned, which new techniques I’ve learned and how I could implement them in a bake I’m comfortable with – like brownies.

2. Conquer something technical that has EPIC flavour (typically spaced out over a month, with research on the specific bake every week). Perfect Baked Cheesecake, Flawless Cupcakes, Perfect Lemon Meringue Pie… these are all very technical desserts, yet I’ve managed to master them through extensive ONLINE RESEARCH and then practicing baking them. It’s all you need. Really.

3. Eat something that gives you a YUM-high! Hard Work, right? 😉 Eating YUM-high food/treats is essential to keeping your flavour edge sharp in your baking. Eat something every week that inspires you! It doesn’t have to be expensive either. Get to that baked thingy that everyone in your town/city is talking about!

4. Follow GREAT bakers (not decorators) online. You will learn something NEW every time. I still do.

5. Use seasonal ingredients for inspiration. Fresh, seasonal ingredients can inspire you to create bakes you’ve never tried before. Search online to see what other herbs/spices/nuts go with that seasonal vegetable or fruit.

It's a TOTAL lie that you need a baking degree/diploma to create a successful Home Bakery! You can start your business this week while you keep working on your baking skills in the background. Your baking doesn't have to be "perfect" before it'll mean something to people. If it's delicious, you can sell it! #homebakery #cakebusiness #bakefromhome #bakingbusiness

These habits have grown me into the baker I am today without ever needing to pay a cent for training.

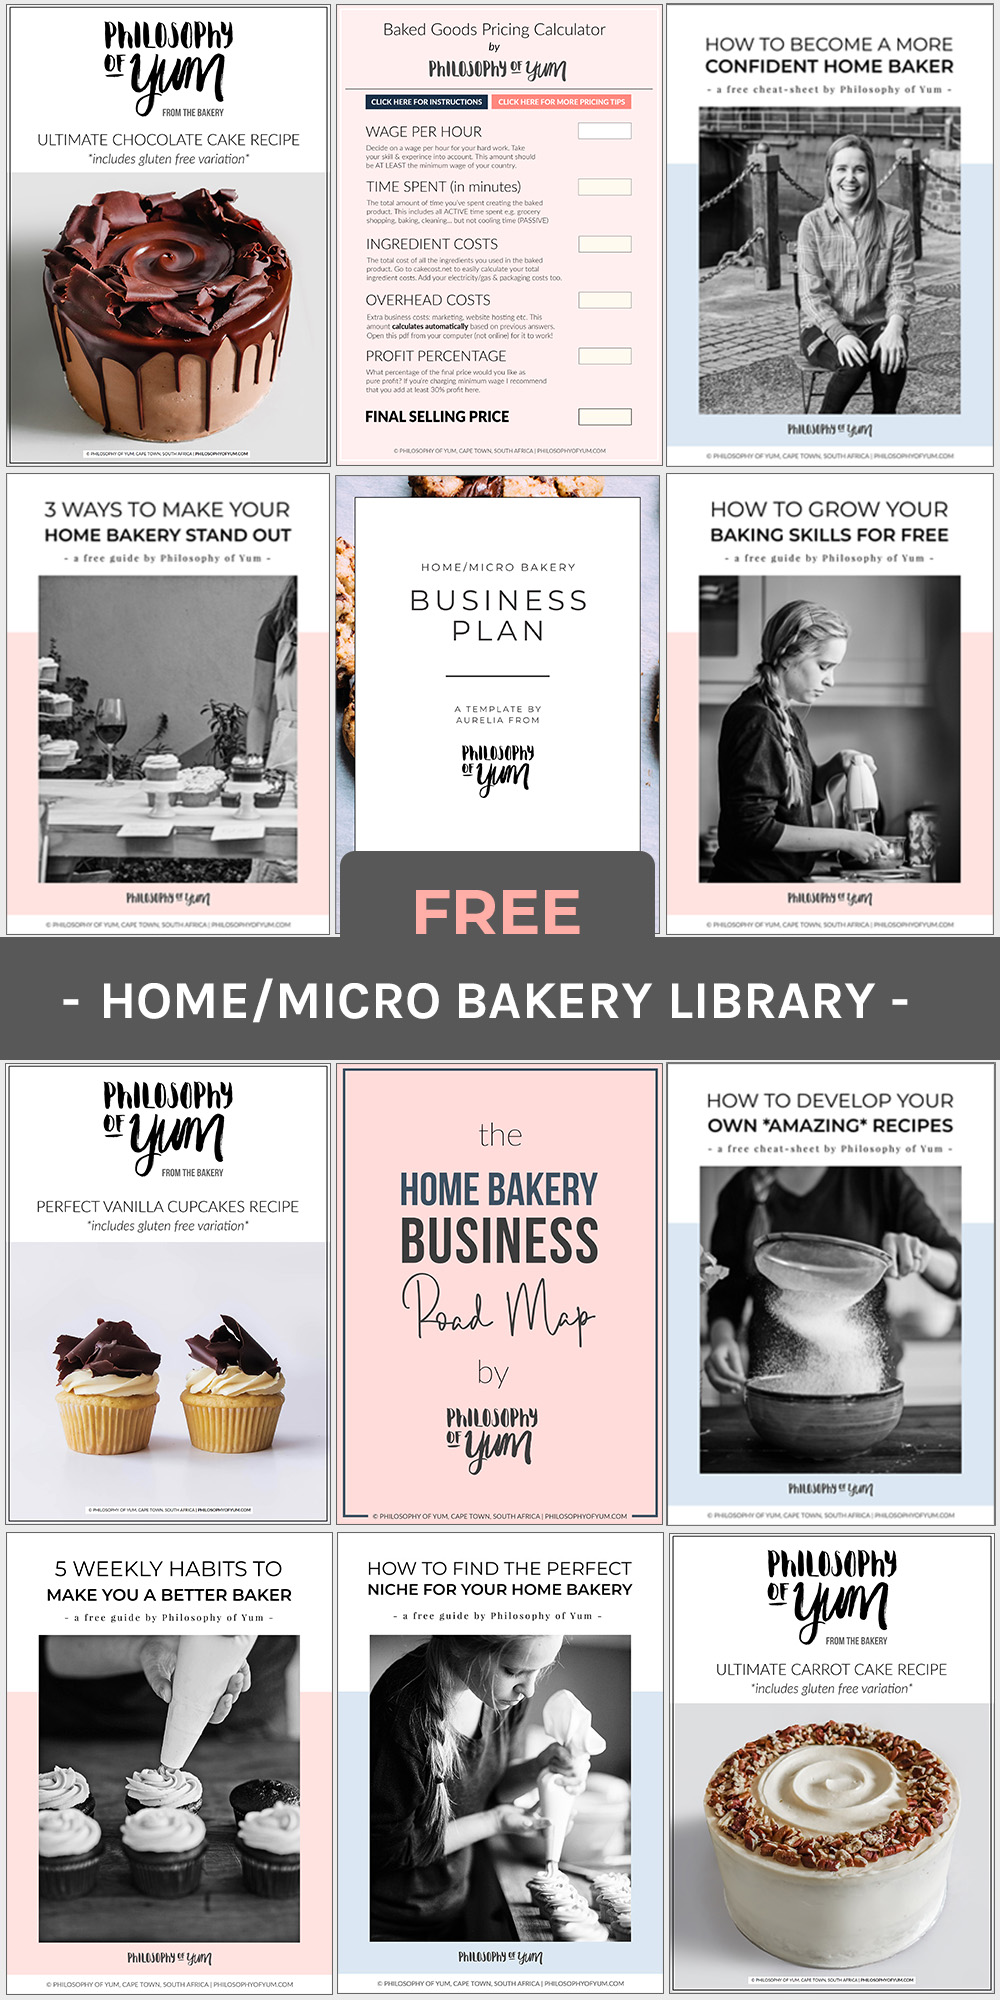
I’ve explained the core concept of each habit, because I don’t want to be stingy, but if you want to, you can download the full, free, 5 page guide in my Free Resource Library. I’m confident that you’ll love it!

Another super effective strategy to Grow as a Baker (for free) is to volunteer at any restaurant/eatery/bakery/suppliers that do anything related to baking. This includes breads, pizzas, doughnuts, pastry, cakes, etc.!

You get to learn, hands on, on a schedule that works for you. Since you are volunteering and providing them with free labour, they can’t exactly make demands on your time. I recommend doing weekends or like every second weekend.

This way the restaurant/bakery gets FREE extra labour and you learn for FREE – TOTAL win-win!!

I’ve explained the basics without being cryptic, but if you want to read more on this strategy of mine you can download my full guide from the Free Resource Library.

MYTH #1 BUSTED!!

MYTH #2: You need a qualification in business/marketing to create a successful small business.

Once again, my friends, this is a different era.

The online world has opened up doors for all of us to learn almost any skill and excel at it. You don’t need to study a formal, expensive course in business for your Home Baking Business to succeed. AT ALL.

The web is absolutely TEEMING with online entrepreneur & business coaches who are giving away a WEALTH of info – often for FREE.

I’ve learned all I need to from these peeps. Their free stuff has made me a savvy entrepreneur with a successful Home Baking Business even though they never speak about baking.

If you have a little bit of money to spend on this, it will definitely help though. I HIGHLY recommend “The $100 start up” by Chris Guillebeau.

This book has genuinely smashed my concepts of business and redefined my home baking business’s focus. It’s really inexpensive and amazing.

So yes, it’s paramount that you learn about business and entrepreneurship, but you don’t need to do a formal, expensive course at a university or institution.

MYTH #2 BUSTED!!

Myth #3: You need to be a master at fondant, sugar art and themed designs for your home baking business to succeed.

Now this is where I get very VERY feisty.

As any “normal” baking nerd would do, I’m part of a few Baking Facebook groups. On these groups you typically see folks posting these AMAZING wedding cakes with mountains of fondant work, sugar flowers and modelling chocolate details… They are works of art.

One day I posted a photo in the one group of the types of cakes I do. A rustic, purist, cleanly presented carrot cake.

This Carrot Cake Recipe has generated $5000+ in sales for my home bakery business. I asked in the group if anyone does cakes like these because everyone’s work seems so “wedding-cakey” or “themed”.

Everyone’s responses SHOCKED ME.

Here’s what the fellow Home Bakers said on the group:

“I love baking cakes like yours for myself, my friends and family. But in order to make a living from baking I have to make fondant cakes.

“LOVE these kinds of cakes, but fondant cakes are what customers want, so that’s what I do most of the time.”

My heart sank!

Is this is truly what most Home Baking Business owners believe??…

It does not have to be this way. I would just curl up in despair if the only way to make a living off baking was to make fondant, themed cakes.

Here’s why…

In general, ANY creative enjoys creating something that THEY actually want to buy themselves. As soon as you start just creating for “whatever anyone wants”, you quickly get frustrated, bored and burned out.

“In order to make a living from baking I have to make fondant cakes…” But it’s not what she enjoys doing at all. She feels she HAS to do it.

TRUTH IS that there’s a WHOLE other market today that is into QUALITY and FLAVOUR. This is what I’ve discovered & experienced over the last 5 years of building my own Home Baking Business.

FLAVOUR and QUALITY (taste) create more concrete memories than sight. It’s been scientifically proven.

When more of your senses are involved in an experience, a more solid memory and rich the whole experience.

If you eat a cake with an awful flavour (includes both your taste & smelling sense) and texture, the only sense that the memory can stand on is SIGHT.

SIGHT does not create a very solid memory to begin with since it is a sense we use 16+ hours per day.

BUT if you eat a cake with a glorious flavour (includes smell) and beautiful, fresh texture then you already have 3 senses involved in the experience and memory!

That’s why the desserts and bakes from our childhoods are forever seared into our memories.

You absolutely DO NOT need to make fondant cakes to have a successful Home Bakery Business! Learn how I've been baking, full-time, for 6 years without EVER touching fondant! Click to learn how you can do it too... #homebakery #bakingbusiness #cakebusiness #homebaking #baking

I’ve NEVER heard anyone say: “oh do you remember when we ate that green fondant?! It was the most delicious thing I’ve ever eaten in my life!” “Yes! And those silver deco balls, how divine!”

Nope. Never.

Over the last decade, the cake decorating scene has exploded on television and social media. It was always there, but shows like Cake Boss, Ace of Cakes, Charly’s Cake Angels etc. opened up an exciting new world to the public and bakers.

Overnight, super decorated, fondant cakes became the new beacon for “baking”. People were loving them on TV (and social media) and demanding them from their local bakers!

Now, I am not saying there’s no need for cake decorating (that would be foolish and ignorant). It’s an amazing art!! I’m just saying that the cake decorating “hype” has gone completely out of control and created this stigma that

BAKING = DECORATING and DECORATING = BAKING. This is FALSE.

You can be an amazing cake DECORATOR, but this does not make you a great BAKER.

In the name of “You eat with your eyes!”, super pretty, BUT terrible tasting, dry, tough, stale cakes have been served to the masses for years now.

I have been on the receiving end so many times… I’m sure you have too?? It totally sucks. It ruins everything.

Bottom line: lines have become blurry and the concept of actual BAKING has been severely compromised by an exterior decorating obsession.

Ultimately, WE ACTUALLY EAT WITH OUR MOUTHS, NOT OUR EYES.

And, believe it or not, there’s a whole market just waiting for someone to produce DELICIOUS cakes, FULL of FLAVOUR, that give them a yum-high and leave them in a daze. Great, full on BAKING. This is what I’ve done and you can totally do it too!

Now obviously the cake needs to be neat and presentable, but all this means is clean lines. A neat finish on something HONEST, HOME MADE and AUTHENTIC.

You never need to make sugar flowers, or spend hours kneading purple fondant, or bake a cake a week in advance so that you have enough time to put the 1000 modelling chocolate ornaments on the cake IF YOU DON’T WANT TO.

So yes, I’m going to say it OUT LOUD:

You CAN make a comfortable living as a home baker without EVER baking a wedding cake or a themed cake!

MYTH #3 BUSTED!!

Myth #4: You need loads of money and investors to start a Home Bakery Business

SO, totally and completely false.

When I started my home baking business I had almost nothing. I had a $10 hand mixer, 2 cheap plastic mixing bowls, 1 square tin and 1 muffin/cupcake tin (and a $5500 student loan to pay off, lol!).

That’s it! That’s all you need.

I didn’t even have an oven, so I baked at my (then boyfriend) husband’s student house and then decorated the baked cupcakes back at my own student house. You can make it work!

I know there are so many gorgeous kitchens on Instagram, Pinterest, YouTube, blogs and magazines, but don’t fall into the comparison trap.

A big, beautiful, fully kitted-out kitchen is not essential for your home bakery’s to succeed. Resourcefulness matters so much more than resources!!

Remember, this is good, honest HOME BAKING.

When your mom or grandma made your favourite birthday cake, could they manage without the $1000 KitchenAid Mixer? Was the cake delicious and memorable, even though they mixed it with an old little hand mixer?

I’m betting YES.

It's a TOTAL LIE that you need heaps of money and fancy, expensive kitchen equipment to start a Home Bakery Business! All you need is a hand mixer, the oven that's already in your kitchen and a mixing bowl - that's it. Click through to start building your own full time Home Bakery Business. #homebakery #bakingbusiness #cakebusiness #cupcakebusiness #homebaking

Focus on the quality of your bakes, not the aesthetics of your kitchen and I promise that your home bakery business will be successful.

Beautiful branding and packaging can also be a very tempting expense. If a wrapper is beautiful, but the candy tastes bad, will you ever buy it again? No.

Just go for simple packaging to start off with. You can seriously get away with 50 cents per cake box. To add a personal touch, get a logo stamp made for $10. It looks super rustic and cool!

OR you can use my super cheap method for making your boxes beautiful.

A simple, affordable logo design solution is to do a trade exchange with a local graphic designer. Creatives really look out for each other and are keen to help where they can! Offer them a cake in exchange for a logo.

If they are super good, maybe offer them a $100 voucher/credit at your home baking business. It’s a wonderfully enriching experience working with any other creative! Give it a try 🙂

The last area where big spending can be super tempting is advertising for your home bakery.

Take it from someone who’s been selling their home baked goods since 2013…

Advertising only amplifies what’s already happening in your business. It’s like pouring fuel on a fire.

But if there is no fire to begin with, you just end up with a pile of wet logs.

Here’s what I mean: If you’re already struggling to attract enough customers, advertising will only amplify that struggle.

You’ll be wasting your money.

If you want to learn how to market your Home Bakery Business in a way that attracts customers (without paying for ads), then you’ve gotta learn >> the 4 Essentials of Marketing Your Home Bakery. 

MYTH #4 BUSTED!!

I hope this post has been helpful and that it’s set you free to take your Home Bakery idea seriously. The world is hurting. It NEEDS comfort. And your delicious home baking can give that comfort.


What’s next?

Now that you’re ready to take your Home/Micro Bakery idea seriously, you probably have a new list of questions popping up in your mind!

Like,

… Do I need a license to sell my baked goods from home?

… How much should I charge for my home baking?

… What should I name my Home Bakery business?

Just click on whichever question you’ve got, and you’ll get super practical tips for those.

Comment below if you’ve got any other struggles or doubts about starting your own home/micro bakery business, and I’ll reply asap!

Hugs & donuts,
Aurelia 🙂

Plan your Home/Micro Bakery in 1 afternoon. Download this free Home/Micro Bakery Business Plan template to start turning your passion for baking into an income.

Got a question? Something to add? Let’s chat in the comments section down below! (I respond to every single comment)

13K Shares

All my BEST Home Baking Resources to Help You Grow Your Baking Skills and Home Bakery Business

Hey there, home baker!

... Have you been thinking about turning your passion for delicious home baking into an income, but just don't know where to start?

... Or are you maybe struggling to attract enough customers and wish you had proven strategies that WORK to get more customers and consistent orders?

... Do you want to make a stable income from your home baking so it can be a profitable side-hustle, part-time, or full-time business?

If you answered YES to any of these questions, I've got just the thing to help you on your baking journey 🙂

It's a...

FREE Home/Micro Bakery Resource Library with:

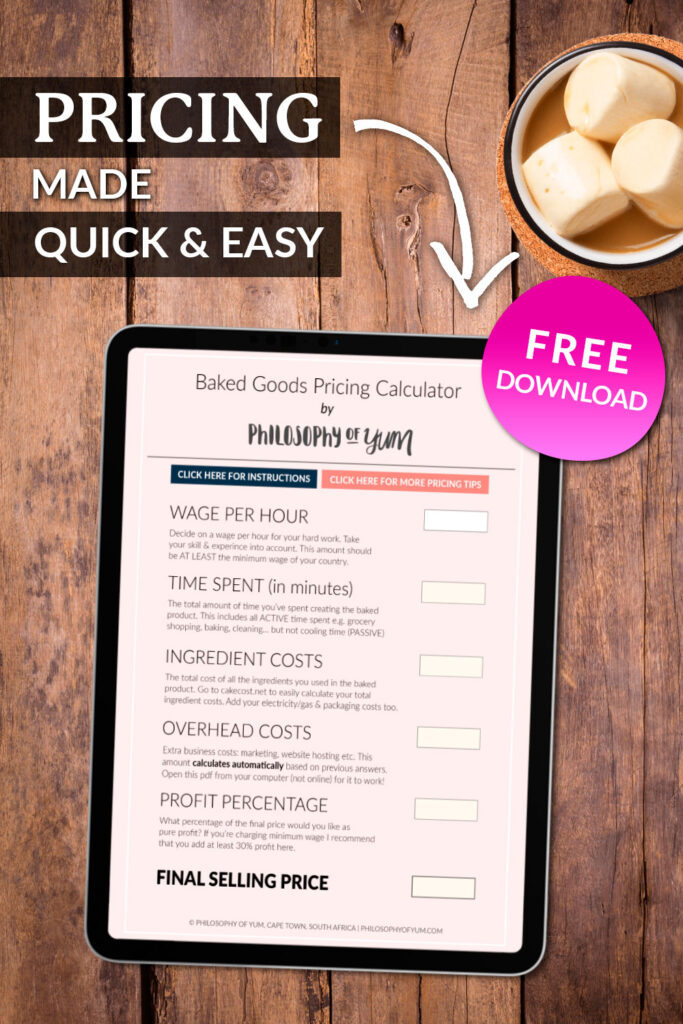
✅ a Baked Goods Pricing Calculator,
✅ guides to help your business stand out from your competition,
✅ a Home Bakery Business Plan Template to help you get organized,
✅ top-secret recipes from my home bakery, and more.

I created it because when I started my Home Bakery there was ZERO information to help me. With these resources, I'm sure your journey to a successful Home Bakery will be less stressful than mine was 😊

A collection of free downloads to help home bakers start and grow a Home/Micro Bakery Business

I share many resources, baking tips, and LEGIT recipes from my own Home Bakery Business on my blog, but there are some documents I don’t want to share with just anyone

I’d rather share them with a passionate home baker, like you, who will benefit MOST from these documents.

These documents are very exclusive – with all the secrets behind my 6+ years of full-time (fully booked) home baking. You cannot find them anywhere else.

In my Free Library, You Can Expect to Find:

🧁 Philosophy of Yum (my Home Bakery)’s TOP secret recipes.

Typically recipes that were baked literally 1000 times over and have generated thousands of dollars in sales. I haven't shared these recipes with ANYONE before now.

All the recipes come with gluten-free variations too!

🧁 Home Baking Business Resources to help you attract customers and repeat orders.

This includes free Workbooks, Templates, Guides, a Pricing Calculator, a Weekly Planner, and Tips to make your Home Bakery Stand out in the crowd, get more consistent orders, and make a stable income for you.

🧁 You'll get tools and tips to help you become THE BEST HOME BAKER YOU CAN POSSIBLY BE.

If you use this info, I guarantee your business will grow like never before. It’s how I have grown into the baker I am today without ever paying to study desserts/pastry/baking/chef etc.

🧁 You'll also get resources to push you further as a Home Baker...

Like learning HOW to develop your own recipes. The aim is to equip you and give you tools so that you can explore and create your own UNIQUE bakes.


→ So… Are you ready to turn your passion for Home Baking into a legal, profitable business?

Click the button to request your invitation to the Library. Let's do this!

I'm SO excited for you to dive into the resources! 🥳

Aurelia

Hi! I’m Aurelia 🙂

I help home bakers build calm, profitable businesses that actually fit their lives by fixing the underlying reasons their orders are inconsistent – not by throwing more marketing, trends, or pressure at it.

Learn more →

5 Tips for Selling Your Baked Goods at Food Markets

5 Tips for Selling Your Baked Goods at Food Markets

5 Tips for Selling Your Baked Goods at Food Markets

Food Market stalls can be a great way to showcase your bakes, your brand and make some good money. Some annual Food Markets/Food Shows boast with attendances of up to 20 000 people – craaaazy!

If there’s one thing that humans LOVE to do, and never seem to get tired of, it is eating GOOD food.

I’ve had my fair share of Food Market Stalls over the last 5 years as an Artisan Home Baker. The spectrum of markets I’ve traded at range far and wide; from the super trendy Kamers vol Geskenke to the colossal Good Food & Wine Show to hipster, casual beach vibes at Big Bay Market.

I’ve traded at 7 DIFFERENT markets for a total of 22 TIMES.

Some of my Food Market Stalls were a huge success and others were kind of meh. I’ve danced with joy, I’ve cried with disappointment. Bottom line is – I’ve learned A LOT.

Today I would love to share my experiences with you and give you a heads up to help you in your Food Market Stall ventures!

Stick around till the very end because there’s a BONUS #6 Tip!

Food Market stalls can be great because you can showcase your bakes, create awareness for your Home Bakery Business & make some good money. But what causes success or failure for Food Market Stalls? Here are 5 key things you need to know about selling your home baked goods at a food market stall. #homebakery #cakebusiness #foodmarket #farmersmarket #bakingbusiness

1. Not all Food Markets are What They Seem (often a GREAT thing!)

The key thing to figure out is where your baked goods will fit in. Which Food Market has the right kind of crowd for your specific bakes? This might not always be as straight forward as you’d think…

There was this one Food Market in Cape Town that I was yearning to get into! The waiting list was long as they were super popular.

For a few years I kept pushing and pushing to get in. From the times I had been there, it looked PERFECT for my bakes!

Everyone at the market was earthy and they seemed to care a lot about flavour, good ingredients and quality. The vibe was always very lively; LOADS of people, twinkle lights and on weekends they also had live music! TOTALLY MY SCENE!

Eventually their dessert Stall decided to call it a day and go travel the world. I was IN!!! 😀 And I was over the moon!

In my mind, THIS would be the food market stall of my dreams where all my bakes would sell in a heartbeat.

Sigh…

Reality can be so crude.

After trading at the market 3 times, I realized that about 90% of the people were only coming to buy beers and burgers. And that was IT. For about 70% of the day/evening, ALL the dessert traders next to me were just standing there… with fully stocked, beautiful food market stalls… And no one was interested.

On the flip side, my most successful food market stall experiences have been at markets that ARE NOT MY SCENE AT ALL! The one market I traded at 11 times – by FAR my biggest number.

It was exclusively a spring and summer market – I don’t really like summer. Sorry if that offends you.

The music was super loud, mostly house and indie vibes – SO not me.

It was in a free-spirited, hippie beach community – SOOOOO not me.

If you attend this market now, you would think that THIS would be a market where folks only attend to buy beer and burgers. Mercifully I was not able to attend the market first before I could decide – because it was brand new. I was attracted to the market for other reasons (which I’ll discuss later) and ended up going ahead with it.

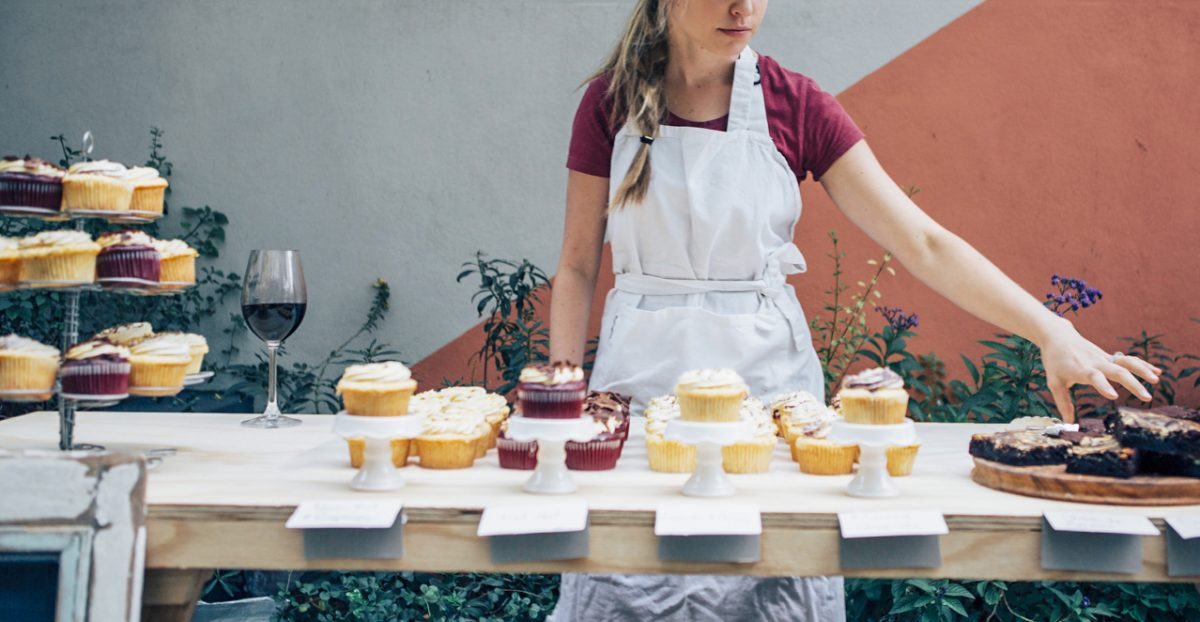
food market stalls cupcakes

I SOLD OUT!

Practically every time!

The last market of the season, I decided to go crazy and baked 50% more goods than I normally would. We ended up selling everything with 1 hour still to spare. Amazing!

What I’ve learned: Give every market a fair chance. Don’t make assumptions based on appearances. You will probably rob yourself of an amazing food market stall experience, connections and profit.

2. High Attendance Does Not Guarantee High Sales

The higher the attendance rates of a market, the higher the sales, right? Not exactly.

High attendance rates do increase the probability of high sales, but it is NOT a guarantee!

There are so many variables to take into consideration; like the Economy, media trends (anti sugar etc.), Food Market design & layout, the Food Market’s marketing campaigns, time of the year, weather and many more. These are all factors beyond your control, yet they influence your sales drastically.

Very often, you won’t even know the impact that one of these factors can have on your food market stall until you are physically at the market.

For this reason, I’ve learned to work out the WORST case scenario beforehand and make peace with it before the market starts (my genius husband has helped me massively in this area). This also gives one the opportunity to work out an all-important BACK-UP PLAN in regards to finances and left over baked goods.

What I’ve learned: Don’t be naïve and just hope for the best. Be SOBER and PREPARED – this minimizes panic and financial losses.

3. Commitment & Repercussions

This is one of my favourite points. It is probably the FIRST thing I investigate before I agree to trade at any food market stall.

I have a life. Yes I do. I have a life, how about you?

Food market stalls can be very strenuous commitments to make. Do you have a spouse? It will undoubtedly affect them. Do you have kids? It will undoubtedly affect them.

Food markets are typically at a time that suits the general public – after hours and weekends. This means you will need to work after hours and weekends.

Honestly, whether you want it to or not, it will have a significant effect on those closest to you. It might be less time to spend with them or needing their help with your food market stalls.

For this reason I prefer to do annual or monthly markets. The degree of commitment is much less and the strain on relationships is not constant, but manageable.

Under this topic, it is also good to mention that markets typically require double the amount of time between initial production and sale. Let me explain: If you bake goods for a coffee shop (for example), you only need to bake it and the “sales” part is up to the coffee shop. It’s out of your hands and you get paid immediately.

With Food Market Stalls you will typically spend a whole day baking your goods and then another whole day selling them on market day. You are now responsible for the sales department as well.

If things don’t go according to plan, then you might waste the baked goods as well as the extra day you have spent trying to sell them.

food market | food market stall | baking business tips | baking business from home

On the flip-side, you can charge MORE (in fact DOUBLE) for your goods at a food market because everyone knows you needed to pay for your stall. Customers are also aware that you are giving the convenience of coming to them. They didn’t have to make a special trip to your Home Bakery.

What I’ve learned: I need to consider how my food market stalls’ commitment affects my closest family and friends. It is better to do a monthly or annual market because it is more sustainable on my own time, energy and relationships.

4. Have a Back-Up Plan and Be Prepared

Totally have the hyena song from Lion King in my head now! “Be prepaaaaared!”

No, but seriously, be prepared. Sometimes a food market stall pays off – BIG time! But be realistic – it probably won’t go well every single time. And that’s completely fine 🙂 Don’t be discouraged or take it personally. There are things you can put in place so that you at least don’t make a loss.

food market | food market stall | baking business tips | baking business from home

My first market fail I didn’t plan for at all. It was a random market a friend recommended to me, but it turned out to be a copycat of the ACTUAL market! The attendance was like 100 on the craft exhibition day (day 1), so my friend warned me to not bother going to the Food day (day 2).

I was mortified. I had baked 120 cupcakes. They even came out better than they ever had before. And now they had nowhere to go.

Because I had no back-up plan, I had to sell my goods at a cheaper price to friends and family. They were very sympathetic and supportive, but I felt quite sheepish about it all. It wasn’t fun.

Since then, I’ve made the decision to only sell brownies at markets, because I sell these to coffee shops as well. If I fail to sell all of them at my food market stalls, the coffee shops are more than happy to buy them from me.

Brownies also have a longer shelf life, which means the coffee shops are not getting a reduced quality product from me. This strategy has been a great safety net.

Another back-up plan that has worked really well is to have a network of loyal supporters of your Home Bakery. I’ve built up a very loyal client base that I’ve turned to a few times post market.

There was one incident where I had almost 400 BROWNIES left over (long story) and with a lot of communication and GRACE, I was blessed to sell all of them! Sell the left overs at a very special, “limited offer” price – this helps too.

5. “Increasing Brand Awareness” Doesn’t Happen at Food Markets

Yes, yes. I know I’m being TOTALLY controversial here.

…Please put down your pitchfork for a second and hear me out…

Food Market organizers are good sales people. Fact. They will try to convince you that their food market is what your business has been missing! They insist that their food market will open doors for you, increase your brand awareness and client base.

This does not happen.

Don’t do a food market for marketing purposes. Do it for sales only.

This might be contrary to popular opinions, but out of the 7 different markets I’ve participated in 22 times, this “sales pitch” from market organizers has been proven to be totally void.

Selling home baked goods at my local Food Markets has been super beneficial for my Home Bakery Business! lt's been a great opportunity to make sales, gain experience and grow my home based cake business. After 22 markets, I've discovered some KEY tips that can make your stall a great success or failure. Here are 5 key things you need to know about selling your home baked goods at a food market stall. #homebakery #cakebusiness #foodmarket #cupcakebusiness #bakingbusiness

People attend food markets to unwind, have a good time and consume stuff. They view you as a cute shelf in a grocery store, not a service provider. Just give them what they need at that point in time – which is the super tasty brownie and a genuine smile.

They’re already buying something from you, don’t force a sales pitch for your services in their face. They don’t care. They just want the brownie, so give it to them. I’ve wasted hundreds of business cards and 20 000 kilo Watts of energy selling what food market peeps aren’t looking for.

What I’ve learned: There are other, amazing ways of increasing brand awareness for your home bakery and a food market is not the place for it. SELL YOUR PRODUCTS YOU HAVE AT THE MARKET, AND SELL THEM WELL. Make this the focus and motivation for your food market stalls.

6. The Enchantment of Novelty

It may happen that your Food Market Stalls start off with a crazy amount of sales, but as time goes by it loses its “new smell”. Your bakes might still be amazing, but they’re not NEW anymore. All humans like NEW things. They carry an enchantment and excitement!

“New” is a novelty.

So, how do you combat this psychological phenomenon? YOU KEEP THINGS INTERESTING. Every time, bring an element of “new” to your Food Market Stalls.

Here’s what I did:

I sold different flavours of brownies – 5 different flavours in total. But ONE of these brownie flavours was ALWAYS a surprize! It was a “limited edition” brownie. It would only be made ONCE, and sold ONLY at the market.

This added major excitement and exclusivity. It worked SO well. Because the regulars at the market always had something NEW to try.

While we are talking about Novelty, it is important to mention that the whole Food Market might lose it’s “new” smell.

People are always keen to check out a new market and the Novelty stamp is ALL over it. Over time though, the attendance may decline if the Food Market organizers aren’t doing anything to KEEP THINGS INTERESTING.

Food Markets (just like your stall) can seriously lose their “new” smell as well.

If you find yourself trading at such a Food Market; have a chat with the organizers. They might be open to your suggestions to create some excitement at the Food Market. Be it a live band, or a contest of some sort…

If they want to keep everything the same, it may be in your best interest to move on when attendance dries up too much.

And that is it! 

I’m curious; Have you ever had a food market stall?

How did it go?

What was your biggest challenge/success/disappointment?

Chat soon!

Aurelia 🙂

Plan your Home/Micro Bakery in 1 afternoon. Download this free Home/Micro Bakery Business Plan template to start turning your passion for baking into an income.

Got a question? Something to add? Let’s chat in the comments section down below! (I respond to every single comment)

168 Shares

Electric Hand Mixer Shopping Guide – 6 PRO Tips!

Electric Hand Mixer Shopping Guide – 6 PRO Tips!

Electric Hand Mixer Shopping Guide – 6 PRO Tips!

A few years back I considered Standing Mixers to be the bee’s knees of baking appliances in the baking world…

To me, electric hand mixers felt like the poor unfortunate cousins of Standing Mixers that are constantly longing for the day they might evolve into standing mixers.

I thought “if I could just get a Standing Mixer, I will never need a Hand Mixer ever again!”, right?

Wrong!

Hand Mixers are LEGIT and there are some jobs that a Hand Mixer can do 10 times better than a standing mixer.

>> They give you so much control!

Another perk is that the tedious “scrape down the paddle & bowl” sessions are so much less with a hand mixer! I insist on making my Ultimate Chocolate Frosting with a hand mixer.

In a standing mixer it turns out lumpy and takes 3 times as long.

I’ve gone through my share of hand mixers as a full time baker. Some were amazing and some of them frustrated me a lot.

I’ve also decided to flex my I-actually-have-an-architecture-degree-and-can-draw muscles this week! Yay!

The sketches should help you understand what I mean. I hope you enjoy my little, super technical, super beautiful sketches. I’ve even framed them like the pro doodlers do these days.

*HINT* There’s a bonus tip #7 at the end of the post 😉

Please note: This post contains affiliate links, meaning I get a small commission if you end up buying one of these products – but it’s at no extra cost to you. I believe each one of them is the best value for money. I’m proud to recommend these tools to you because I know they’ll enhance your baking life at the most affordable rate possible.


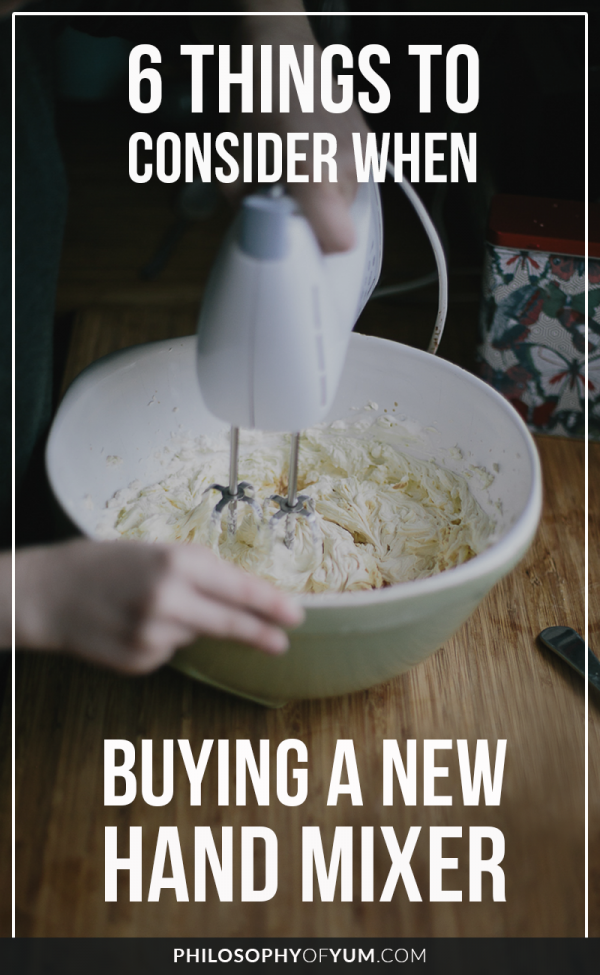
Here are 6 key things to consider when you’re buying a Hand Mixer

baking tips | baking tips and tricks | hand mixer | kitchen equipment


1. The Base of the Hand Mixer

By this I mean the side of the Hand Mixer you put down on the counter when you’re not using it. If the base is too small, the Hand Mixer will keep toppling over time and time again! It can become blindingly frustrating.

Be sure to buy one that doesn’t have crazy curves or rounded edges toward the base. It’s best when the body shape of the mixer goes straight down into a completely flat surface.

Some designers often try to be cute and add a creative little arch below the base of the mixer. It’s so impractical. A slight variation from a completely flat surface might not have too drastic implications.

The best way is to test it.

Put the mixer on a flat surface and test its stability by pushing it with varied amounts of force. This is a technical way of saying “poke the mixer”! Lol! If it falls over easily, I would recommend that you keep shopping.

The stability of the base also includes the angle at which the power cord comes out of the hand mixer.

Might seem futile, but if the angle is too steep it compromises the stability of the mixer in a standing position. Make sure that the cord doesn’t interfere with the stability.


2. The Shape of the Beaters

Beater attachments are just beater attachments, right?

I’ve come to see that there’s a whole lot more to it!

My dear husband bought us a new fridge last year. He knew I was in dire need of a new hand mixer. I’m super particular about the appliances I buy and he knows this.

The sales lady at the appliance store highly recommended a Bosch Hand Mixer and made him an offer he couldn’t refuse.

I was so skeptical about his impulsive buy, but it’s turned out to be one of the best hand mixers I’ve ever had. It meets a lot of other criteria, but the main reason I love this hand mixer so much is because of the unique little twist in the beater attachments.

These boys whip things up in at least 30% less time! It’s amazing! I assume that the slight twist agitates the ingredients just that much more during beating, speeding up the creaming/whipping process.

This little edge has saved me so much time over the past year!

Please note that this feature is NOT essential, it’s just a super handy “nice to have”.

I know Bosch Hand Mixers aren’t available everywhere, so don’t worry too much if you can’t get one. There are plenty of other AMAZING hand mixers available! I’ll give you my verdict right at the end of the post 🙂


3. The Weight of the Hand Mixer

Have you ever made 7 minute frosting?

Or a batter that needs to be beaten for 5 minutes?

Even the lightest hand mixer can feel like lead after about 2 minutes.

On the flip side, it also doesn’t help if you get a super light Hand Mixer that falls over when you just look at it. I know I’m exaggerating, but we’ve all had an el-cheapo that falls over like 5-10 times a day.

Not fun.

Especially when there’s batter on the beaters and now it’s all over the counter. *Sigh of note!*

To me, the ideal weight of a hand mixer should be about 680 g (1,5 lbs) without any attachments. You can still go down to 650 g, but anything lighter than that becomes a bit too flimsy.

The weight of a hand mixer is not necessarily on the box, so be sure to take your scale with so that you can weigh it in the store! It may be nerdy, but it’s also kind of hard core when you think about it. Oh yeah. You know it.


4. Watts of the Hand Mixer

You get some powerful hand mixers on the market, but we’re not planning to use it to propel us across the ocean.

On the flipside, you do want a rather powerful mixer that will get the job done, and get it done well.

I recently watched a YouTube video by Cupcake Jemma where they reviewed different Standing Mixers. What an eye opener! Turns out higher watts does NOT mean it’s a higher quality mixer! Click here to watch the whole video.

The Watts refers to how much power goes INTO your mixer, not how much comes OUT! A lower watt mixer often means that the gears inside your hand mixer are of a higher quality, so they need LESS watts to operate.

So higher watts does NOT mean higher quality!

In my experience, 350 Watts is ideal for a hand mixer. But ultimately, it’s your decision here. 350 Watts has just worked the best for me so far.


5. Speed Settings of the Hand Mixer

A turbo speed option is not essential. My current hand mixer doesn’t have one and I honestly haven’t missed it for a second.

In fact it’s actually more important that the slow speeds on your mixer are in fact SLOW. I’ve had 2 hand mixers where the so called “slowest speed” was actually really fast! Try to test this in store if they allow you to.


6. Price of the Hand Mixer

Have you watched “Midnight in Paris”? Rachel McAdams’s mother says on a few occasions “You get what you pay for. Cheap is cheap!”.

I really don’t feel that’s true.

Some famous brands have these stunning hand mixers, but they are so heavy and unpractical. Very strange, but true.

Price does not equal quality when it comes to buying a hand mixer. Specs equal the quality of the hand mixer.


7. Spinning Direction of the Beaters

This point is super important. Generally, we beat things with a hand mixer to incorporate air. Thus it is KEY for the ingredients to be forced to work against gravity i.e. starting at the bottom and ending at the top.

For this to be accomplished, the spinning direction should spin from the inside out, forcing ingredients UP.

If the spinning direction is from the outside in, then the ingredients are being forced DOWN resulting in less air in the mixture.

What you hold the hand mixer out in front of you like a drill, you want the beater on the left to spin anti-clockwise and the beater on the right to spin clockwise.


Summary + My Recommended Hand Mixers

  1. Check the standing stability of the hand mixer you are considering. Do not compromise on this. Seriously. You can compromise on any of the other points, but not this one.
  2. Try to get a mixer with twisted beater attachments to save you whipping time. (This is not essential, it’s just a nice bonus)
  3. Higher Watts does NOT equal higher quality! Often lower Watts indicates better gears on the inside of sa hand mixer. 350 Watts is ideal in my experience.
  4. Get a hand mixer that isn’t too heavy. 680 g (1,5 lbs) is perfect.
  5. Don’t go for pretty, go for practical. You will use this hand mixer almost every day. Pretty is a bonus. Pretty hand mixers from famous brands will also cost you a whole lot more.
  6. Always read the specs of the appliance and decide according to that. Base your decision on the facts, not the brand name!
  7. Check the spinning direction of the beaters – it should be from the inside out.
  8. Don’t be too idealistic. Sometimes you’ll have to settle. What’s the best value you can get for your money? As long as your mixer has great standing stability, you should be fine.


Here are 3 options for hand mixers (each the best in their price range) to accommodate your budget:

BUDGET PRICE RANGE: Hamilton Beach 6 Speed Mixer (around US$20)


INTERMDIATE PRICE RANGE: Cuisinaid Hand Mixer (around US$40-$50)

Image Source: Amazon.com


PREMIUM PRICE RANGE: KitchenAid Cordless Hand Mixer (around US$100)

Image Source: Amazon.com


And that’s it!

I hope this post has shed some light on the process of buying a hand mixer.

Have fun when you whip out your digital scale in the store to weigh the prospective hand mixer. Make sure you are wearing shades at the time and playing “Bad to the Bone” in the background 😀

Chat soon

Aurelia 🙂

Plan your Home/Micro Bakery in 1 afternoon. Download this free Home/Micro Bakery Business Plan template to start turning your passion for baking into an income.

Got a question? Something to add? Let’s chat in the comments section down below! (I respond to every single comment)
28 Shares
X