How to Make Caramelized Cheesecake Shards

How to Make Caramelized Cheesecake Shards

Caramelized Cheesecake Shards are a thing, yes… sort of. Well, I guess I’m the first person doing it, so IF it becomes a “thing” – remember you heard it here first 😉

What are Caramelized Cheesecake Shards?

They are thin discs of cheesecake that have been baked in the oven until they are golden brown around the edges. Think of them as thin cheesecake cookies made from cheesecake batter.

How Did They Originate?

The idea for this creation was a number of factors really.

First of all, I am an artisan baker insisting on using ONLY delicious ingredients as decorations and ZERO FONDANT, buttercream ornaments, modelling chocolate or gum-paste.

Chocolate shavings and nuts make great cake decorations, but you can’t really put them on every single cake.

Doing so makes your menu look a tad monotone eventually, which is why I’m always looking for new, TASTY decoration ideas.


There’s an absolutely delectable muffin I’ve been baking for coffee shops in particular for 5 and a half years now – Pumpkin & Cream Cheese Muffins.

This is not a “new” idea, I mean the basic recipe idea has been around for years, BUT I created my own spin on the cream cheese filling. It’s not just made up of cream cheese, but rather a type of cheesecake mixture – without any eggs.

When these muffins bake, this filling tends to ooze out a bit onto the baking tray below. These blobs obviously get exposed to more heat from the oven and the direct contact with the baking tray makes it cook faster and caramelize.

Over time I even started overfilling these muffins “by accident” so that more filling would bake out and I would have more caramelized cheesecake bits to feast on! SO YUMMY!


The most DELICIOUS cake decorating trend is on the rise! Caramelized cheesecake shards are easy cake decorations to make and taste AMAZING! Click through for the recipe and tips. #cakedecorating #cakedecoratingideas #cakedecoratingtips


After about 4 and a half years of full time baking, I decided I want to make a cake full of the stuff that I LOVE.

This included a proper, soft, moist, super flavourful vanilla cake (recipe in resource library) with my ultimate vanilla frosting, salted caramel, a little bit of chocolate ganache and these caramelized cheesecake bits that I just could not get enough of!

I made the cheesecake mixture as usual, except this time I added a bit of egg to help with the post-baked stability.

I smeared thin circles of it onto a WELL greased baking tray, baked it until deeply golden around the edges and there it was.

I’m now using these caramelized cheesecake shards as flavourful decorations on 3 different cakes in my home bakery.

I’ve even added sprinkles on top of the cheesecake circles before they go in the oven to create fun fetti caramelized cheesecake shards!

Although they are crisp for the first few hours after baking, they will lose that crunch quite soon. I do not see these shards as a “crunch” element in my bakes, but rather a flavour element. It also doesn’t hurt that they look super cool, right? 😉

How to make Caramelized Cheesecake Shards!

5.0 from 1 reviews
Caramelized Cheesecake Shards
 
Prep time
Cook time
Total time
 
Author:
Ingredients
  • 20 g Egg
  • 120 g Plain, non-aerated Cream Cheese (about 25% fat), COLD
  • ¾ tsp Vanilla Extract
  • 30 g Icing Sugar
Instructions
  1. Preheat your oven to 180°C/356°F.
  2. Beat the egg and cream cheese together in a medium sized bowl till completely smooth. Scrape down the sides of the bowl and beat again till smooth.
  3. Beat in the Icing Sugar and vanilla extract till completely combined. Set aside.
  4. Grease a large baking tray SUPER WELL with non-stick spray. Spread identical-ish blobs of the mixture out fairly thinly (about 2mm thickness) and evenly onto the bottom of the tin.
  5. Reduce oven temperature to 175°C/347°F and bake cheesecake mixture for around 30 mins. Keep an eye on it as it can catch and burn quite easily. Rotate the pan halfway through the baking time for more even caramelization.
  6. When the cheesecake shards are half golden brown and half white, they are done baking, remove them from the oven.
  7. Leave them to cool on the tray completely. Slide a knife underneath each disc of caramelized cheesecake to loosen it from the baking tray.
  8. Cut into shards as desired and use to decorate your cakes as desired! It’s so delicious that I even crumble it up between cake layers.


Thanks so much for reading! If you give this recipe a go, tag me @philosophyofyum so that I can see your work.

See you again soon

Aurelia 🙂

Got a question? Something to add? Let’s chat in the comments section down below! (I respond to every single comment)

Lemon Poppy Seed Blondies

Lemon Poppy Seed Blondies

Lemon Poppy Seed Blondies

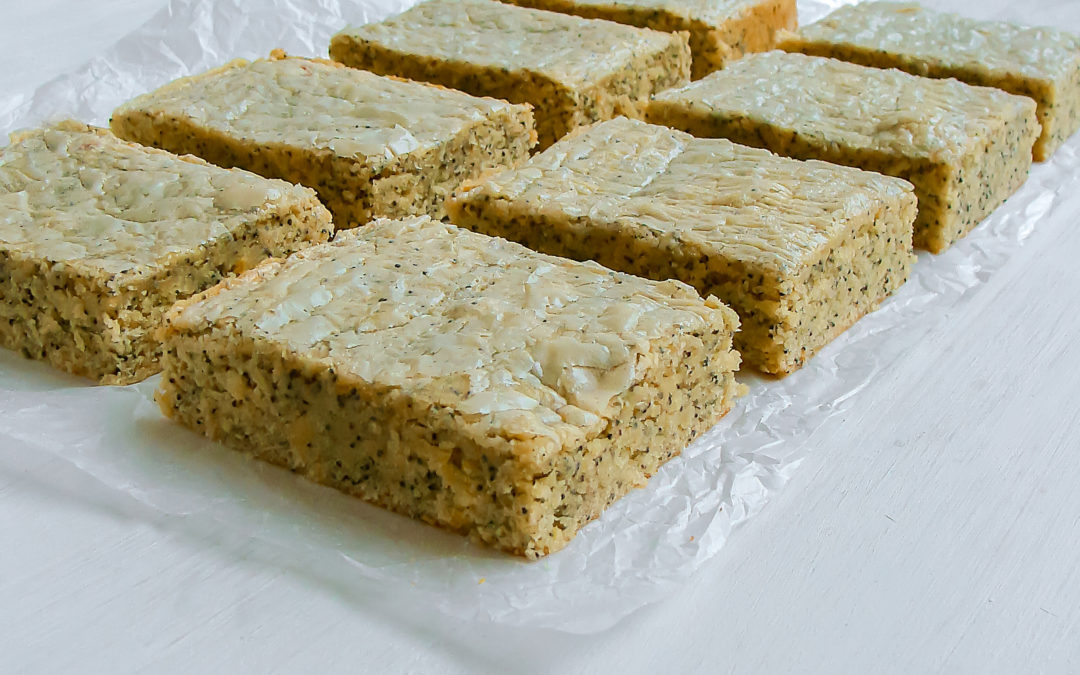
Lemon Poppy Seed Blondies is a recipe that just worked out brilliantly… It’s moments like these when life just feels AWESOME and it’s wonder & beauty just hits you afresh.

So I’m BEYOND excited to share this recipe with you today!

Now you’ve heard it said that “When life hands you lemons, make lemonade!But we bakers can go a bit beyond producing a drink, can’t we? 😉

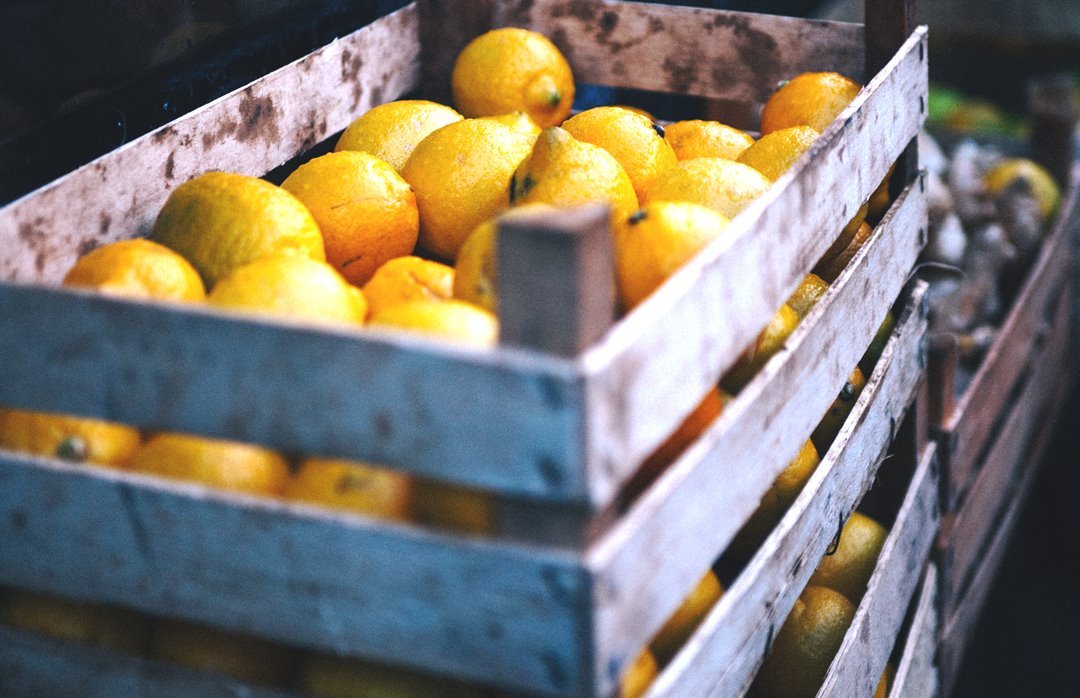
I got a bag of about 50 huge lemons from my friend Lorraine’s farm the other day! They were bright, super juicy, sweet, tart and perfect! After giving lemons away to most of my friends, I was still left with around 35 of them.

Making Lemonade or lemon bars was the obvious choice, but for some reason I just didn’t get excited about either of those ideas.


These Lemon Poppy Seed Blondies are fresh, chewy, zesty, zingy, buttery, juicy, hearty and creamy all in one bite – SUPER yum and satisfying! And of course, no fake lemon flavourings in sight.

A flavour combo that came to mind was lemon & poppy seed. Then my mind jumped to these super delicious cupcakes I bake in my home bakery – Poppy Seed & White Chocolate Cupcakes.

I got the recipe for these cupcakes from a friend who has sworn me to secrecy, so I cannot share it with you. BUT the secret ingredient that makes those cupcakes SO GOOD is coconut 😀

Poppy Seed and coconut pairs brilliantly together and if you add something tart on top of that… the YUM factor is just UNREAL…

So my friend, when life hands you lemons, bake Lemon Poppy Seed Blondies!


Recipe Introduction

I’ve posted a recipe for Blondies once before on my blog, but those were Salted Caramel Apple Blondies. The apples in the recipe provide enough moisture to keep the blondie’s texture fudgy. Lemon Poppy Seed Blondies are a bit different though.

We don’t really want these guys to be cakey, so adding enough fat and moisture is essential for achieving the ideal blondie texture.

For this reason I add a lot of butter, white chocolate and also cream to the batter 🙂

I was also completely set on NOT USING ANY LEMON ESSENCE/EXTRACT in this recipe, but only FRESH lemons.

Adding fresh lemon juice as is to the batter would result in a very runny batter and I just couldn’t see that scenario playing out well… So I decided to reduce my freshly squeezed lemon juice! The only other thing left to do was to add a small mountain of finely chopped fresh lemon zest.


The kick of bright, zingy lemon comes through BEAUTIFULLY in these lemon poppy seed blondies!

With blondies there is always the concern that they will be too sweet. Brownies & blondies are basically cake with DOUBLE the FAT, double the SUGAR and no raising agents.

The bitterness of dark chocolate and cocoa powder masks the amount of sugar used in brownies, so what is there to absorb the sweetness in blondies?

The lemon zest provides some bitterness and the sharpness of the lemon cuts through a lot of the sweetness. BUT my recipe also uses a bit less sugar than blondies usually do. I’ve replaced some of the sugar with white chocolate and cream – which is not exactly second best, right?

As you know I’m all about FLAVOUR & QUALITY – not just a colossal mountain of sugar, because that’s how it’s “usually done”.

Lemon Poppy Seed Blondies: fresh, chewy, zesty, zingy, buttery, juicy, hearty and creamy all in one bite – SUPER yum and satisfying! And of course, no fake lemon flavourings in sight. #blondiesrecipe #lemonpoppy #lemonblondies


These Lemon Poppy Seed Blondies are fresh, chewy, zesty, zingy, buttery, juicy, hearty and creamy all in one bite – SUPER yum and satisfying! And of course, no fake lemon flavourings in sight.

Lemon Poppy Seed Blondies
 
Prep time
Cook time
Total time
 
Author:
Serves: 8
Ingredients
  • 100 g Unsalted Butter
  • 100 g Baking Margarine
  • 50 g Cream (about 33% fat)
  • 70 g White Chocolate, super finely chopped
  • 130 g White Sugar
  • 100 g Demerara Sugar/Soft brown sugar
  • 135 g Egg (2 x-large eggs + 1 yolk)
  • ½ Tbsp Vanilla Extract
  • 1 Tbsp Lemon Zest, finely chopped and packed tightly into the spoon
  • 60 ml Fresh Lemon Juice
  • 40 g Poppy Seeds
  • 45 g Desiccated Coconut
  • 200 g All Purpose Flour
  • 5 g Salt
Instructions
  1. Reduce the fresh lemon juice by two thirds on a low simmer. You should end up with 20 ml of reduced lemon juice.
  2. Sift flour and salt in a large bowl, set aside.
  3. Preheat your oven to 180°C/356°F.
  4. Melt butter, margarine and cream in a stand mixer mixing bowl in the microwave for 3 mins. It must boil before you continue.
  5. Stir in sugars and 50 g of the white chocolate. Microwave again for 30 seconds. Stir thoroughly and microwave once more for 30 seconds.
  6. Mix on medium speed with paddle attachment for about 30 seconds. The Sugars should stick to the paddle when you lift it up.
  7. Add eggs, lemon zest, reduced lemon juice, poppy seeds, coconut and vanilla. Stir until roughly combined.
  8. Add dry ingredients. Beat on low speed for 30 seconds. Stop mixer and scrape down the sides of the bowl with a spatula. Beat batter on medium speed for 2 minutes.
  9. Scrape batter into a greased and lined 27 cm x 16 cm (or 8 x 8 inch) pan. Spread mix evenly into all the corners.
  10. Melt the reserved 20 g of finely chopped white chocolate in 30 seconds bursts in the microwave. Pour all over on the surface of the batter. Smear the top of the batter so that the melted chocolate is mixed thoroughly into the top surface of the batter leaving no streaks of chocolate behind – this forms the crust on top.
  11. Bake on top shelf at 180ᵒC for 20 - 25 mins, turning after 13 mins. They are done baking when a toothpick still has a few moist crumbs sticking to it. Do not over-bake these guys!
  12. Leave to cool in the tin, then remove and slice as desired.
  13. Enjoy!


I hope you’ll give these Lemon Poppy Seed Blondies a go! I AM IN LOOOOVE with them!! Which is something I don’t say very often.

Chat soon!

Aurelia

Got a question? Something to add? Let’s chat in the comments section down below! (I respond to every single comment)

Pear Cupcakes with Caramel & Hazelnuts

Pear Cupcakes with Caramel & Hazelnuts

Pear Cupcakes with Caramel & Hazelnuts

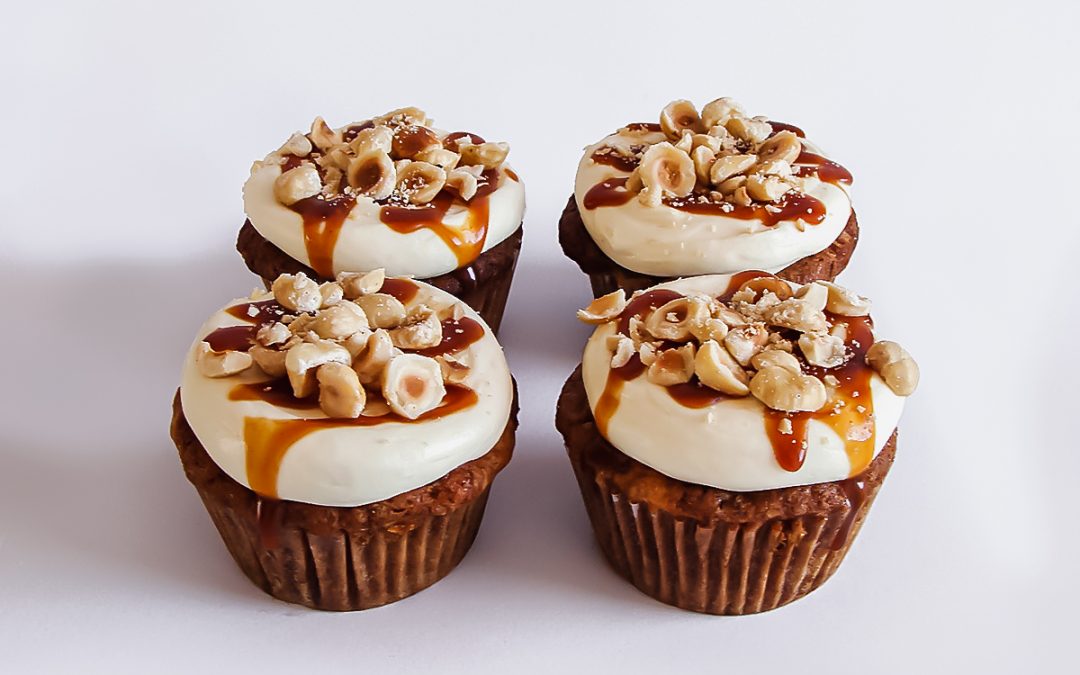
Pear Cupcakes with Caramel & Hazelnuts came into being thanks to one of my favourite clients here in Cape Town – Saa-rah Adams 😀

She is so cool! She and her family have ordered pretty much everything on my home bakery menu, TWICE! And sometimes when they order they’ll say the best line a baker wants to hear: “Surprize us!”

I actually baked Pear, Caramel & Hazelnut Cupcakes as a large cake for her, but today I would like to share the cupcake version. I love the cupcake version so much because there is more caramelization during baking which just makes the flavour SENSATIONAL!

Recipe Introduction

My Pear Cupcakes recipe is quite similar to German Apple Cake, in the sense that there’s no additional liquid added to the batter like milk, buttermilk, etc. All the liquid comes from the natural juices inside the fresh fruit.

For this reason the batter is really stiff when you mix it. It is more like something in between a batter and dough. DO NOT ADD ANY EXTRA LIQUID!

I know it is quite difficult to mix, but just take your time and “massage” the fresh pear into the batter with the back of a sturdy metal spoon. I once used a standard stainless steel dessert spoon to mix the pear into the batter and the thing bent over onto itself completely!

Another super important note is to have your cupcake pans ready and lined with cupcake cases BEFORE you mix the pear into the batter. I have a post on making your own cupcake cases as well.

The reason behind this is that the sugar inside the batter starts to draw out the pear’s natural juices very quickly. If these juices are stirred about into the batter, the caramelization of the cupcakes seriously decreases! By about as much as 30% I’d say.

The texture of the crumb is also then just all wrong and the pear pieces inside the batter are less pronounced. Bottom line, DO NOT LET THIS BATTER STAND, but scoop it into the cupcake cases immediately.

Since the batter is stiff, it is a bit more difficult to spoon into cases. Press the pear cupcakes batter in firmly and fill the cases right to the very top! The filled cases should be more or less level with the rims of the cupcake pan.

A Note on Pears

I like to use Bosc Pears. I have used different varieties of pear for this recipe as well with great success. Bosc Pears are just bigger, so there’s less peeling to do! Lol!

Whichever pears you use, just make sure they are NOT SOFT! In other words, they should be slightly under ripe.

Super ripe pears will just disintegrate entirely in this recipe, and you don’t want that. The pear flavour is more pronounced in the pear cupcakes when you bite into plenty little jewels of pear in every bite.

The pear pieces will spend 40 minutes in the oven, so they will end up being soft in the final taste experience.

These Pear Cupcakes are SO GOOOD! In one bite you get: crispy, chewy, fresh, smooth, depth and crunch. These Pear Cupcakes are just the quintessence of autumn to me and I absolutely adore them! Topped with Cream Cheese Frosting, salted caramel & hazelnuts - YUM! #pearcake #pearcupcakes #pearcaramel #fallrecipes


What Makes These Pear Cupcakes so Good?

They are SO SCRUMMY! They have a deep and even slightly crispy caramelization on top and a super moist, crazy flavourful interior. Paired with Philosophy of Yum Whipped Cream Cream-Cheese Frosting, salted caramel & Toasted Hazelnuts the YUM factor is taken even further.

In one bite you get: crispy, chewy, fresh, smooth, depth and crunch. These Pear Cupcakes are just the quintessence of autumn to me and I absolutely adore them! And you know I don’t say anything like this very often!

Pear Cupcakes with Caramel & Hazelnuts
 
Prep time
Cook time
Total time
 
Author:
Serves: 14
Ingredients
Instructions
  1. Preheat oven to 350°F/180°C.
  2. Line 14 cupcake tin holes with cupcake liners/cases.
  3. In a mixing bowl; beat oil and eggs with an electric mixer until smooth and creamy. Add the sugar and vanilla and stir well.
  4. Sift the flour, salt, bicarbonate of soda and ground cinnamon together in a bowl.
  5. Stir the dry ingredients into the egg mixture with a sturdy metal spoon until well combined. The batter will be very thick.
  6. Add chopped pears to the batter. Press and fold the pears into the batter. The batter will be super thick, BUT DO NOT ADD ANY EXTRA LIQUID!
  7. DO NOT LET THIS BATTER STAND, but scoop it into the cupcake cases immediately. Since the batter is stiff, it is a bit more difficult to spoon into cases. Press the batter in firmly and fill the cases right to the very top! The filled cases should be almost level with the rims of the cupcake pan.
  8. Bake at 350 degrees F (180 degrees C) for 35 - 45 minutes or until they have a uniform dark golden colour. I really prefer to leave them in longer so that they caramelize a bit more. The flavour is just sensational! There’s heaps of fresh pear inside the cupcakes, so there’s no danger of them drying out.
  9. Leave cupcakes to cool in the tin.
  10. Once the cupcakes are cool, frost them with Philosophy of Yum Vanilla Frosting, drizzle with Salted Caramel and finish with a generous sprinkle the toasted chopped hazelnuts.
  11. Enjoy! Yummm!


If you give this recipe a go, tag me on facebook, twitter or instagram #philosophyofyum because I would LOVE to see!

Chat soon

Aurelia 🙂

Got a question? Something to add? Let’s chat in the comments section down below! (I respond to every single comment)

How to Make ANY Cake/Cupcake Recipe Gluten Free

How to Make ANY Cake/Cupcake Recipe Gluten Free

Make ANY Cake/Cupcake Recipe Gluten Free

Gluten Free Baking was such a challenging fete a few years ago, but today it’s a totally different story! There are so many gluten free flours available in most grocery stores nowadays.

And with the research of some amazing food bloggers like Art of Gluten Free Baking, Gluten Free on a Shoestring and more, gluten free ANYTHING is possible!

In my own Home Bakery, all my cakes and cupcakes are available in gluten free. This is not because I “saw a gap in the market” or anything, it’s rather because my husband, Adriaan, is highly intolerant to gluten.

I firmly believe that no home baker should try and sell anything they don’t believe in. Not so much because it’s inconsistent, but honestly, it just doesn’t work.

You can market products till you pass out, but if you don’t LOVE your products and really believe in the motivation behind baking them, you will literally not be able to sell them. Not nearly enough of them anyway.

There I go again, throwing in baking business advice. Back to the gluten free chat!


Gluten Free, But Also Lazy

The biggest problem I found with gluten free baking when I started exploring it, was that I needed to use a whole new recipe every time I wanted to bake something gluten free.

In other words, I couldn’t just use my favourite Carrot Cupcake Recipe, I had to go search for a gluten free carrot cupcake recipe – and even then there was no guarantee that the recipe would be up to scratch.

Having a Home Bakery is quite a high paced job, so I mostly memorize my recipes so that my baking process is much faster. The idea of memorizing DOUBLE the recipes because of a whole gluten free repertoire was just WAY too exhausting to even consider!!

I’ve quoted my wise (and unconventional) dad on this before in my How to Freeze Crème Pat post, but he always said:

“If you want to be lazy, you have to be clever!”

There simply had to be a gluten free flour blend you can sub into ANY regular cake or cupcake recipes.

On top of that, MANY gluten free cake recipes are severely annoying. They ask for these crazy ingredients which I’ve never seen before in my life and still have not found in any supermarket or health food store in my area.

Things like Ultratex, Expandex and Whey Protein Isolate… What?! Or should I say “Gezuntheid”?

Step by step instructions to help you make literally ANY cake or cupcake recipe Gluten Free. Includes recipe for the best gluten free cake flour you can make at home! No need to hunt for special, gluten free recipes anymore. Just your favourite recipes and substitute in this gluten free flour blend :) #glutenfreebaking #glutenfreecake #glutenfreeflour #glutenfreecupcakes

I’ve been on a mission to find something that could be made with ingredients that are available to me and can easily be mixed with no special equipment or effort.

So I came up with my own gluten free cake flour blend that has changed everything for my husband! I also started using this gluten free cake flour in my own bakery for all gluten free cakes and cupcakes. The POY gluten free flour blend yields such a soft and tender crumb!

And I love that I can find ALL of these ingredients in my closest health store/supermarket!

This gluten free flour can be substituted gram for gram in ANY cake and cupcake recipe!

I mix 1 kg of flour in a little sealed bucket and keep it in my cupboard to whip out whenever I need it. You are welcome to halve or quarter the recipe if you need to. I go by grams because the accuracy is just better when it comes to dry ingredients.


Not All Cake Recipes Are Created Equal

The worst mistake we can make as bakers is to assume that all cake and cupcake recipes should be treated the same way. I did a thorough post on Baking Perfect Cupcakes a while back where I also stress this fact.

Butter based recipes respond completely different to mixing than oil based recipes. Butter based cake/cupcake recipes can be overmixed so much faster than oil based recipes and this is amplified severely when you use gluten free flour.


Subbing With POY Gluten Free Flour Blend

I love to use my own gluten free flour blend because it works PERFECTLY in all cake and cupcake recipes.

And here’s a super important tip for the subbing process: Go By Weight and Not Volume!

I never, ever, EEEEVERRRR use cup measurements for dry ingredients. EVER. Wet ingredients, absolutely, but not dry ingredients. The reason why is because cup measurements leave way too much room for error. A loosely poured cup of flour weighs about 150 g, but a scooped cup of flour can weigh up to 190 g!

If a recipe does not provide weight measurements, I like to assume I should use 170 g per cup which is in the middle. This has always worked for me 🙂


Mixing Technique for Butter Based Recipes

Cream your butter and sugar as you normally would. Beat in the eggs and vanilla extract as you normally would.

When you add the gluten free flour (remember to use exactly the same weight as regular cake flour the recipe calls for) and milk/buttermilk, be careful how you stir and how much you stir.

Gluten free flour in butter based batters, gets overmixed really quickly. Overmixed gluten free cake batter will feel very stiff when you stir it and will result in small and tough cupcakes once baked.

For this reason, I incorporate my gluten free flour and milk/buttermilk on the slowest stir speed with my hand mixer – not with a stand mixer – for about 10 seconds which gives me more control and eliminates the danger of overmixing. If your hand mixer does not have a super slow stir speed, stir super gently, by hand, with a balloon whisk.

When I can’t see any more flour, I then go in with my rubber spatula. Use the spatula to scrape and fold all the eggy butter at the bottom of the bowl into the thicker batter on top. Keep folding gently and scraping the bowl till the batter looks uniform in texture.

Then you may proceed to fill your cupcake liners or cake pans. You can read more about perfect batter distributing techniques in my post Baking Perfect Cupcakes – Advanced Tips 🙂

Just remember to NEVER stir a butter based gluten free batter vigorously.

There are some butter based recipes out there that instruct you to beat the batter after the flour has been added. This is often done to give the cake’s texture a little bit more density and some chewiness. BUT, ignore this is you sub gluten free flour into the recipe. It just flops entirely and you end up with gluten free bricks that no one wants to eat.

(No weird ingredients!) Use this simple gluten free flour blend in all your favourite cake and cupcake recipes! No need to keep hunting endlessly for the ideal gluten free baking recipes. Just sub this gluten free cake flour in - gram for gram. #glutenfreeflour #glutenfreebaking #glutenfreecake #glutenfreecupcakes


Mixing Technique for Oil Based Recipes

Great news is that oil based batters are WAY more forgiving! Score! Whether you are mixing carrot cake, chocolate cake or red velvet cake, you don’t need to be as careful as you are with butter based gluten free batters.

This being said, I still wouldn’t mix it a lot unless the recipe states that you should do so. My Chocolate Cupcake Recipe, for example, requires you to mix the batter on medium speed for 2 minutes before adding boiling water. Since this is an oil based recipe, I do beat the batter for the required time even when I sub gluten free flour and they turn out great!


Baking Technique

When you sub POY Gluten Free Flour blend in a regular recipe, please note that your goods will bake a lot faster than when you use regular flour. It’s hard to say how much faster because it all depends on your oven. For me it’s usually about 10%-15% faster. Rather start testing your cake or cupcakes sooner to avoid over baking.


Subbing Beyond Cakes & Cupcakes

In our home we like to use this gluten free flour blend in Shortcrust Pastry, Cheesecake Pastry and Fresh Pasta too! It produces a gluten free pasta we can even roll out in our pasta machine – so rad!

Important note: This flour recipe is not ideal for making bread or brownies, but I do have an Ultimate Gluten Free Brownie Recipe.


If you have any more questions on substituting gluten free flour in regular cake/cupcake recipes, please comment below and I’ll be happy to answer them 🙂

Chat soon!

Aurelia 🙂

Got a question? Something to add? Let’s chat in the comments section down below! (I respond to every single comment)

Ultimate Carrot Cupcakes Recipe

Ultimate Carrot Cupcakes Recipe

Ultimate Carrot Cupcakes

The ultimate carrot cupcakes are not simply a carrot cake recipe poured into cupcake liners. It’s much more sensitive and complex than that for several reasons.

When you use a regular carrot cake recipe to bake cupcakes, the texture typically ends up being too dense for a cupcake.

Another problem is that cupcakes bake for a shorter period of time than a large cake, so that deep caramelization flavour is lost. Which is definitely not okay! That caramelised, slightly chewy top is the BEST part.


Flavour Comes First

When I speak of Carrot Cake, I’m NOT talking about those “carrot cakes” that are basically just a vanilla sponge with shredded carrot inside. That is not proper Carrot Cake. It is carrot flavoured Vanilla Cake. If it were a song, it would be “itsy bitsy spider”.

Proper Carrot Cake is much deeper and darker, with such a dynamic flavour and texture. If it were a song, it would be “O sole Mio”. EPIC. Unique. Gutsy. Excellence. (And yes, I’m listening to O sole mio as I write this post 🙂 There’s an AMAZING version where Pavarotti sings it with Bryan Adams – so stunning!)

This ultimate carrot cupcakes recipe is made with golden syrup, dark brown sugar and molasses, so it is absolutely brimming with caramel-ly depth!

The Texture

When I eat carrot cake as a slice of cake, the texture should absolutely be a bit denser than a sponge cake.

However, when I eat carrot cake in cupcake form it has to be just as moist and flavourful, BUT also LIGHT. Heavy cupcakes are just not pleasant…

So this recipe perfectly captures ALL the stunning texture of regular carrot cake, but also with a light, tender and super moist crumb – as a cupcake should be.

The way you prepare the carrots for your ultimate carrot cupcakes is key. Do not shred/grate them too finely. If you grate them too fine, they will just disappear into the batter and be less prominent in the final flavour experience.

Another reason to not grate the carrots too fine is because it leaves more surface area for the batter to react with the carrots. The batter contains sugar and salt which draws the moisture out of the carrots.

So IF you grate the carrots too fine, they react with the batter much faster, drawing moisture out of the carrots much faster and leaving you with a very runny batter in a matter of minutes.

This makes all your lovely raisins, pineapple etc. sink to the bottom when baking. So to avoid this, rather grate your carrots coarser.


As for all the extras beyond carrots, I like to use raisins, crushed pineapple plus toasted pecans.

I know that walnuts are more traditional in carrot cake, but the toasted pecans completely outshine walnuts in this instance.


These are seriously the ULTIMATE Carrot Cupcakes. Deep, gutsy, EPIC flavour, but with a light, moist and tender crumb. Topped with the best cream cheese frosting ever and toasted pecan nuts. SO YUM! #carrotcake #carrotcupcakes #carrotcakerecipe #bestcarrotcake


The Frosting

As you may know by now, I make no secret of my disdain for traditional buttercream and even cream cheese frosting as well, because they are TOO SWEET.

Frosting is supposed to CONTRIBUTE to the flavour experience, not just round off the visual presentation of cupcakes.

Philosophy of Yum Cream Cheese Frosting is balanced and DELICIOUS and it pairs perfectly with these ultimate carrot cupcakes 🙂

These are seriously the Ultimate Carrot Cupcakes. Deep, gutsy, EPIC flavour, but with a light, moist and tender crumb. Topped with the best cream cheese frosting ever and toasted pecan nuts. SO YUM!

So here we go – my recipe for the Ultimate Carrot Cupcakes!

5.0 from 2 reviews
Ultimate Carrot Cupcakes
 
Prep time
Cook time
Total time
 
Author:
Serves: 15
Ingredients
  • 230 g Flour
  • ¾ tsp Baking powder
  • 1 ¼ tsp Bicarbonate of soda
  • ½ Tbsp Cinnamon
  • ¼ tsp Ginger
  • 1 tsp Salt
  • 130 g Eggs
  • ½ T Vanilla Extract
  • 65 g White Granulated Sugar
  • 100 g Demerara Sugar
  • 130 g Canola Oil
  • 70 g Golden Syrup
  • 15 g Molasses
  • 40 g raisins
  • 270 g grated Carrots
  • 100 g Crushed Pineapple, scooped with juice
  • 100 g Toasted Pecans
Instructions
  1. Preheat oven to 180°C/356°F.
  2. Sift together the flour, baking powder, bicarbonate of soda, spices and salt in a large bowl. Set aside.
  3. In a large mixing bowl, place the eggs, oil, vanilla, white sugar, demerara sugar, golden syrup and molasses. Whisk together with a hand mixer on high speed for 90 seconds. It should be pale and almost doubled in volume.
  4. Fold dry ingredients into the wet ingredients using a large metal spoon.
  5. Add the grated carrot, raisins and crushed pineapple to the bowl and fold in. Be sure to mix everything together thoroughly as the fresh carrot can often hide together in little huddles in the batter.
  6. Proceed to fill the lined cupcake tins immediately. Do not let the batter stand. Divide the batter evenly between 15 lined cupcake tin holes. I like to first fill each liner halfway, stir the remaining batter again, and then fill the liners the rest of the way so that the first 5 cupcakes don't get all the extra bits and the last few cupcakes just get batter with no raisins, pineapple, etc.
  7. Bake at 180ᵒC/356°F for about 25 mins, rotating the tins halfway through baking. The cupcakes should be a deep golden brown. Also test the cupcakes with a toothpick – if the toothpick comes out clean, the cupcakes are done.
  8. Leave to cool in the tins. Once completely cold, remove from tins.
  9. Make Philosophy of Yum Cream Cheese Frosting. Pipe onto cupcakes as desired and sprinkle the remainder of the chopped pecans generously on top. Enjoy!


If you give this recipe a go, tag me on Facebook, twitter or Instagram @philosophyofyum because I would LOVE to see!

Chat soon

Aurelia 🙂

Got a question? Something to add? Let’s chat in the comments section down below! (I respond to every single comment)

The Most DELICIOUS, Ultimate Vanilla Frosting

The Most DELICIOUS, Ultimate Vanilla Frosting

The Most DELICIOUS, Ultimate Vanilla Frosting

This Ultimate Vanilla Frosting Recipe is THE MAIN reason my clients LOVE my cakes so much…

It’s unique and FREAKIN’ DELICIOUS.

I know buttercream is the “standard frosting” out there, but it does not deserve to be. Its overwhelming sweetness actually DETRACTS from the beautiful flavour of a GOOD cake. 

I know there are some yummy buttercream recipes out there – like Magnolia Bakery’s famous frosting – but once you’ve tried this Philosophy of Yum frosting recipe, there will be a whole new standard of yum for you.

So today I’m asking you to please be open-minded.

low sugar frosting | low sugar frosting vanilla | most delicious frosting | alternative to buttercream frosting


This recipe is my Home Bakery’s SIGNATURE Frosting. It’s my GO-TO recipe I use every single day. I use this vanilla version or the chocolate frosting version on ALL my cakes & cupcakes.

It goes with EVERY CAKE FLAVOUR known to man. And not only does it “go with it”, it elevates it to a whole new dimension of bliss!

ALL my Home Bakery clients go gaga over this low sugar frosting, because it has so much flavour and it’s gloriously luxurious and smooth.

Please note that Philosophy of Yum frosting has a higher water content than buttercream or ganache, so if you place a high sugar item on top of it, it will melt into this frosting. This means fondant and sugar candies. But chocolate is A-OK 🙂

For classic cakes, cupcakes, naked frosting, semi-naked frosting, layered cakes, covering cakes etc. this frosting is absolutely perfect! It’s an honest frosting and it is honestly ridiculously delicious!!

Ultimate Vanilla Frosting Development

I explain the whole journey in detail on my chocolate frosting post if you want to check it out. In a nutshell it goes like this:

As a child I could not stand frosting. I always scraped it off the cake because it was just TOO sweet. My mother is a dietitian and developed a lower sugar frosting for her carrot cake recipe. Now that frosting was DELICIOUS! It was, however, a bit too runny to pipe.

When the time came for me to start up my own Home Baking Business, I knew that I would need to come up with my own frosting recipe… And that the frosting would need to be SUPER YUM and lower in sugar so that it’s not too sweet.

I made a drastic decision to omit butter altogether from my recipe! *GASP!!* Since you need to add HEAPS of icing sugar to butter to get it to the right consistency, it’s just so not worth it.

I opted to use whipped cream instead because cream is just SO delicious! The whipped cream also makes the frosting so much lighter.

Because cream cheese and cream are already quite soft, there’s no need to add kilos and kilos of sugar to achieve the right consistency.

The result was just stunning… So smooth, so luxurious, SO YUMMY!!

You'll never want to eat buttercream again. Ultimate Vanilla Frosting elevates cake to a whole new dimension of YUM! It goes with EVERY CAKE FLAVOUR known to man. #deliciousfrosting #creamcheesefrosting #lowsugarfrosting


Reasons to make Philosophy of Yum Vanilla Frosting

* It is so flipping DELICIOUS!!! So delicious in fact that it makes you giggle, squirm and dance from the deliciousness.

* Philosophy of Yum Frosting contains a staggering 75% – 80% LESS SUGAR than any other frosting, but it’s completely sufficiently sweet enough. 

* It is actually a whole lot quicker and easier to make than buttercream or traditional cream cheese frosting.

* You don’t need a stand mixer to make this frosting! A simple electric hand mixer is ideal.

* Because there is no butter in my ultimate vanilla frosting, it is also 55% lower in fat than any other conventional frosting. What a bargain!!

* Extra perk: you can freeze this frosting! Say what?? Yes indeed. Let it thaw again in the fridge for about 2 hours and proceed to whip it GOOD. You are basically re-whipping the cream inside the frosting. After a minute or so it will be beautifully thick once more 🙂

Let’s get started! My instructions are going to be quite thorough so that there’s little room for error. I really want you to experience the awesomeness of this Ultimate Vanilla Frosting.

5.0 from 3 reviews
Ultimate Vanilla Frosting
 
Author:
Serves: 12
Ingredients
  • 80 g Whipping Cream (at least 33% fat), ICE COLD
  • 200 g Full Fat Cream Cheese (at least 25% fat), non-aerated, ICE COLD
  • 1,5 tsp Vanilla Extract
  • 50 g Pure Icing/Powdered Sugar (no added corn starch)
  • 40 g White Chocolate (minimum 30% cocoa solids)
Instructions
  1. SUPER IMPORTANT: The recipe varies slightly depending on whether you're using the frosting for piping on cupcakes or to use in layer cakes. The default ingredients list and method steps are for piping frosting on cupcakes. Variations for layer cake frosting will be in brackets. For layer cakes, make this recipe for the 1st layer of cake and let it sit in the fridge overnight. The next morning, make 1.5 times of this recipe as if you're making it for cupcakes (super important!), to frost the second layer of cake and the sides. This frosting doesn't work for cakes taller than 2 layers, but they can be up to 5cm (2-inch) thick layers.
  2. First make your white chocolate ganache. Finely chop the white chocolate. Put it in a small bowl (or mug) with 15 g of the whipping cream. Melt it in the microwave in 2 x 30 second bursts. Stir it till smooth and put it in the fridge to cool down. If I'm in a rush I scrape it onto a plate and put in the freezer for 5 minutes. (*If making frosting for your 1st layer of cake, skip the ganache! Instead, stir ½ tsp agar-agar powder and 3 Tbsp water together in a small saucepan and set aside for 10 minutes. Once it's hydrated, boil the mixture for 2 minutes and set aside to cool slightly.)
  3. Whip the remaining COLD cream to soft peaks with an electric hand mixer in a medium mixing bowl. (*If making frosting for 1st layer of cake, whip all 80 g of cold cream to soft peaks.)
  4. Beat in COLD Cream Cheese till smooth. Scrape down sides of bowl and beat again till smooth and thickened. About 1 minute in total.
  5. Beat in Vanilla and icing sugar for 20 seconds (*if making frosting for a layer cake, beat in 20 g extra icing sugar). Leave frosting to stand in the fridge for 5 minutes so that sugar can melt into the cream cheese thoroughly.
  6. Get the frosting from the fridge. Beat it on max speed for 30 seconds - 1 minute (tilt your bowl and keep your beaters still in on the lowest side of the bowl while beating). The frosting might start off runny, but keep beating in one spot and it will start to thicken up. You're essentially re-whipping the cream inside the frosting. It should be quite thick after 1 minute. *NOTE: If the frosting isn't COLD, it won't whip up.
  7. Next scrape all the white chocolate ganache (it shouldn't be warmer than a cool room temperature when you add it in) into the frosting and beat it in on max speed immediately for 1 minute. The white chocolate will also help to thicken up the frosting even more. (*If making frosting for 1st cake layer, scrape your room temp, liquid agar-agar mixture into your frosting and beat it on max speed for 1 minute.)
  8. The frosting will be quite thick at this stage (depending on the cream cheese you used and how cold your ingredients were). If I’m using the frosting for layer cakes, I use it as it is. Frost the first layer of cake and let it chill in the fridge for AT LEAST 4 hours (I leave them in the fridge over night). Note that this is NOT a hard setting frosting. It will always still be wet to the touch, but it still holds.
  9. FOR LAYER CAKES: When the first layer of frosting has firmed up a bit, you can add 1 more cake layer on top. Not ideal for stacking more than 2 layers of cake!! Make 1.5 times this recipe and frost the top and sides of the cake. When you've frosted the outside of the cake, let it stand in the fridge for at least 2 more hours. After that the frosting is quite stable at room temp and won't melt - even on a hot day!
  10. If I’m piping the frosting onto cupcakes, I like to leave the frosting at room temperature for a few minutes to soften slightly before I transfer it to a piping bag. When you've frosted your cupcakes, let them stand at cool room temperature (or in the fridge) for about 30 minutes. After this the frosting is quite stable and won't melt - even on a hot day! I even tested this on a day that was 43 degrees C (109 degrees F).

Important Notes:

* THIS RECIPE ONLY WORKS WHEN THE INGREDIENTS ARE SUPER COLD. Both the cream and cream cheese should have been in the fridge, on the lowest shelf, overnight. Make sure your kitchen isn’t hot when you mix the frosting.

* If you live in a super hot climate, you may need to take extra precautions. If your frosting isn’t whipping up, let it chill in your FREEZER for 15 minutes. Hold your mixing bowl at an angle and hold beaters in the lowest spot on top speed for 1-2 minutes (don’t move beaters around initially). Once the frosting gets really thick around the beaters, gradually start moving the beaters around in smaller circles to incorporate the runnier frosting with the thick frosting. Continue beating till you see the frosting is as thick as it’s possibly going to get.

* Another precaution for super hot climates: Once you’ve piped the frosting onto cupcakes, let the frosted cupcakes chill in the fridge for at least 30 – 40 minutes so that the piped frosting chills and dries out a bit. After this, you can leave the cupcakes at room temperature and the frosting will keep its shape.

* Super important note: do not use candy or fondant or sugar paste decorations on this frosting! The frosting has a high water content, so sugary decorations will simply melt and weep into the frosting!

* A smaller, deeper mixing bowl makes this frosting much easier to whip up.

* This recipe produces enough frosting for about 12 cupcakes.

* If using in a layer cake: Allow the frosting on each layer to chill in the fridge for at least 2 hours before placing the next layer of cake on top. Do not stack more than 2 layers of cake on top of each other!

* This is not a hard-setting frosting. It remains moist. I love this because it keeps my cakes moist as well, so you never need to do the simple syrup soaking again!

* Because there’s cream & cream cheese in the frosting, encourage your clients eat their bakes within 2 days max.

* This frosting needs to be prepared fresh right before you use it. You can’t make it in advance. But you CAN freeze the left overs for up to 1 month! When you want to use it; let it thaw in the fridge overnight. Then whip it like crazy the next day till it thickens up again.


If you give this recipe a go, tag me on Facebook, twitter or Instagram #philosophyofyum because I would LOVE to see!

Chat soon!

Aurelia 😊

Got a question? Something to add? Let’s chat in the comments section down below! (I respond to every single comment)

All my BEST Home Baking Resources to Help You Grow Your Baking Skills and Home Bakery Business

Hey there home baker!

🍩 Have you been longing to turn your passion for delicious home baking into an income?
🍩 Do you want step-by-step strategies that WORK to get you more customers and consistent orders in your home bakery?

🍩 Do you want to make a stable income from your baking so it can be your part-time or full-time career?

If you answered YES to any of these questions, I've got just the thing to help you on your baking journey 🙂

It’s a FREE Resource Library with:
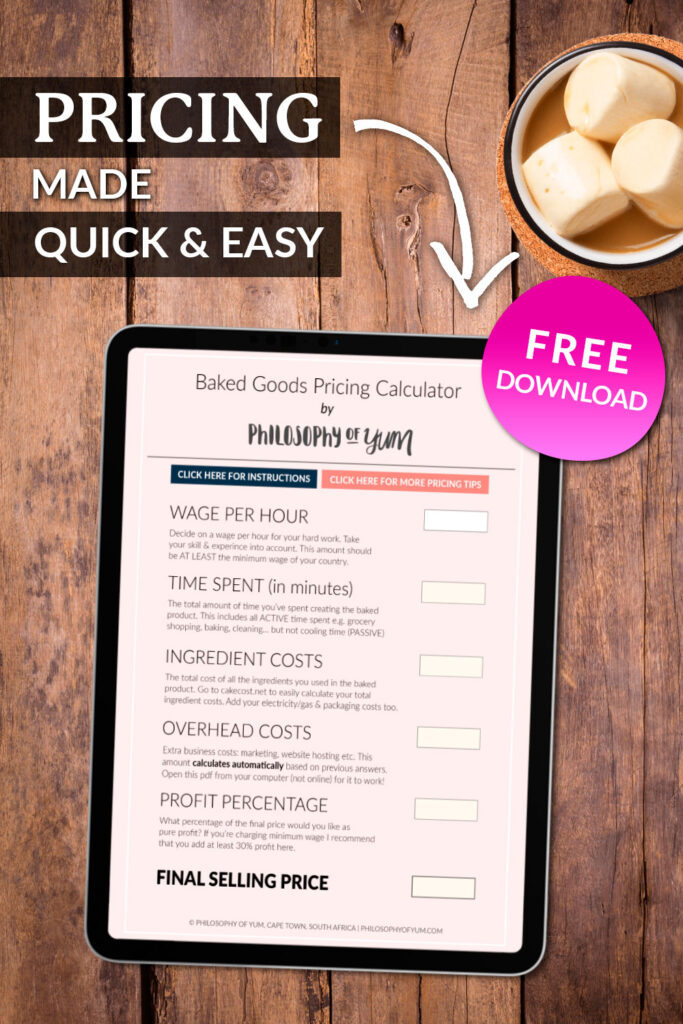
✅a Baked Goods Pricing Calculator,
✅guides to help you start your business and become a more confident baker,
✅templates for a Home Bakery Business Plan,
✅top-secret recipes from my home bakery, and more.

I created it because when I started my Home Bakery there was ZERO information to help me. With these resources, I'm sure your journey to a successful Home Bakery will be less stressful than mine was 😊

Want to start a Home Bakery Business? Or maybe you have a business but you want more customers and consistent orders? Here's a free library full of resources, tips, tools, secret recipes and ideas to grow your Home Baking Business. Click through to access the free library! #homebakery #homebaking #bakingbusiness #cakebusiness

I share many resources, baking tips, and LEGIT recipes from my own Home Bakery Business on my blog, but there are some documents I don’t want to share with just anyone

I’d rather share them with a passionate home baker, like you, who will benefit MOST from these documents.

These documents are very exclusive – with all the secrets behind my 6+ years of full-time (fully booked) home baking. You cannot find them anywhere else.


In my Free Library, You Can Expect to Find:

🧁 Philosophy of Yum (my Home Bakery)’s TOP secret recipes.

Typically recipes that were baked literally 1000 times over and have generated thousands of dollars in sales. I haven't shared these recipes with ANYONE before now.

All the recipes come with gluten-free variations too!

🧁 Home Baking Business Resources to help you attract customers and repeat orders.

This includes free Workbooks, Templates, Guides, a Pricing Calculator, a Weekly Planner, and Tips to make your Home Bakery Stand out in the crowd, get more consistent orders, and make a stable income for you.

🧁 You'll get tools and tips to help you become THE BEST HOME BAKER YOU CAN POSSIBLY BE.

If you use this info, I guarantee your business will grow like never before. It’s how I have grown into the baker I am today without ever paying to study desserts/pastry/baking/chef etc.

🧁 You'll also get resources to push you further as a Home Baker...

Like learning HOW to develop your own recipes. The aim is to equip you and give you tools so that you can explore and create your own UNIQUE bakes.

Want to start a Home Bakery Business? Or maybe you have a business but you want more customers and consistent orders? Here's a free library full of resources, tips, tools, secret recipes and ideas to grow your Home Baking Business. Click through to access the free library! #homebakery #homebaking #bakingbusiness #cakebusiness

Is the Library REALLY free? Is there a catch?

YES, it is and will always be free. Nope, there's no catch. I remember how hard and SCARY it was to start my Home Bakery. I understand what you're going through and I want your journey to be easier and faster than mine.

So… Are you ready to turn your passion for Home Baking into a successful business? Click the button to request your invitation to the Library. Let's do this!

I'm SO excited for you to dive into the resources! 🥳

Aurelia 🙂

Chocolate Swirl Baked Cheesecake Recipe

Chocolate Swirl Baked Cheesecake Recipe

Chocolate Swirl Baked Cheesecake

Chocolate Swirl Baked Cheesecake has kind of built up this rep of being one of thee most delicious things I make in my Artisan Home-Bakery. And I humbly, completely agree.

I don’t necessarily see it as MY super creation. It just kind of happened that this recipe picked me as a friend and I SO LOVE this friend!

Completely objectively speaking – this chocolate swirl cheesecake has changed my life. It is SO FREAKIN GOOOOOD!

The Story Behind My Chocolate Swirl Baked Cheesecake

My late sister (Leaan) is generally acknowledged to be one of the rad-est human beings to have ever existed.

One weekend my husband was out of town. By now she knew full well that I would spend the entire weekend indoors… working or playing computer games. Leaan had a grand plan up her sleeve though!

She arrived at our home at 10h00, unannounced, and politely informed me that she was kidnapping me for the day! She took me to this incredible vintage store & restaurant called “Boere Sjiek” which means “Farmers Chic” in Afrikaans.

AND, of course, there was the most beautifully festive cake display in history!! Tall layer cakes decorated with fresh roses, tarts, cupcakes, pastries, quiches etc. I was gawking at everything like a 5-year-old!

After oooh-ing and ahhh-ing over all the beauty, we sat down to enjoy some cake. We shared something savoury and something sweet – going halfsies is how we roll! Best of both worlds.

Our dessert selection was the Oreo Cheesecake. Oreo cookie crust, with marbled baked cheesecake and ganache on top. It was fantastic!!

It took about 2 months of reminiscing before I decided I had to eat this cheesecake again. I would definitely try and make it myself this time around though…


Chocolate Swirl Cheesecake Development

chocolate swirl cheesecake recipe | baked chocolate cheesecake

As much as I love Oreos, the added icing from the cookies in the crust makes it a tad too sweet for me. As you know I’m very partial to balance in baked goods. Dominant flavour, not sweetness. For this reason, I opted for my favourite chocolate cheesecake pastry instead of crushed Oreos.

The baked cheesecake part is my own Baked Vanilla Cheesecake of which some is turned into chocolate cheesecake and marbled together.

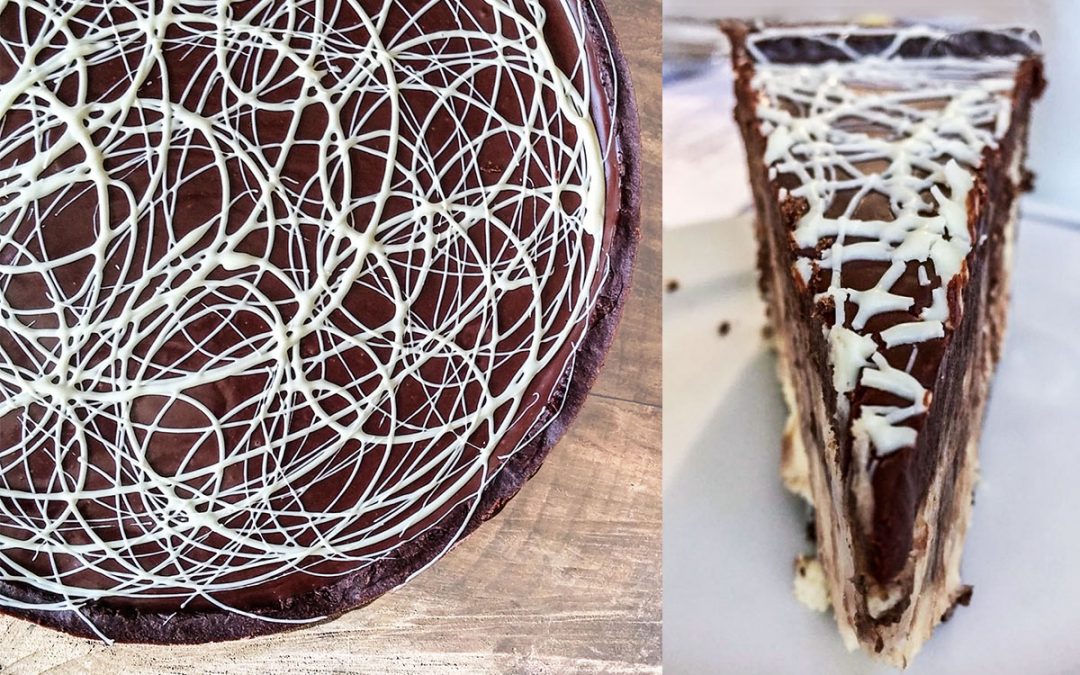
The ganache topping, I made with Dark Couverture Chocolate from Cocoafair – my favourite local Chocolaterie. The Dark Chocolate ganache is less sweet and more chocolaty 😊 A contrasting, white chocolate drizzle completes the look of the Chocolate Swirl Cheesecake beautifully.


So, How Does It Taste?

For a completely objective opinion, I’ll share a Google Review from one of my clients, Silke Rittershaus:

“We all agreed, this is the best cheesecake we ever had. My husband and his friend normally don’t eat dessert. But from the Chocolate Swirl Cheesecake both of them eat even two slices! With every bite, you indulge yourself. The cheesecake is moist and very creamy and the chocolate crust fits perfectly to this cheesecake. The taste of the whole composition is incredibly delicious. It’s really hard to stop eating, you just want to have more of this heavenly treat.”

This chocolate swirl baked cheesecake recipe has changed my life. Here's a testimonial from one of my clients: "With every bite, you indulge yourself. The cheesecake is moist and very creamy and the chocolate crust fits perfectly to this cheesecake. The taste of the whole composition is incredibly delicious. It's really hard to stop eating, you just want to have more of this heavenly treat." #bakedcheesecake #chocolatecheesecake #cheesecakerecipe

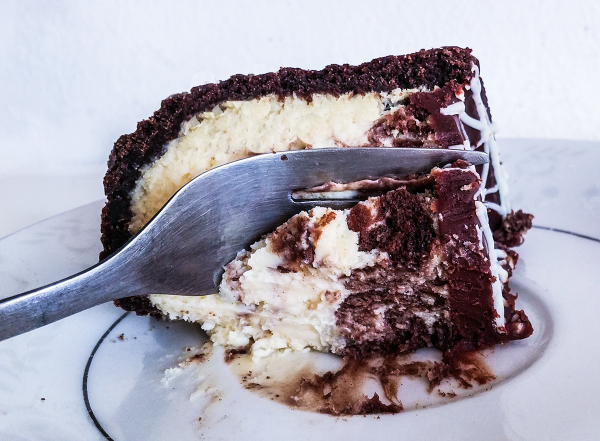
Silke’s husband, Axel, was kind enough to send me the photo a cheesecake slice! Just look at that creamy, dreamy texture… Yummmm…

After all of this, I hope you are convinced that you should make this Chocolate Swirl Cheesecake!

The only advice I would give is that you READ MY PERFECT CHEESECAKE GUIDE FIRST, before diving into the recipe! These tips will prep you for making your own flawless Baked Cheesecake.

My Perfect Cheesecake Guide covers all the essential tips you need to avoid any cracks, curdling, sinking etc. I also discuss an alternative method to the traditional (and indiscreetly tedious) water bath baking method. Open it in a separate tab and give it a read. Remember, method determines at least 50% of the quality of your bake! Method matters.

Without further ado, here is the recipe for one of the gems of my Artisan Home-Bakery (Philosophy of Yum)…


5.0 from 1 reviews
Chocolate Swirl Baked Cheesecake
 
Prep time
Cook time
Total time
 
Author:
Serves: 9 inch Cake
Ingredients
FOR THE PASTRY:
  • 195 g All-Purpose Flour
  • 35 g Cocoa Powder
  • 75 g Pure Icing Sugar
  • pinch of salt
  • 130 g Salted Butter, ice cold & cubed
  • 50 g Egg Yolks (about 2 ½ egg yolks)
  • ½ Tbsp Vanilla Extract
FOR THE CHEESECAKE:
  • 1000 g Medium Fat Cream Cheese (25% fat), at room temperature
  • 320 g White Sugar
  • 5 g Salt
  • 4 X-Large Eggs (240 g)
  • 200 ml Sour Cream
  • 1 Tbsp Vanilla Extract
  • 2 Tbsp Cocoa Powder
  • 1 Tbsp Water
FOR THE DARK CHOCOLATE GANACHE:
  • 110 g Whipping Cream
  • 1 tsp White Sugar
  • 90 g Dark Chocolate (at least 65% Cocoa Solids)
FOR DECORATION:
  • 20 g White Chocolate
Instructions
FOR THE PASTRY:
  1. Follow instructions as specified in Cheesecake Pastry Post. Includes detailed instructions and photos! When you've finished blind baking the pastry, turn your oven down to 150°C/302°F.
FOR THE CHEESECAKE:
  1. Place the room temperature cream cheese in the bowl of your stand mixer. With the paddle attachment, beat the cream cheese on medium low speed till smooth.
  2. Add in the sugar and salt. Beat on medium low speed for 30 seconds. Leave to stand for 5 minutes and beat again till smooth.
  3. Scrape down the paddle, sides and bottom of the bowl. Beat again till smooth.
  4. From here on out ONLY mix on the lowest and slowest turtle speed possible. If your mixer doesn’t have the option to go very slow, then do the rest by hand.
  5. Crack all the eggs in a separate bowl. Stir lightly with a fork till the yolks are broken.
  6. Pour more or less 1 egg at a time into the cream cheese mixture with the mixer going on its slowest speed, or stir by hand. It is crucial to not whip in any air.
  7. Add the remaining egg in in 3 sessions. Don’t watch it the whole time, you will be SO tempted to increase the speed. It is a great opportunity to spend some time on Pinterest or learn a language on the Duo Lingo App (I’ve become 7% more fluent in French, just from cheesecake mixing time! Haha!).
  8. Before mixing in the last egg, scrape down the sides and bottom of your bowl thoroughly and mix again on lowest speed.
  9. Stir the sour cream and vanilla into the cheesecake batter by hand to avoid overmixing.
  10. Pour the cheesecake mixture into the semi-baked pastry base, but reserve about 1/7 of the mixture. Stir 2 tablespoons of sifted cocoa powder + 1 Tablespoon water into the left-over cheesecake mixture till fully combined. Smoosh out any cocoa lumps with the back of a spoon against the side of the bowl. You may stir this chocolate cheesecake mixture vigorously with a spoon!
  11. At this point, start boiling a full kettle of water.
  12. Dollop/pour the chocolate cheesecake mixture over the vanilla cheesecake mixture in the tin.
  13. With a chopstick, carefully make vertical circles in the cheesecake mixture (with wrist movement – like you are beating something with a balloon whisk) so that the 2 tones are marbled together slightly. Turn your tin as you go around the perimeter. I usually make one wide circle around the outside and one smaller circle inside it. To finish off, I swirl just the top surface again so it looks pretty.
  14. Place the cheesecake in the center of your oven. Fill the empty roasting tray with just boiled water. Bake for 1 hour at 150°C/302°F.
  15. Turn the cheesecake 180 degrees around in the oven. Bake for another 35 minutes. Switch off the oven with the cheesecake still inside and the door still closed.
  16. After 5 minutes, leave the oven door ajar. Leave the cheesecake inside for 1h30.
  17. Remove from the oven and leave to cool at room temperature for 1 hour. Transfer to the fridge and leave to cool overnight.
FOR THE GANACHE:
  1. The next morning you can decorate the cheesecake! There may be some condensation on the surface of the cheesecake; dab the surface with some paper towels to absorb the moisture.
  2. Heat the cream and tsp of sugar in a saucepan to simmering point. Pour it over the finely chopped chocolate. Leave to stand for 2 minutes, stir till smooth. Pour over the cheesecake immediately. Tilt the pan till the whole surface is covered in chocolate ganache. Refrigerate for 5 minutes.
  3. In the meantime, melt the 20 g of white chocolate in the microwave in a mug – 30 seconds at a time. Stir thoroughly every 30 seconds. Keep going till it is fully melted. Place a small plastic sandwich bag over a cup with one corner facing down. Transfer the melted chocolate into the sandwich bag. Aim for the bottom corner!
  4. Remove the cheesecake from the fridge. Snip a tiny bit of the end off the corner chocolate baggie. Drizzle over the cheesecake any way you like. I like circles.
  5. Carefully push up the bottom of the tin all around the cheesecake to loosen the sides. Place the cheesecake on top of the middle of a wide-bottomed mug or sturdy glass, gently pressing down the sides of the tin.
  6. Lift the bare sided cheesecake back onto your work surface. Slide a large, smooth edged knife under the pastry to loosen the cheesecake from the bottom of the tin. I like to go all around the edges first before attempting to loosen the center-bottom. Push the cheesecake gently, with a cupped hand, onto your cake stand/cake board/serving platter.
  7. Cut slices with a hot, dry knife. Enjoy!!!

If you’re into Cheesecake you’ll love these related posts:

Perfect Baked Cheesecake | The Ultimate Guide!

Cheesecake Pastry Recipe (with chocolate variation)

Perfect Vanilla Baked Cheesecake Recipe

Chat soon!

Aurelia

Got a question? Something to add? Let’s chat in the comments section down below! (I respond to every single comment)